Learn how to use all the features of the Movi Gimbal using the Movi app installed on the Legacy Mini Kit 3's included iPhone.
This article will include both beginner and advanced functions available on the Movi App.
How to insert and balance your phone
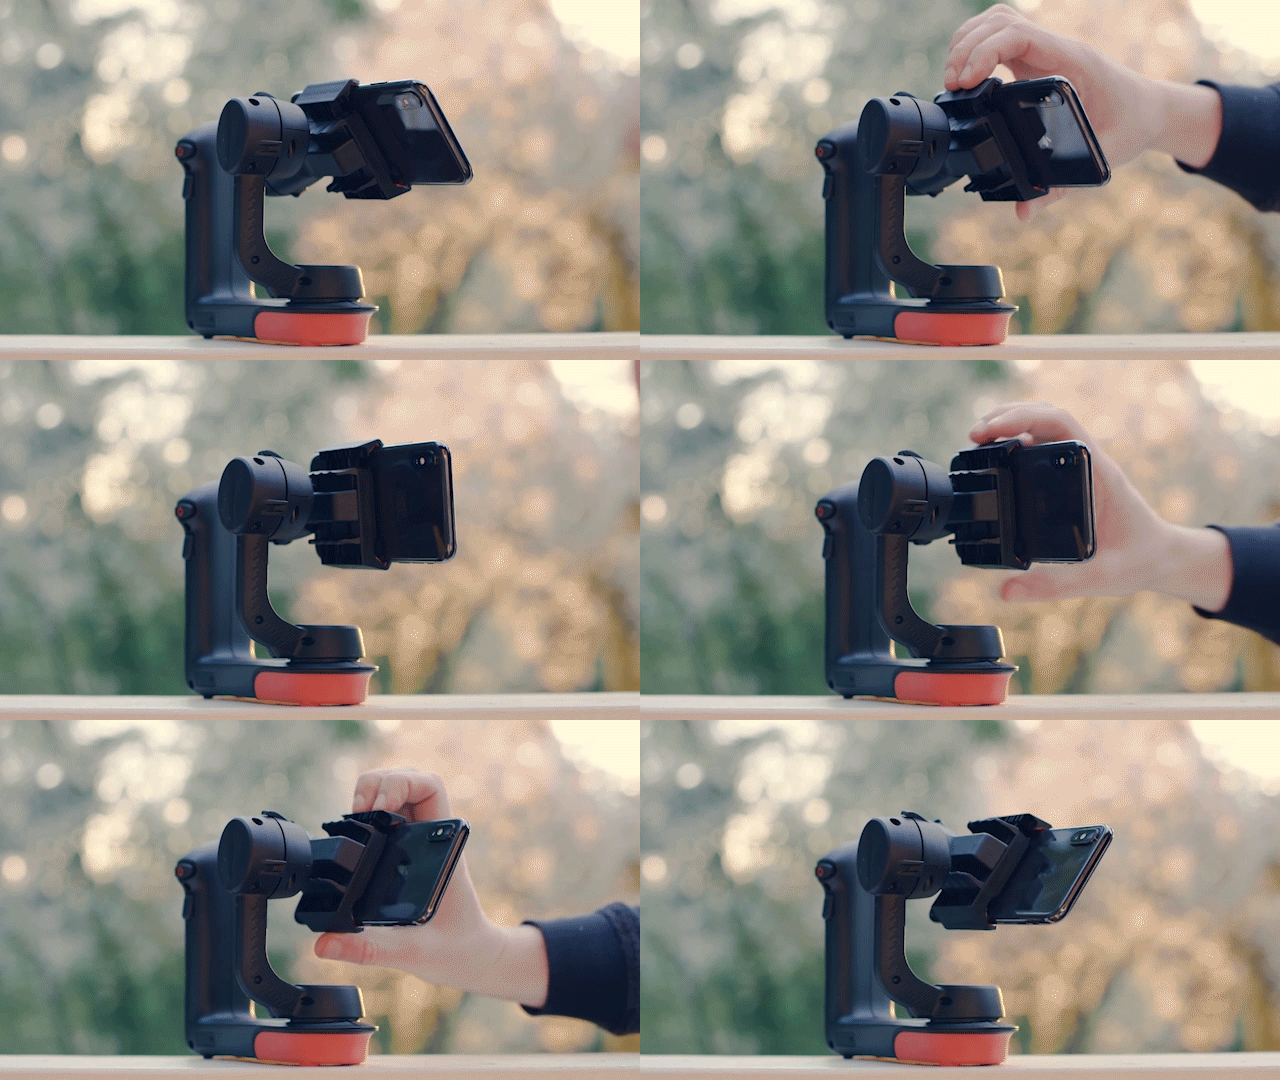
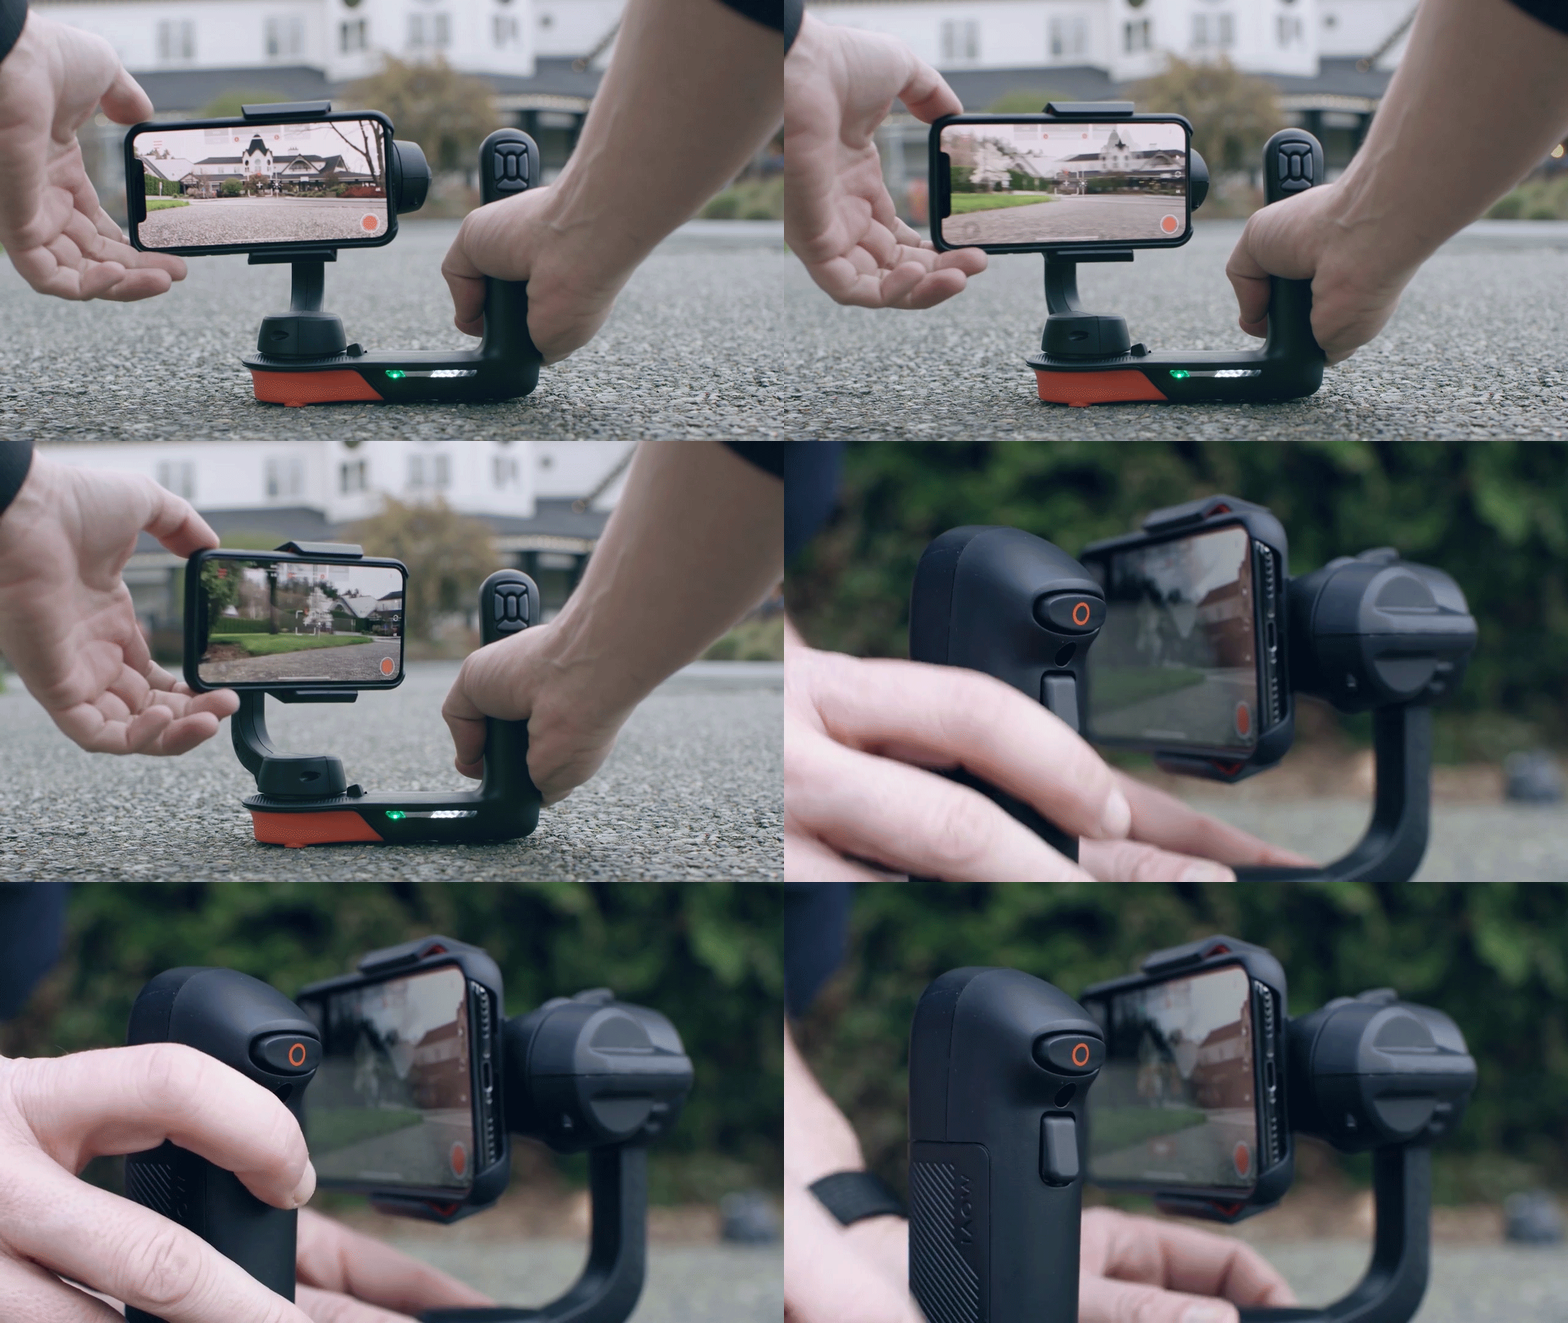
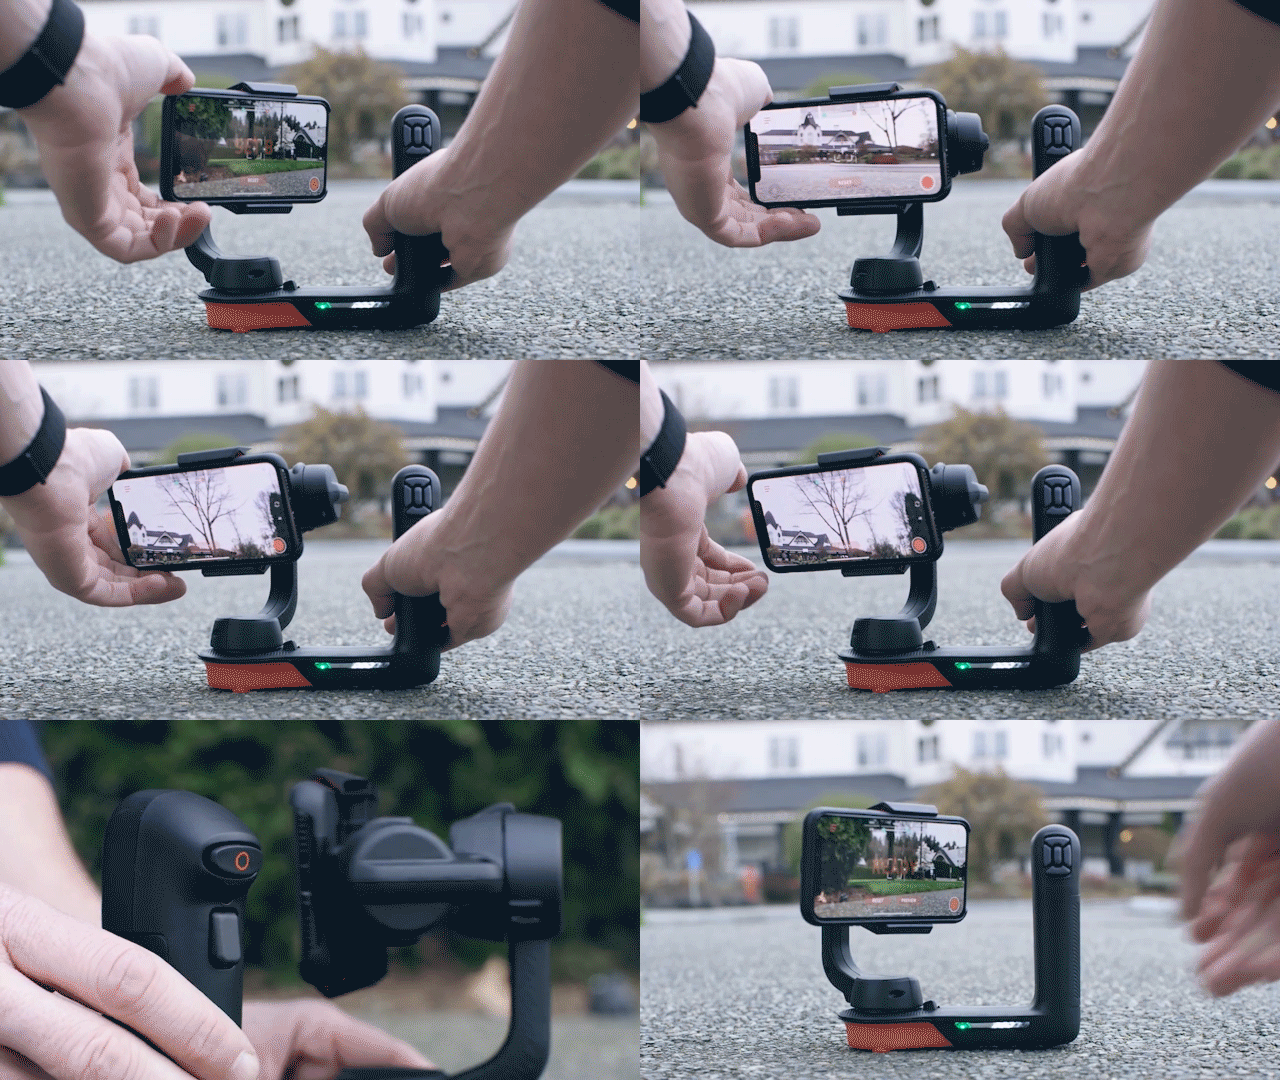
Step 1 - Squeeze the back of the clamp to open, then insert your phone.
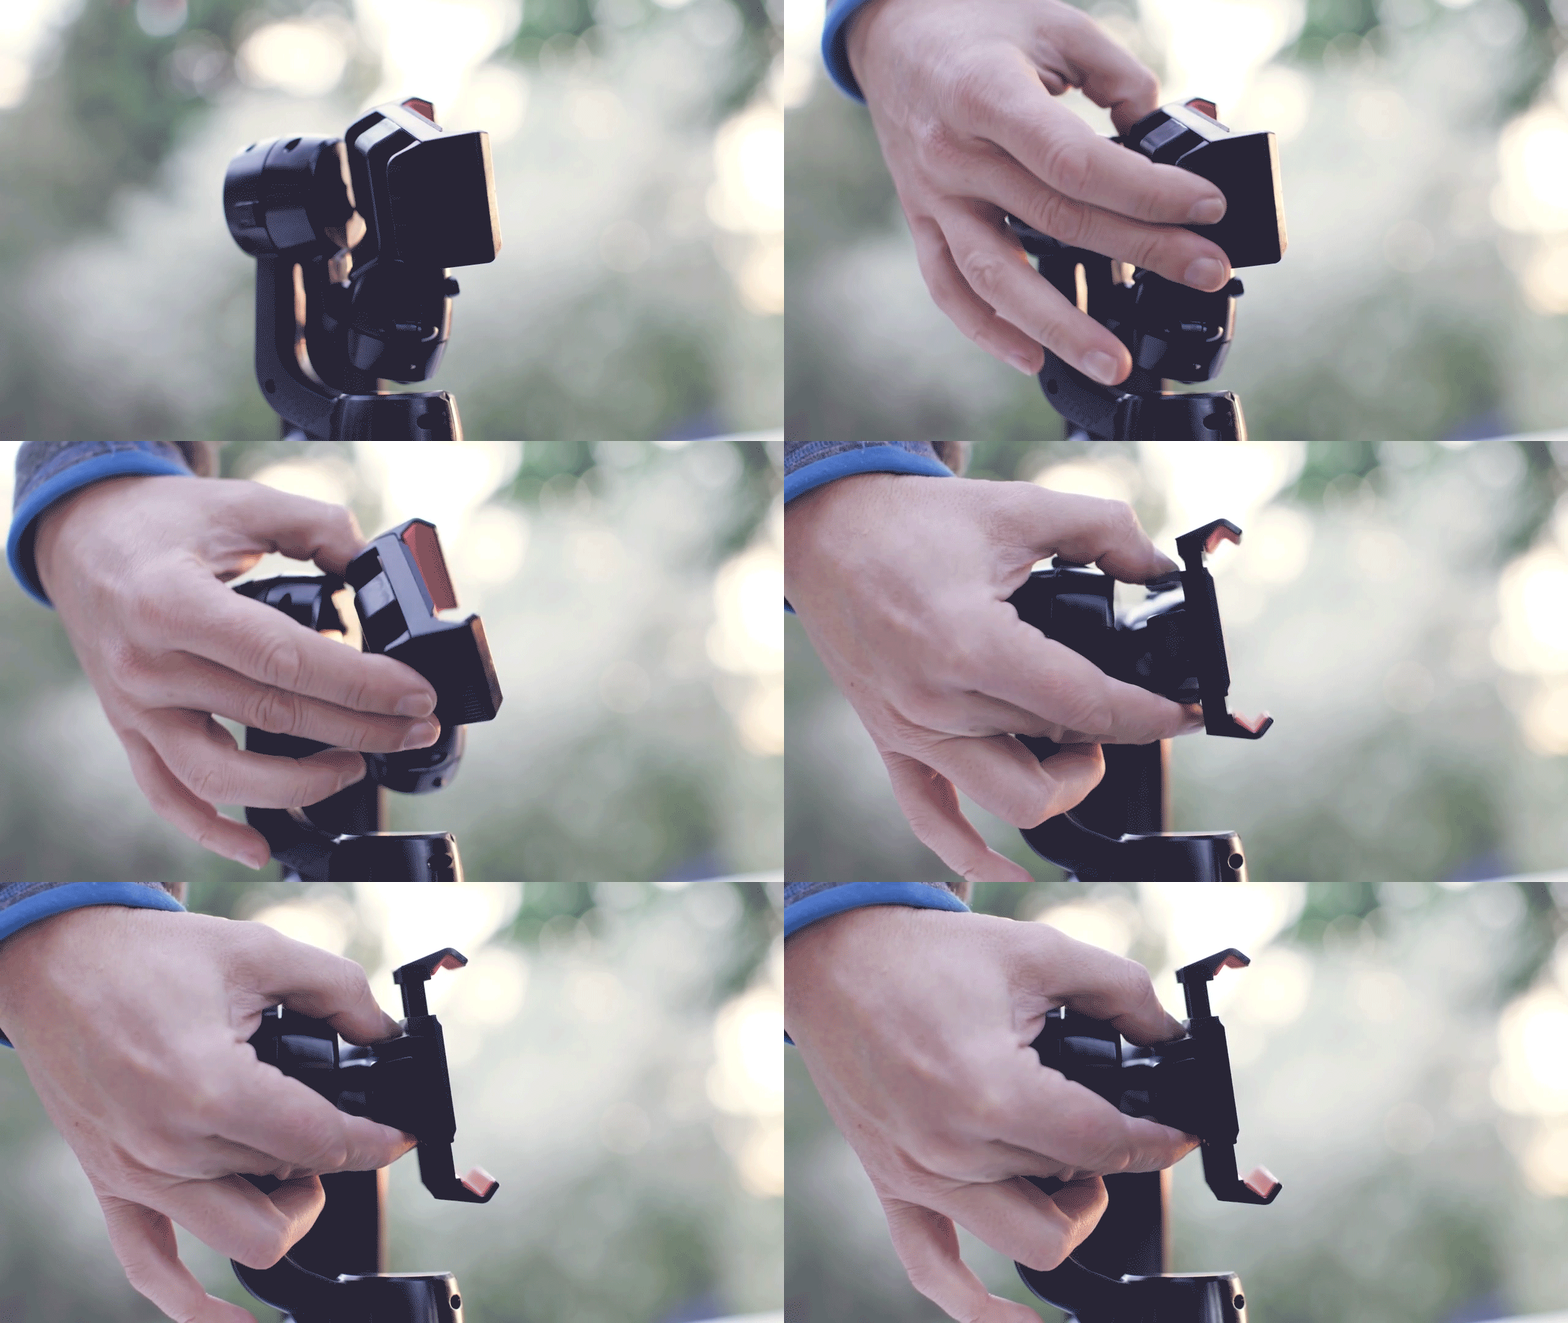
Step 2 - Insert the phone into the clamp and slowly release until it sits securely in the clamp.
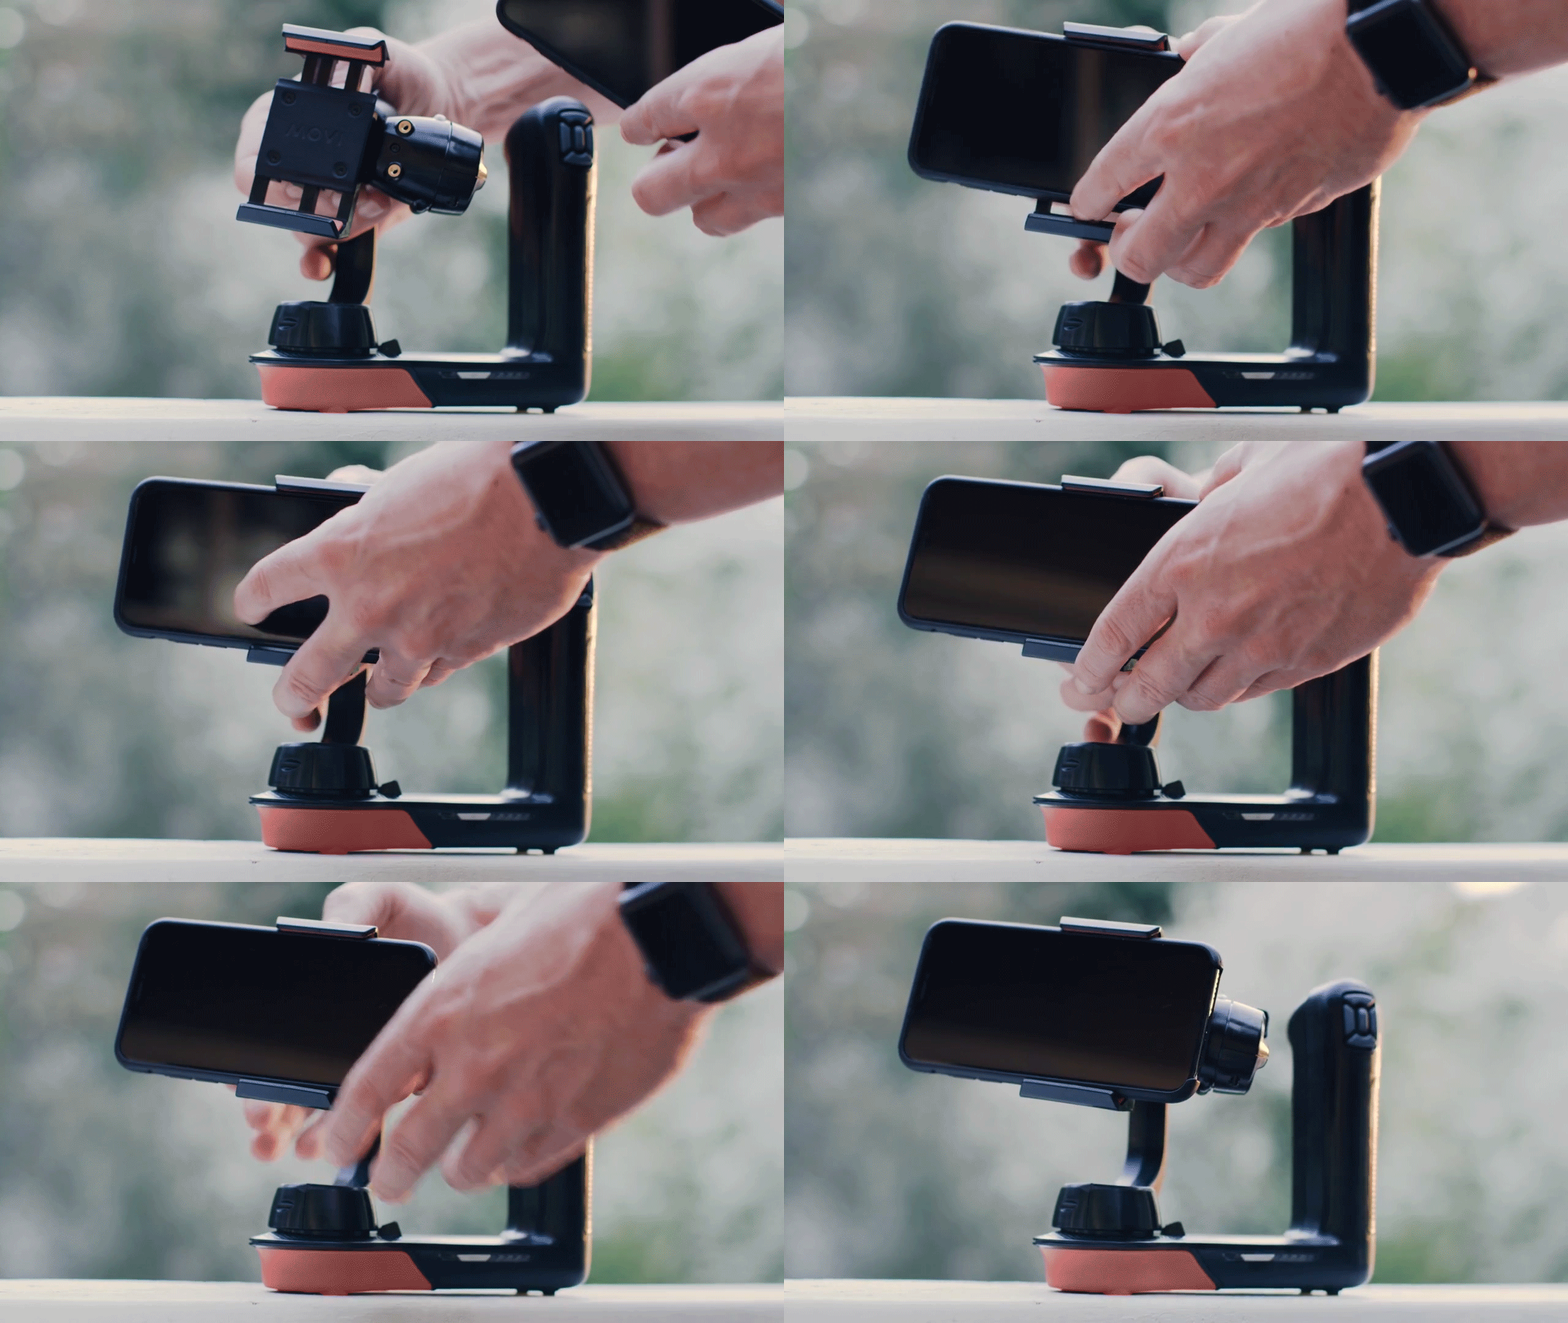
Step 3 - Adjust the phone until it stays level by sliding the phone side to side until it balances by itself.
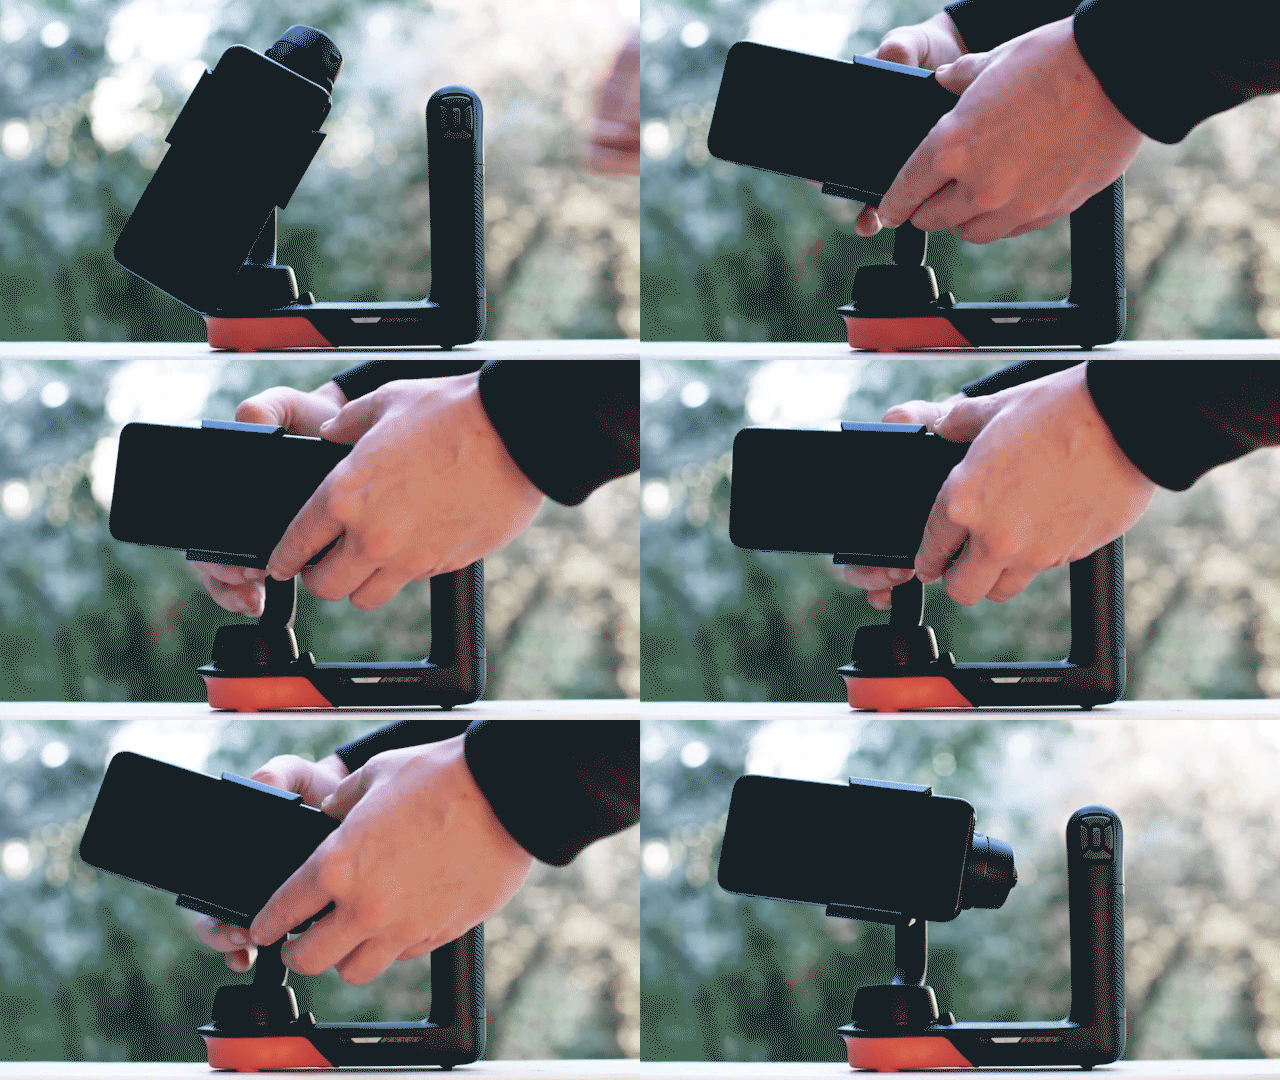
Ready to power on!
How to hold the Movi Gimbal
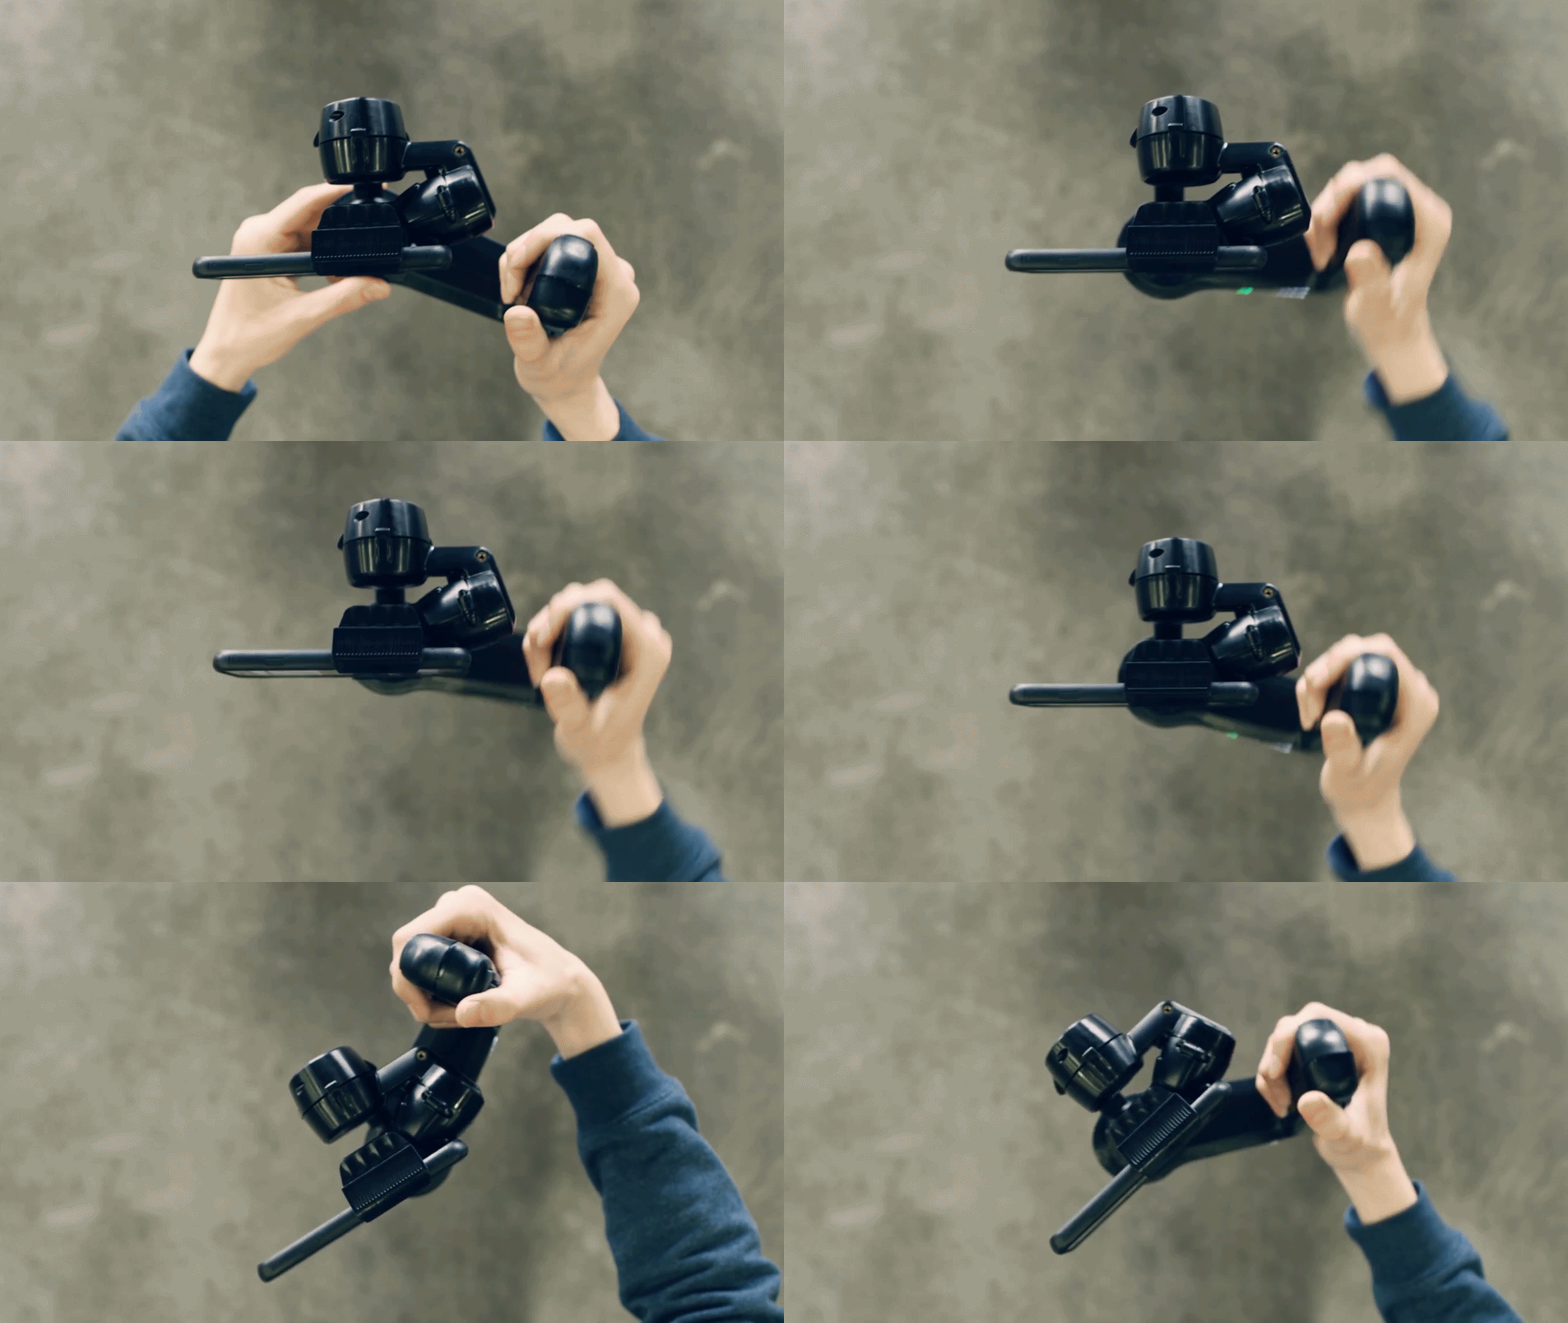
One Handed - Place your right hand on the gimbal handle. Holding the gimbal with one hand is not as steady as holding it with two. This means you will need to hold the gimbal close to your body and concentrate on keeping it as steady as you can.
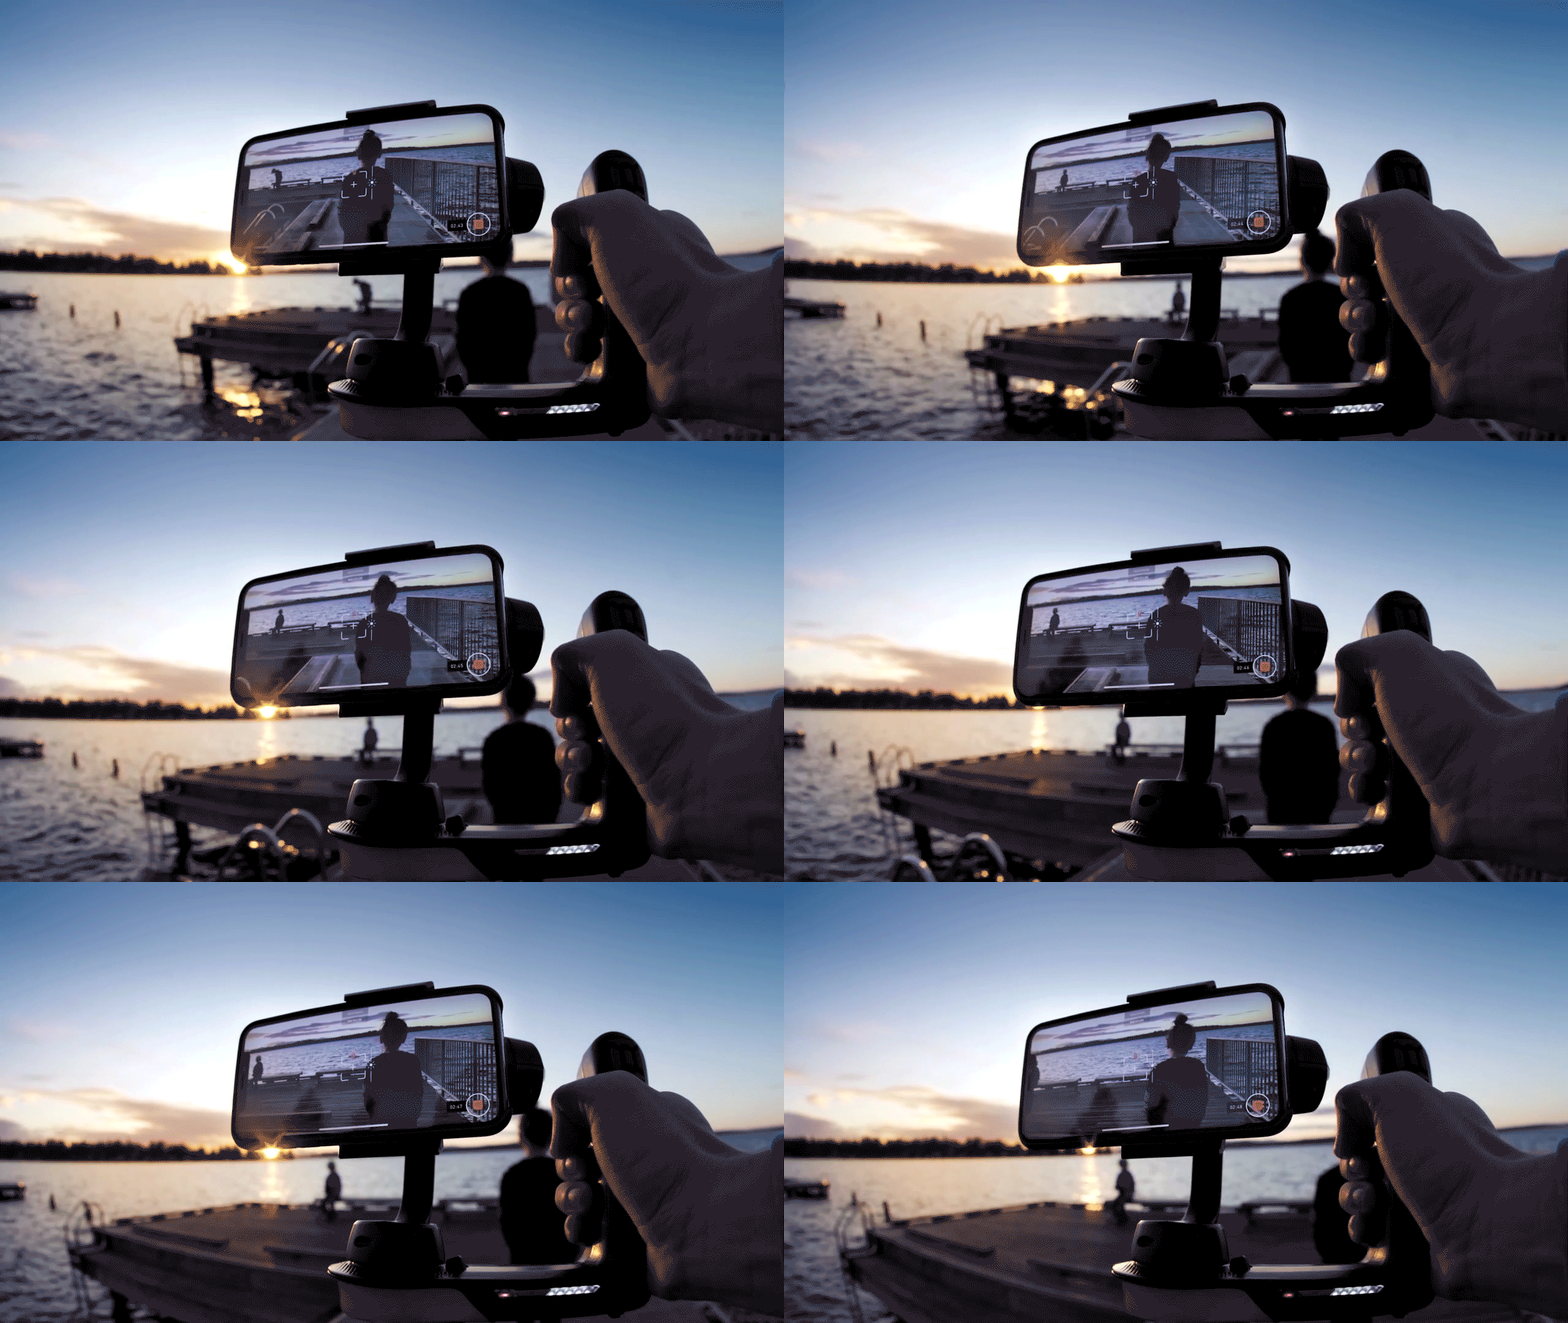
Two Handed - Place your right hand on the gimbal handle. Place your left hand underneath the gimbal, gripping the bottom with your thumb and forefinger. This will keep the gimbal steady and help with precise movements.
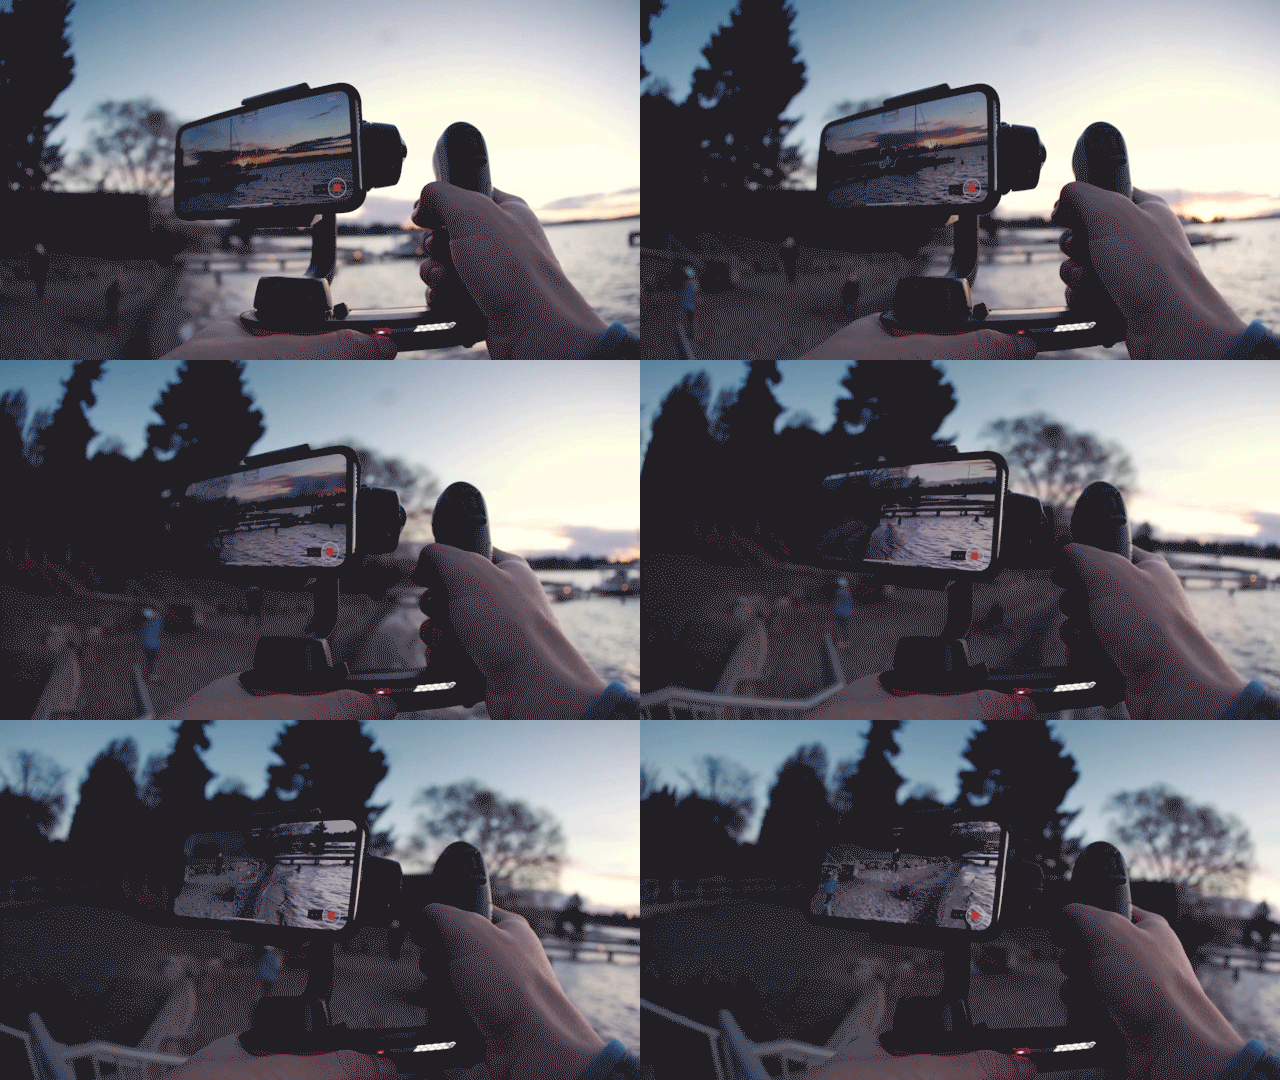
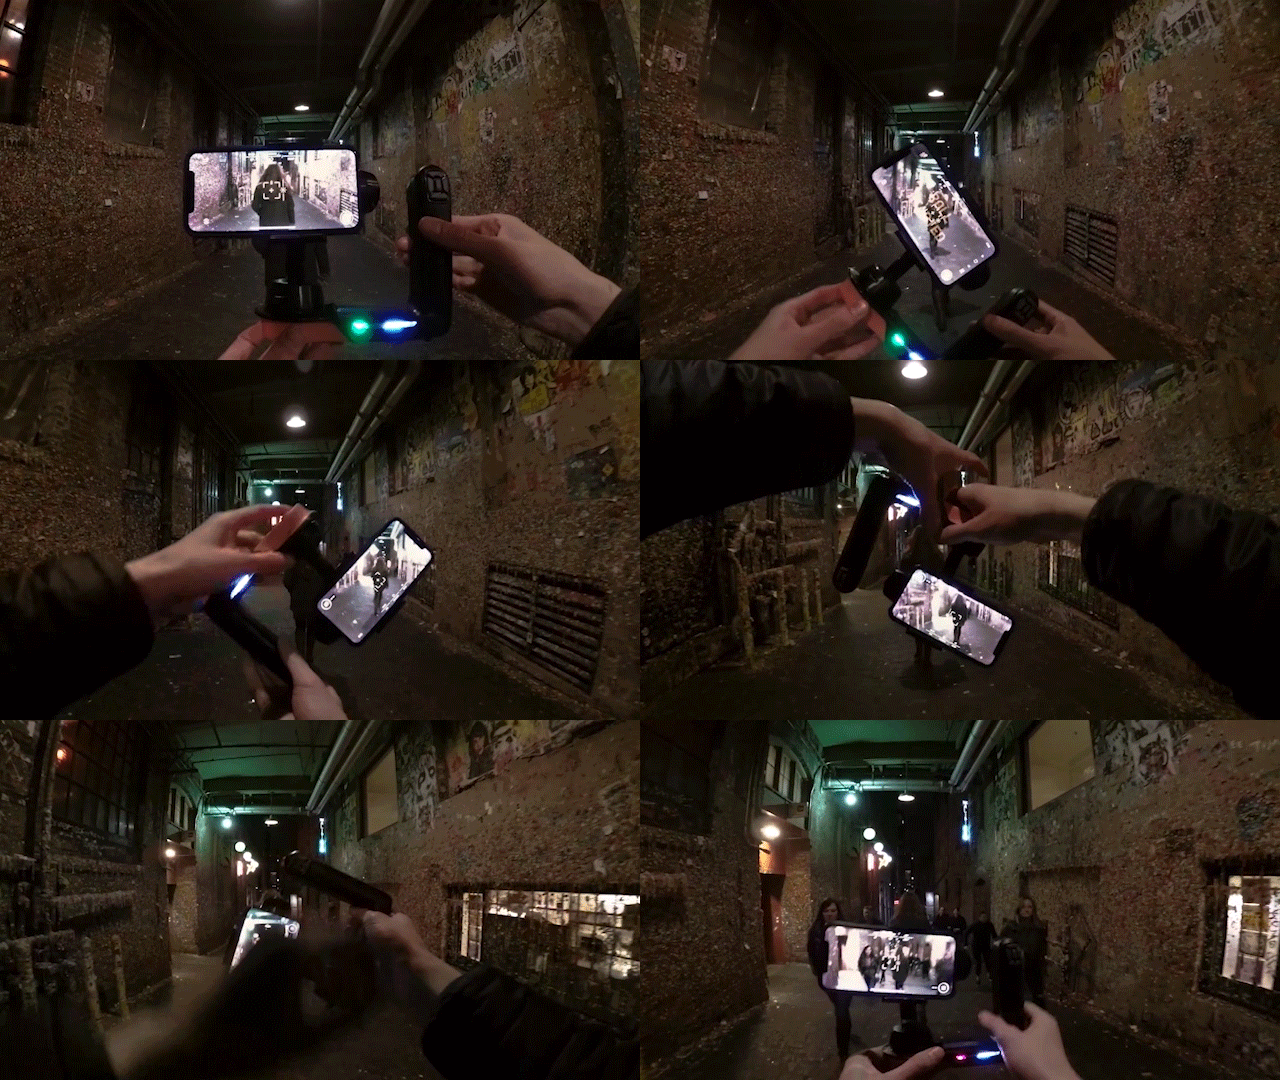
Walk Smoothly - Remember to walk slowly and smoothly when filming, as this will help keep the gimbal steady whilst moving.
How to shoot in portrait mode
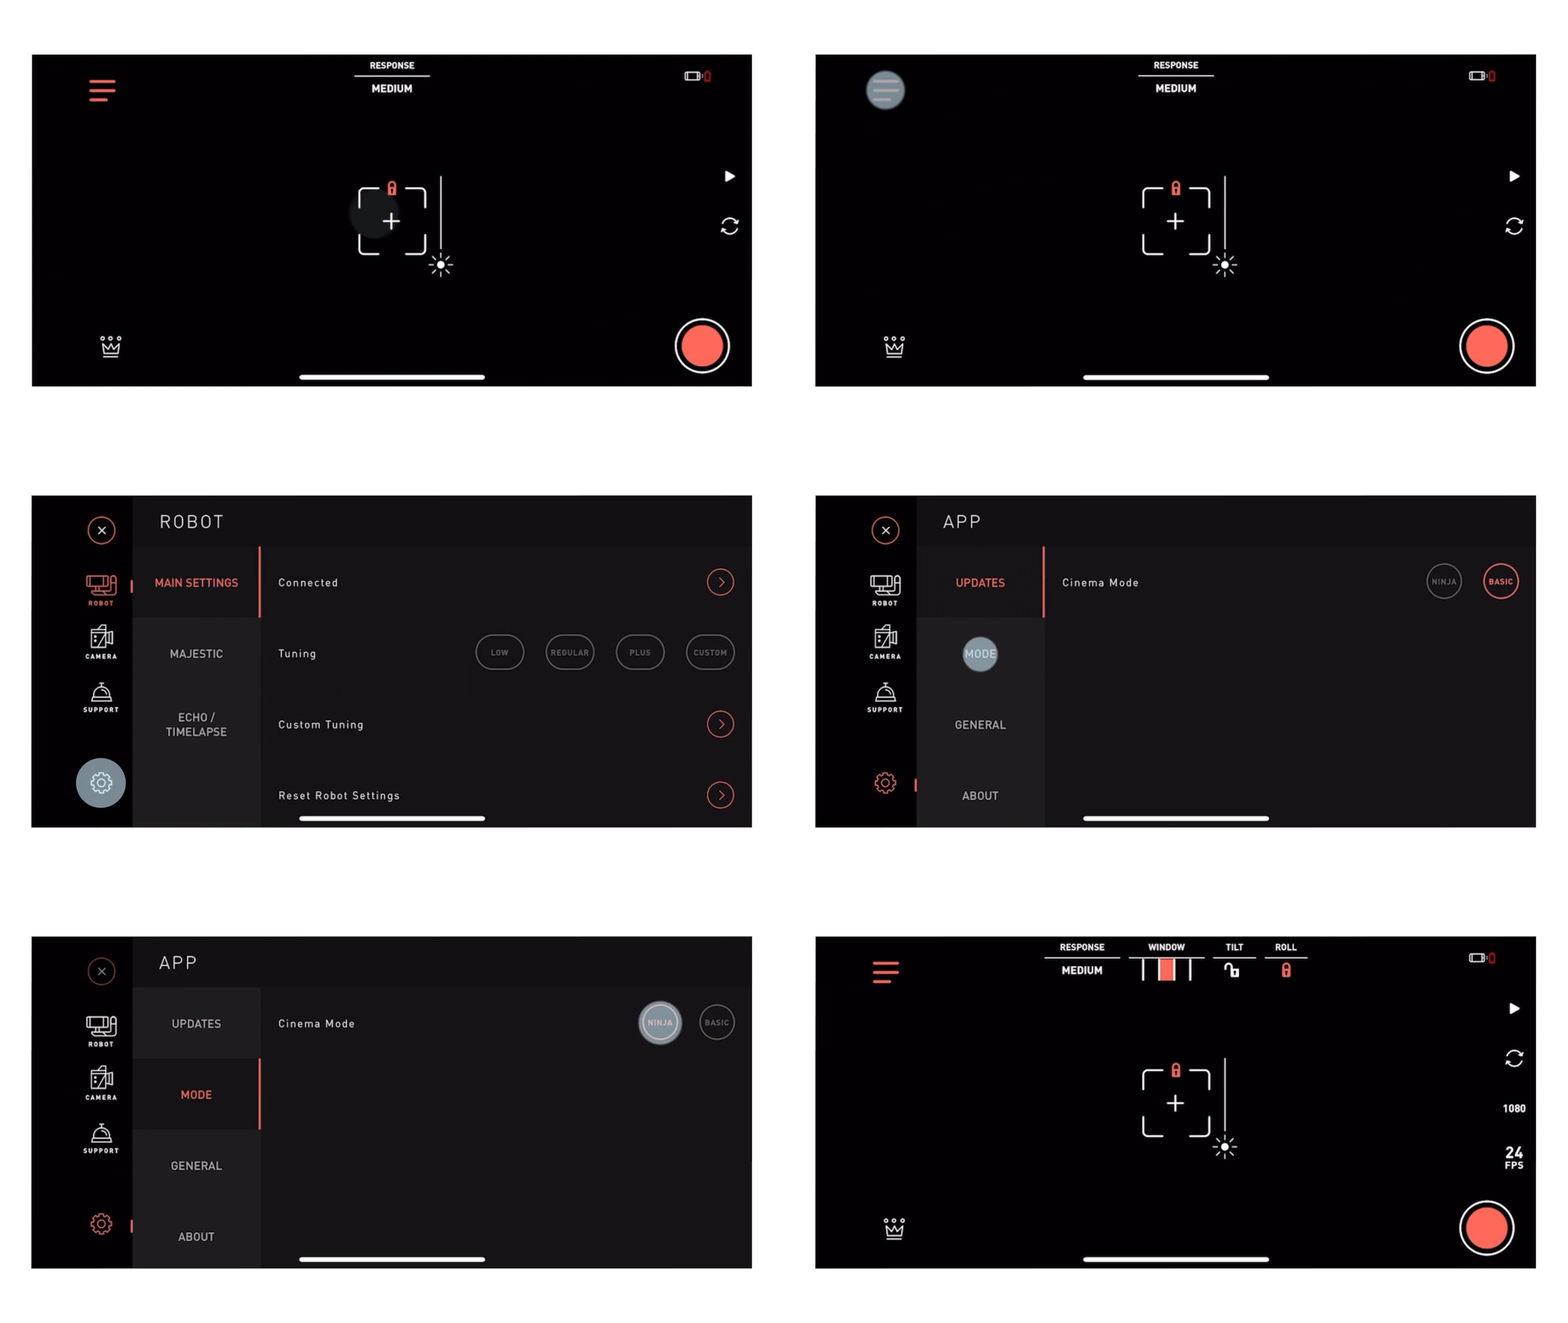
Step 1 - Majestic Mode. To film in portrait you will need to be in Majestic Mode. You can access Majestic Mode by pressing the icon at the bottom left corner of your screen and selecting Majestic. You will also need to unlock tilt for this to work.
Step 2 - Rotate. Simply rotate the Movi 90 degrees so your phone sits in portrait mode.
How to choose between Basic and Ninja mode
Basic Mode - Basic mode, or “Majestic mode”, is for beginners and is best used when you are just starting off filming with the gimbal. Basic mode locks additional features so you can concentrate on mastering great footage without any distractions or confusion.

Ninja Mode - Ninja mode gives you access to more advanced features like echo, movilapse, timelapse, orbit, barrel roll and smartpod. They can be a little harder to master, but once you have you can take your video content to the next level.
Changing Modes - To change between basic and ninja mode, go to the three line menu bar on the top left hand corner of the app. Press the settings icon, click ‘mode’ and toggle between basic or ninja. The Movi’s default mode will be Ninja, but don’t be afraid to master the basics first.
Tilt lock and Roll lock features
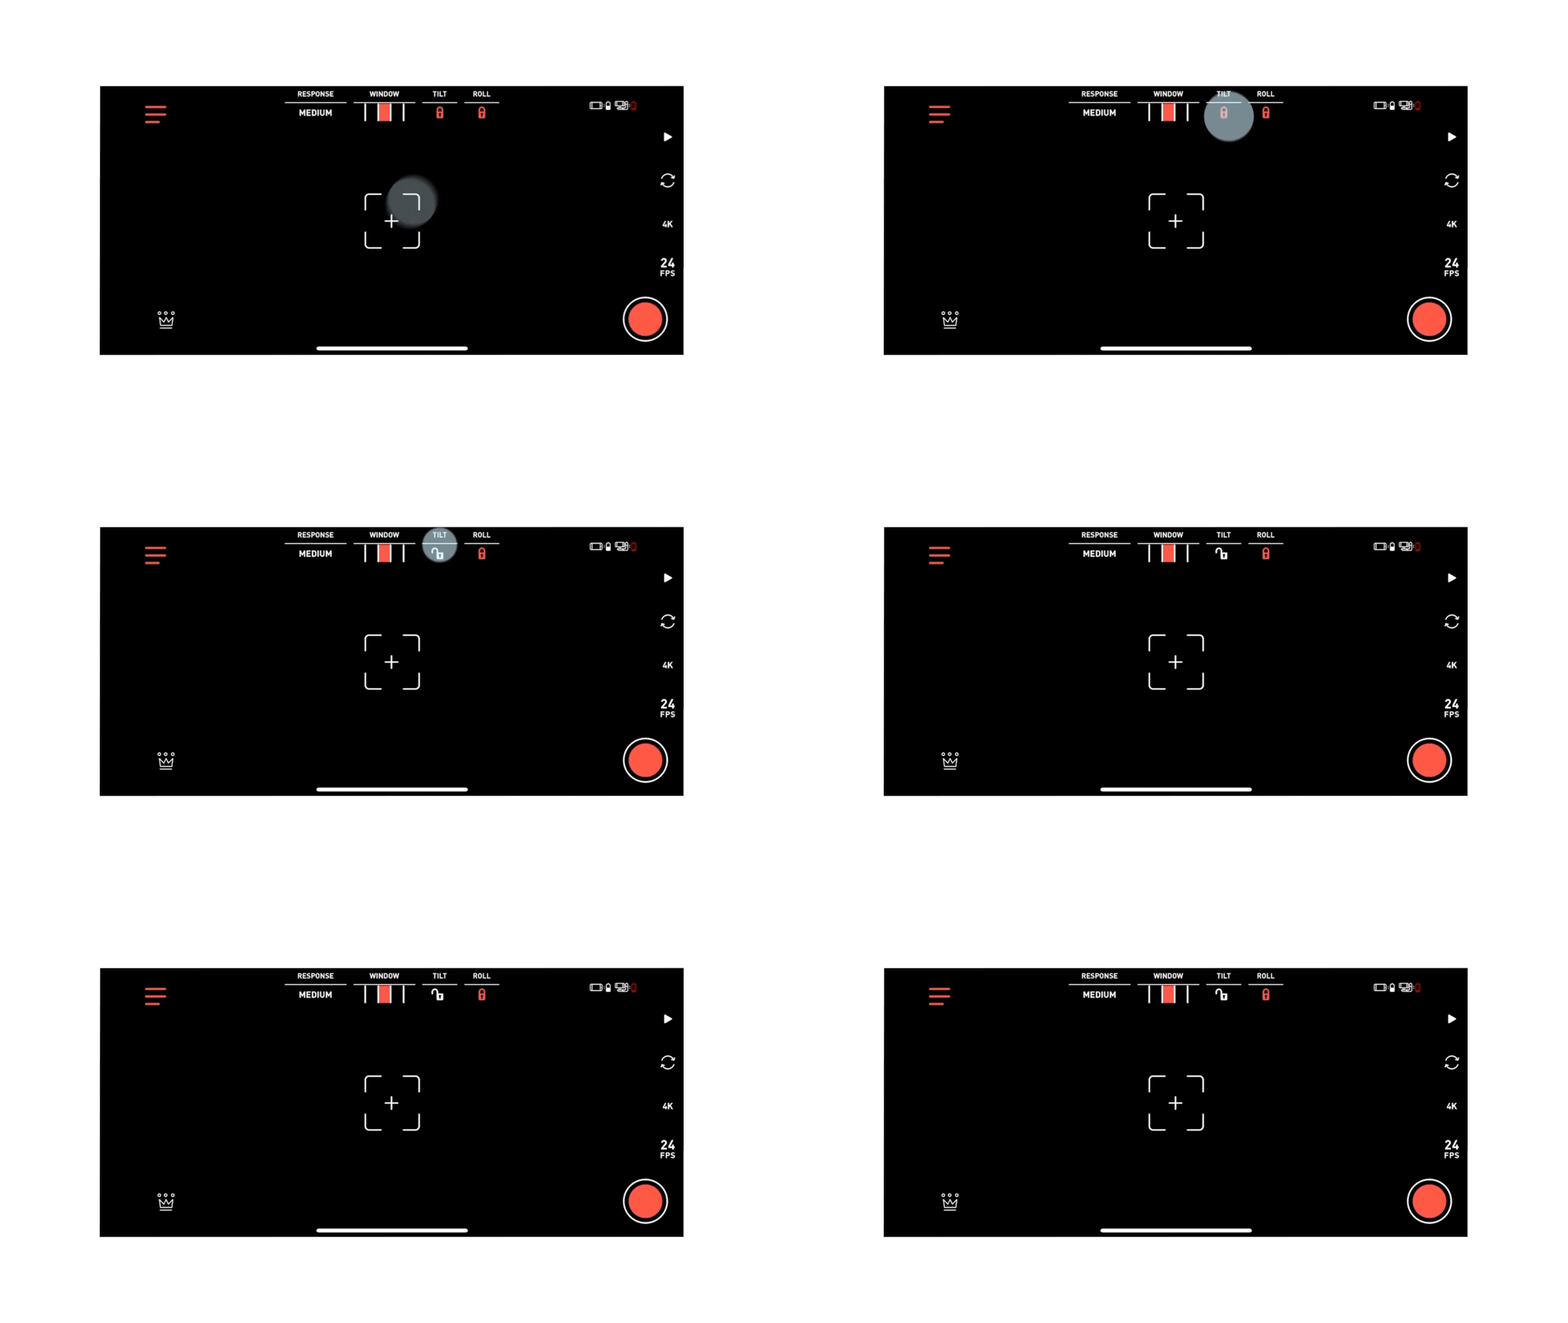
Tilt Lock - Tilting is when the camera rotates up or down. You can lock the phone in place by pressing the Tilt Lock icon on the top of your screen. This will allow you to move the gimbal handle freely without changing the phones position.
To get your desired shot you can manually tilt the phone in the clamp.
Roll lock - Roll Lock will keep your horizon level locked and prevent the camera from tilting left or right, even when moving the gimbals handle. To do this, press the Roll Lock icon which can be found next to the tilt lock icon on your screen.
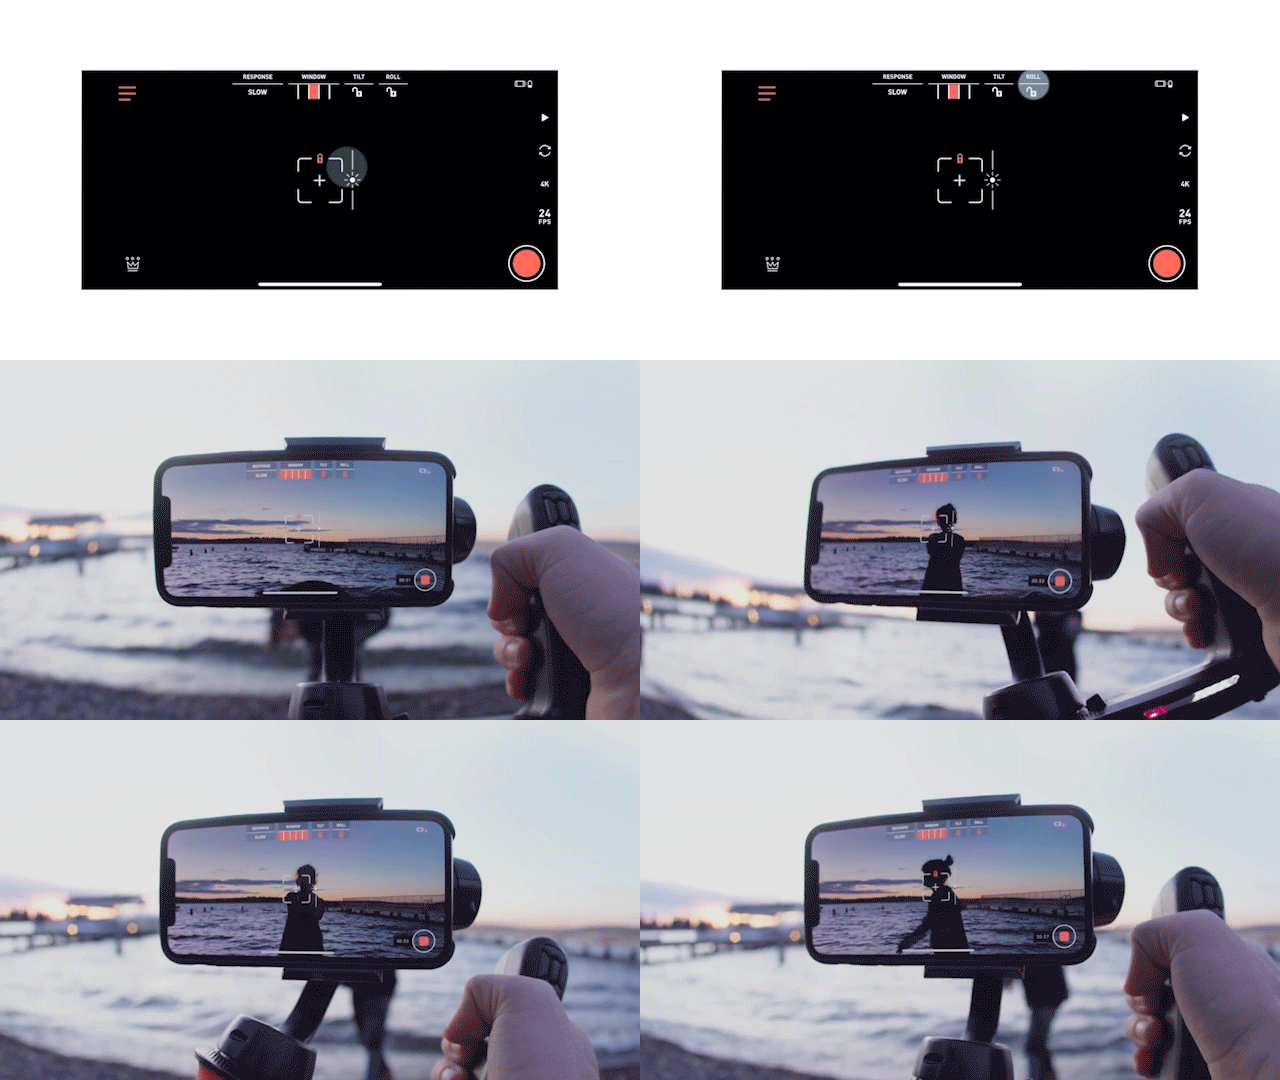
You can turn Roll Lock off to create some wild shots!
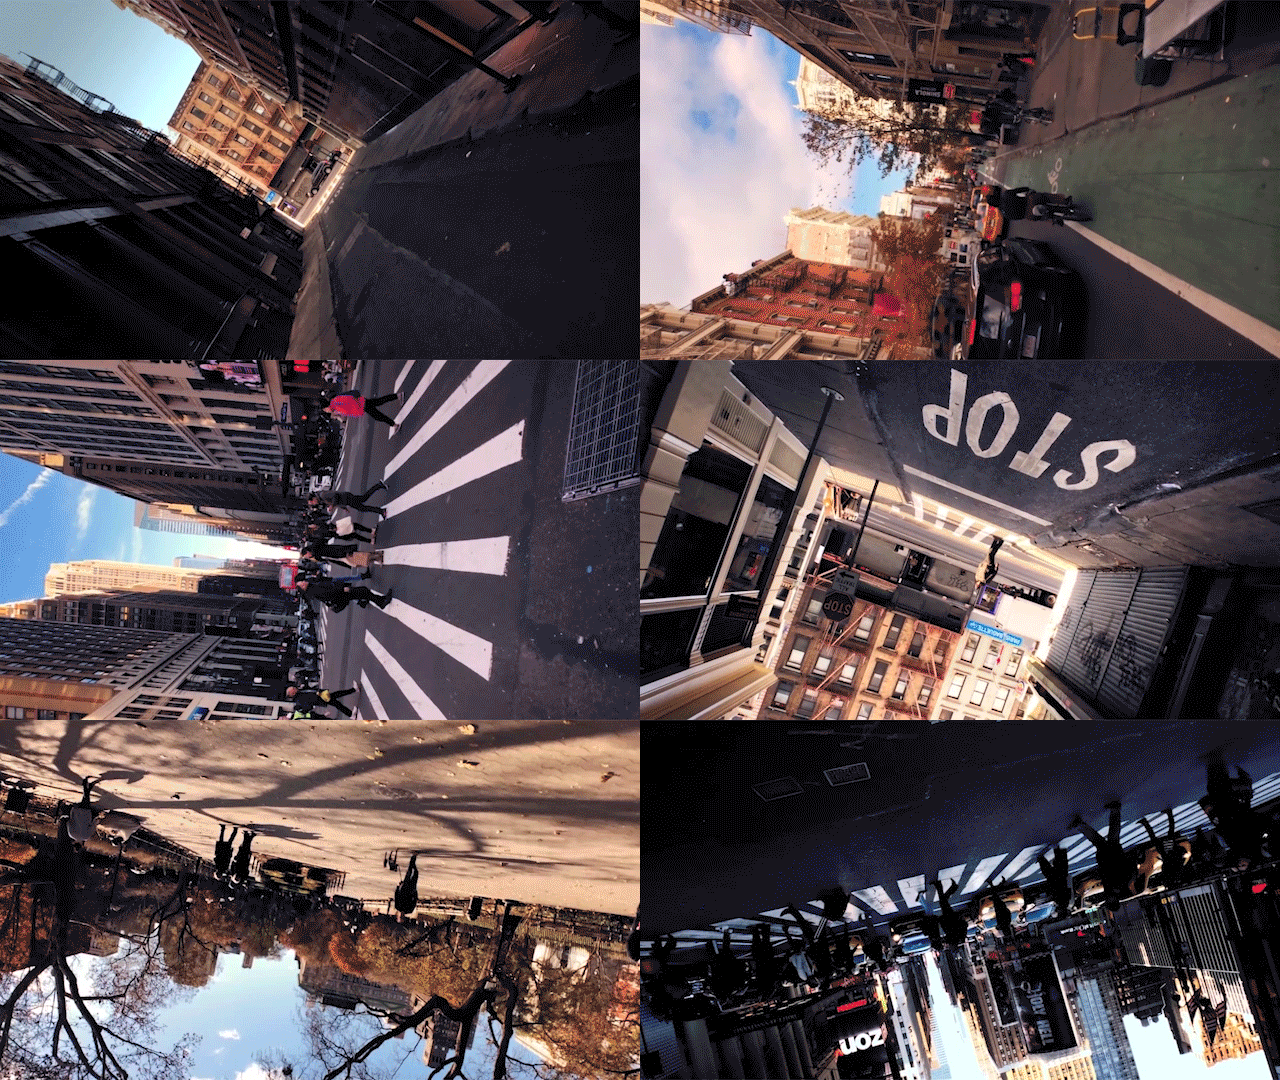
Majestic Window feature
Set the Window - The “window” option at the top of the screen allows you to control how receptive the gimbal is to your every movement. Your window size is determined by the highlighted boxes on the top of the screen.
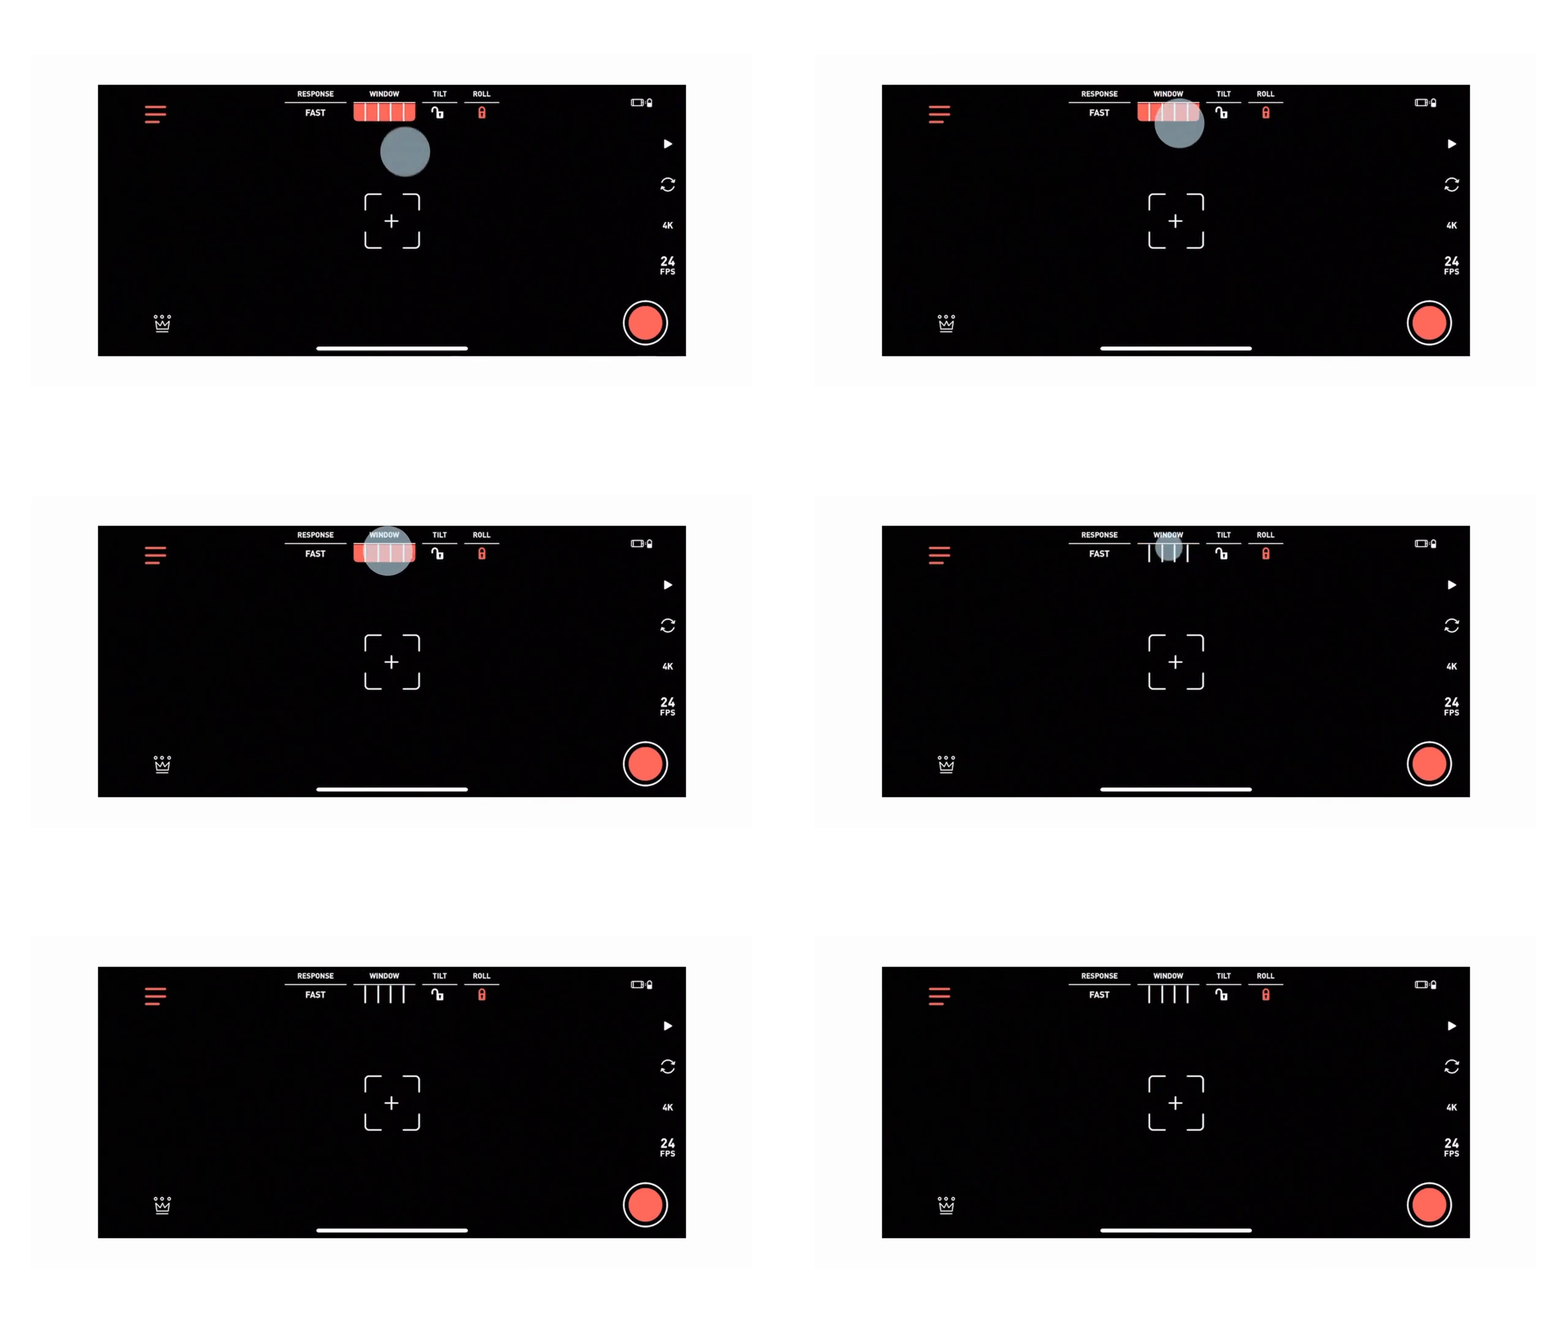
Narrow Window - A very narrow window or no highlighted boxes will allow the Movi to turn your phone with every movement you make allowing you to capture all the action.
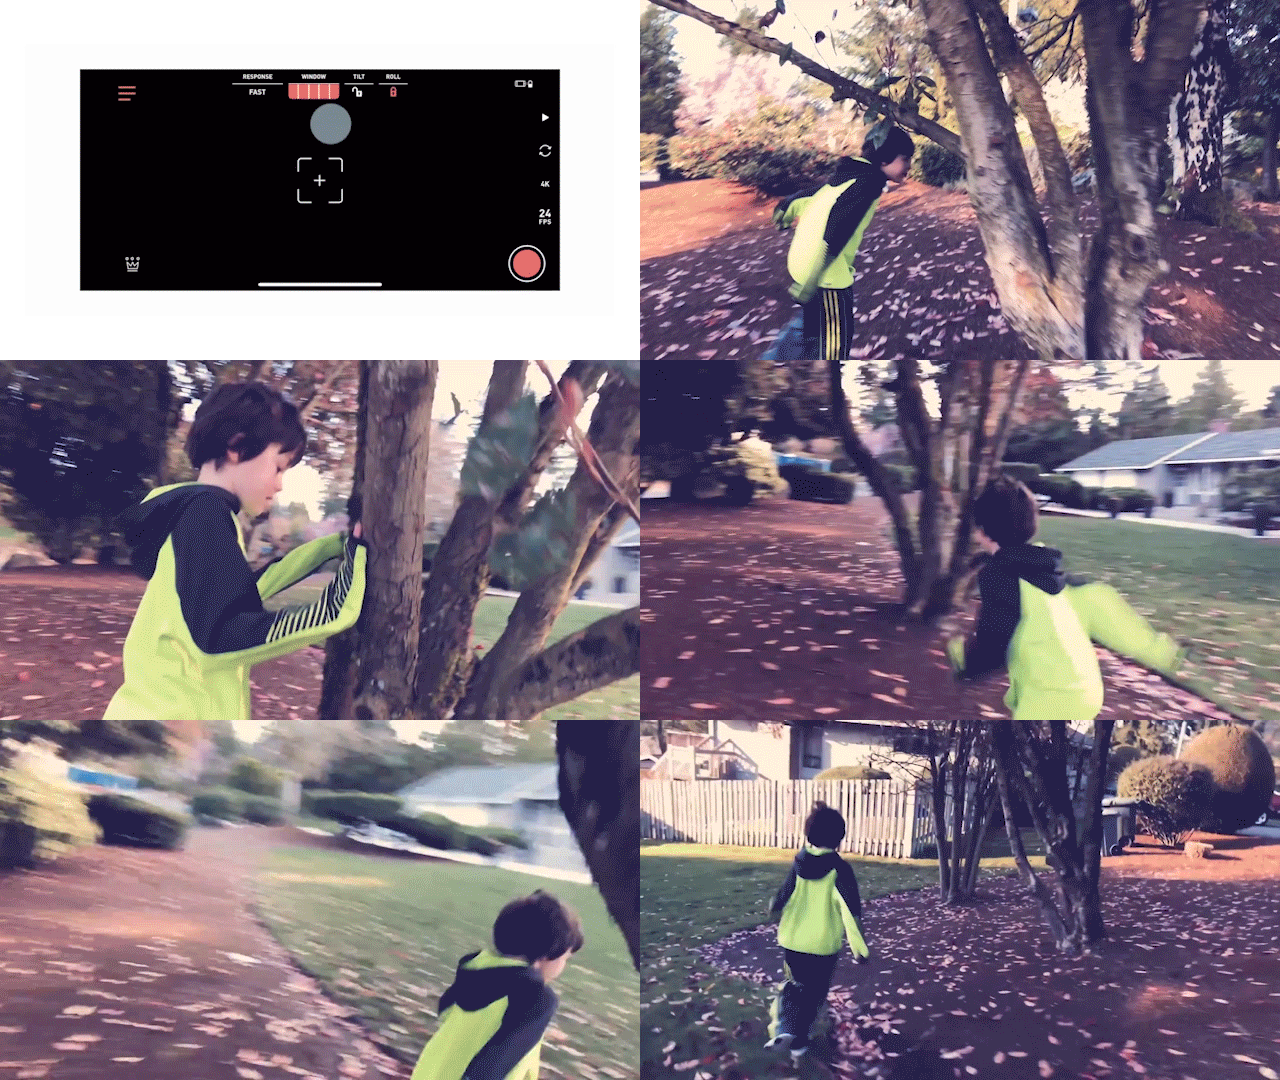
Wide Window - For smoother, more cinematic shots, increase the size of the window to 3 or 5 highlighted boxes by tapping the icon on the top of the screen.
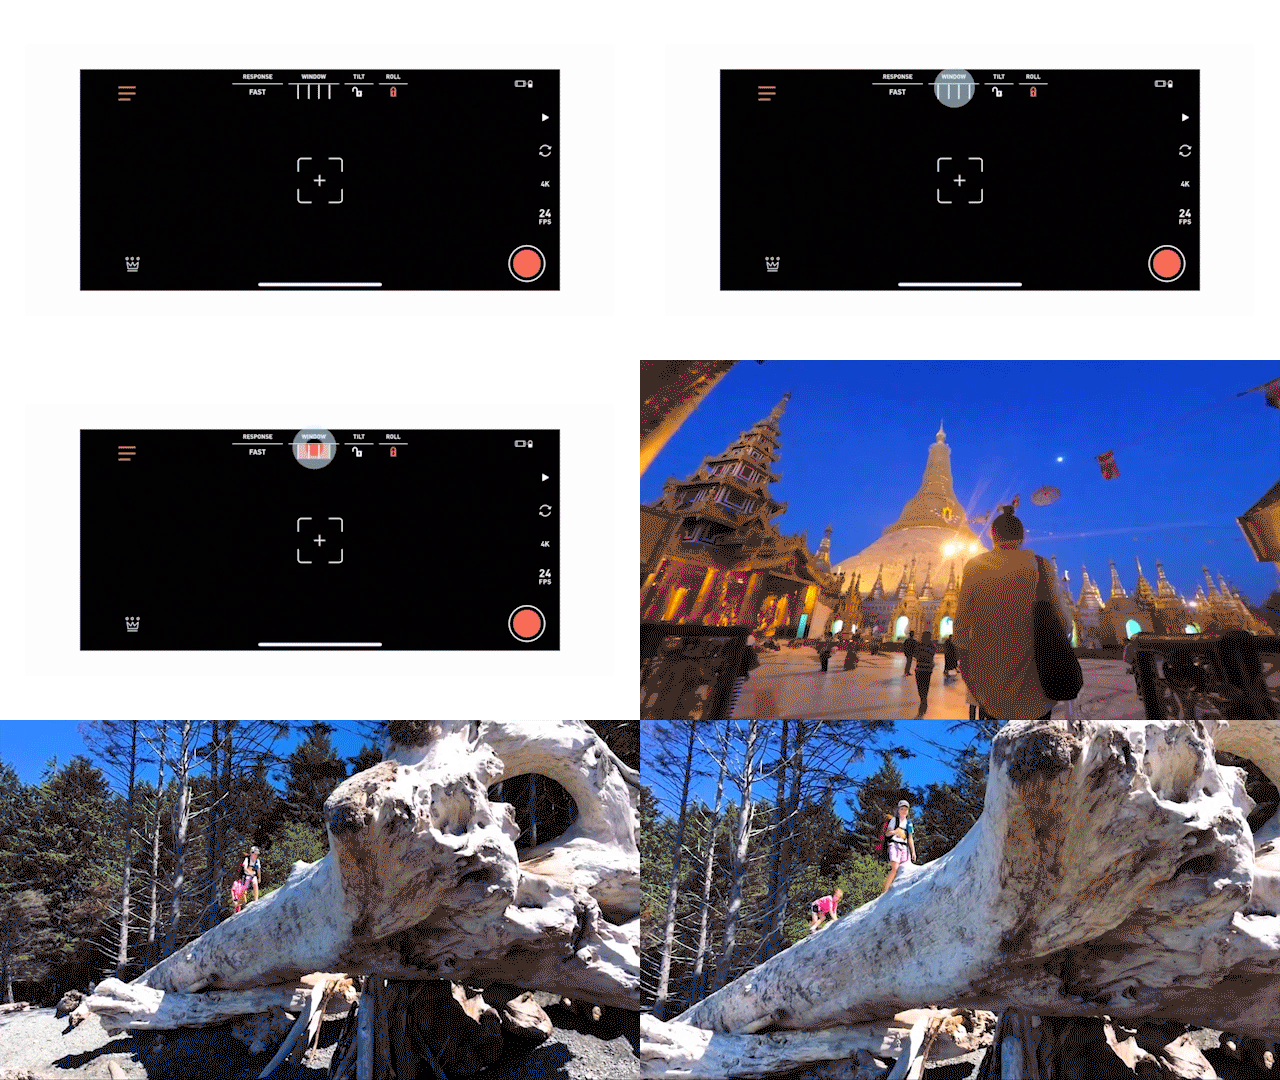
This will keep the gimbal in the same position for all but the biggest movements you make, ensuring that your footage is smoother.
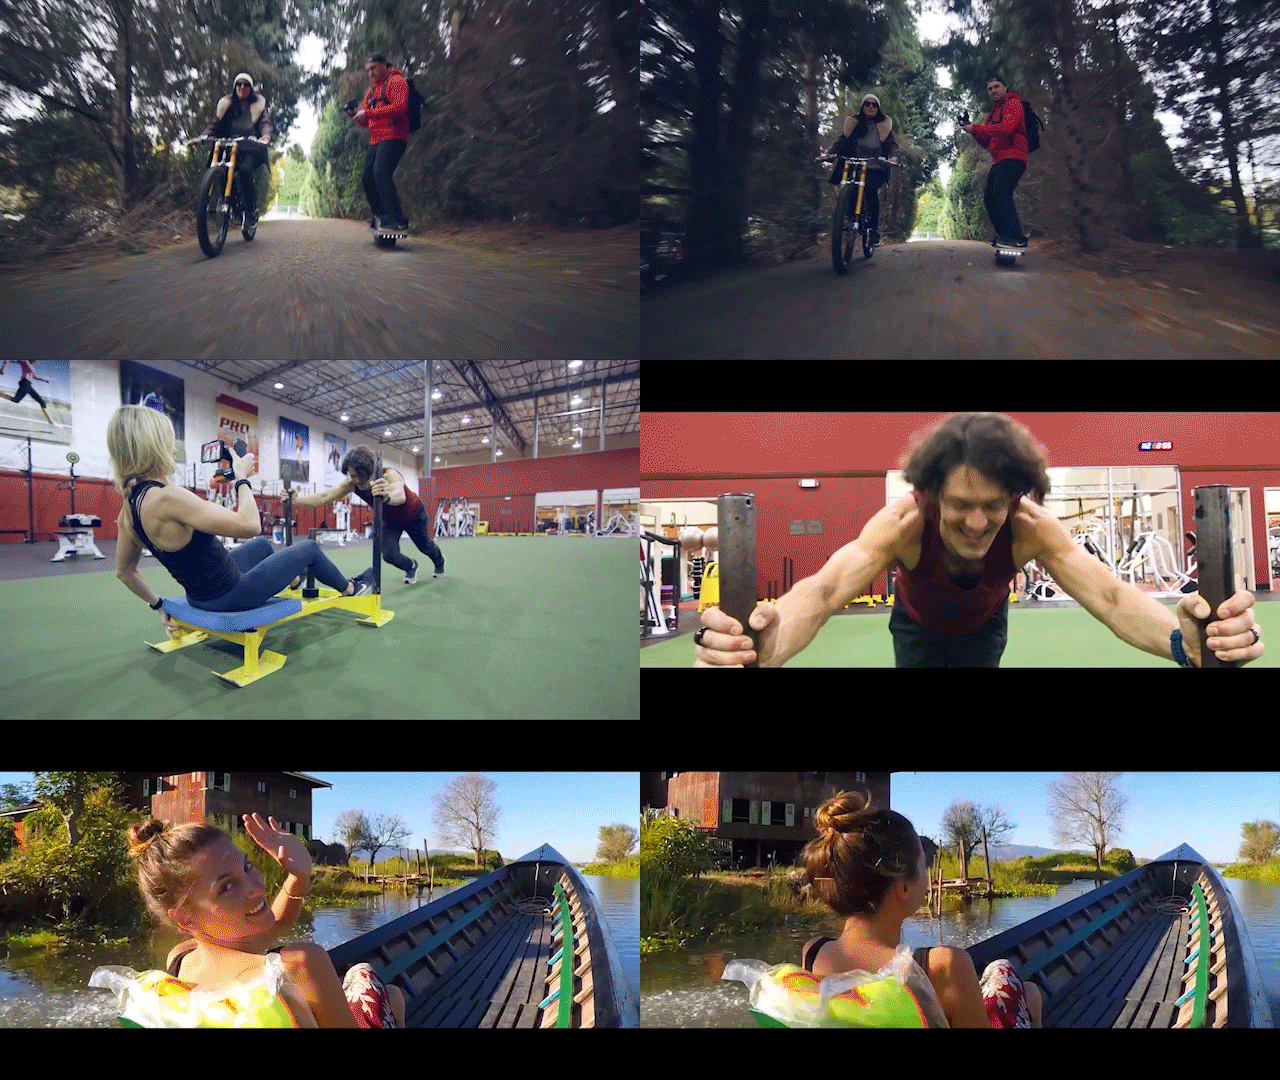
For bumpy scenarios like driving, running or crowded areas, consider shooting with a wider window to make sure your footage is as steady as possible.
How to shoot a stationary A - B shot
Echo Mode - To toggle between modes, press the icon at the bottom left hand corner of the screen and select the mode you want to use. In this tutorial we will be using Echo Mode.
Step 1 - Set point A. Set your gimbal down in your desired position or attach it to your tripod. Turn your phone to set the starting position of your shot. When you’re happy, press the trigger on the Movi’s handle to set that as your A point.
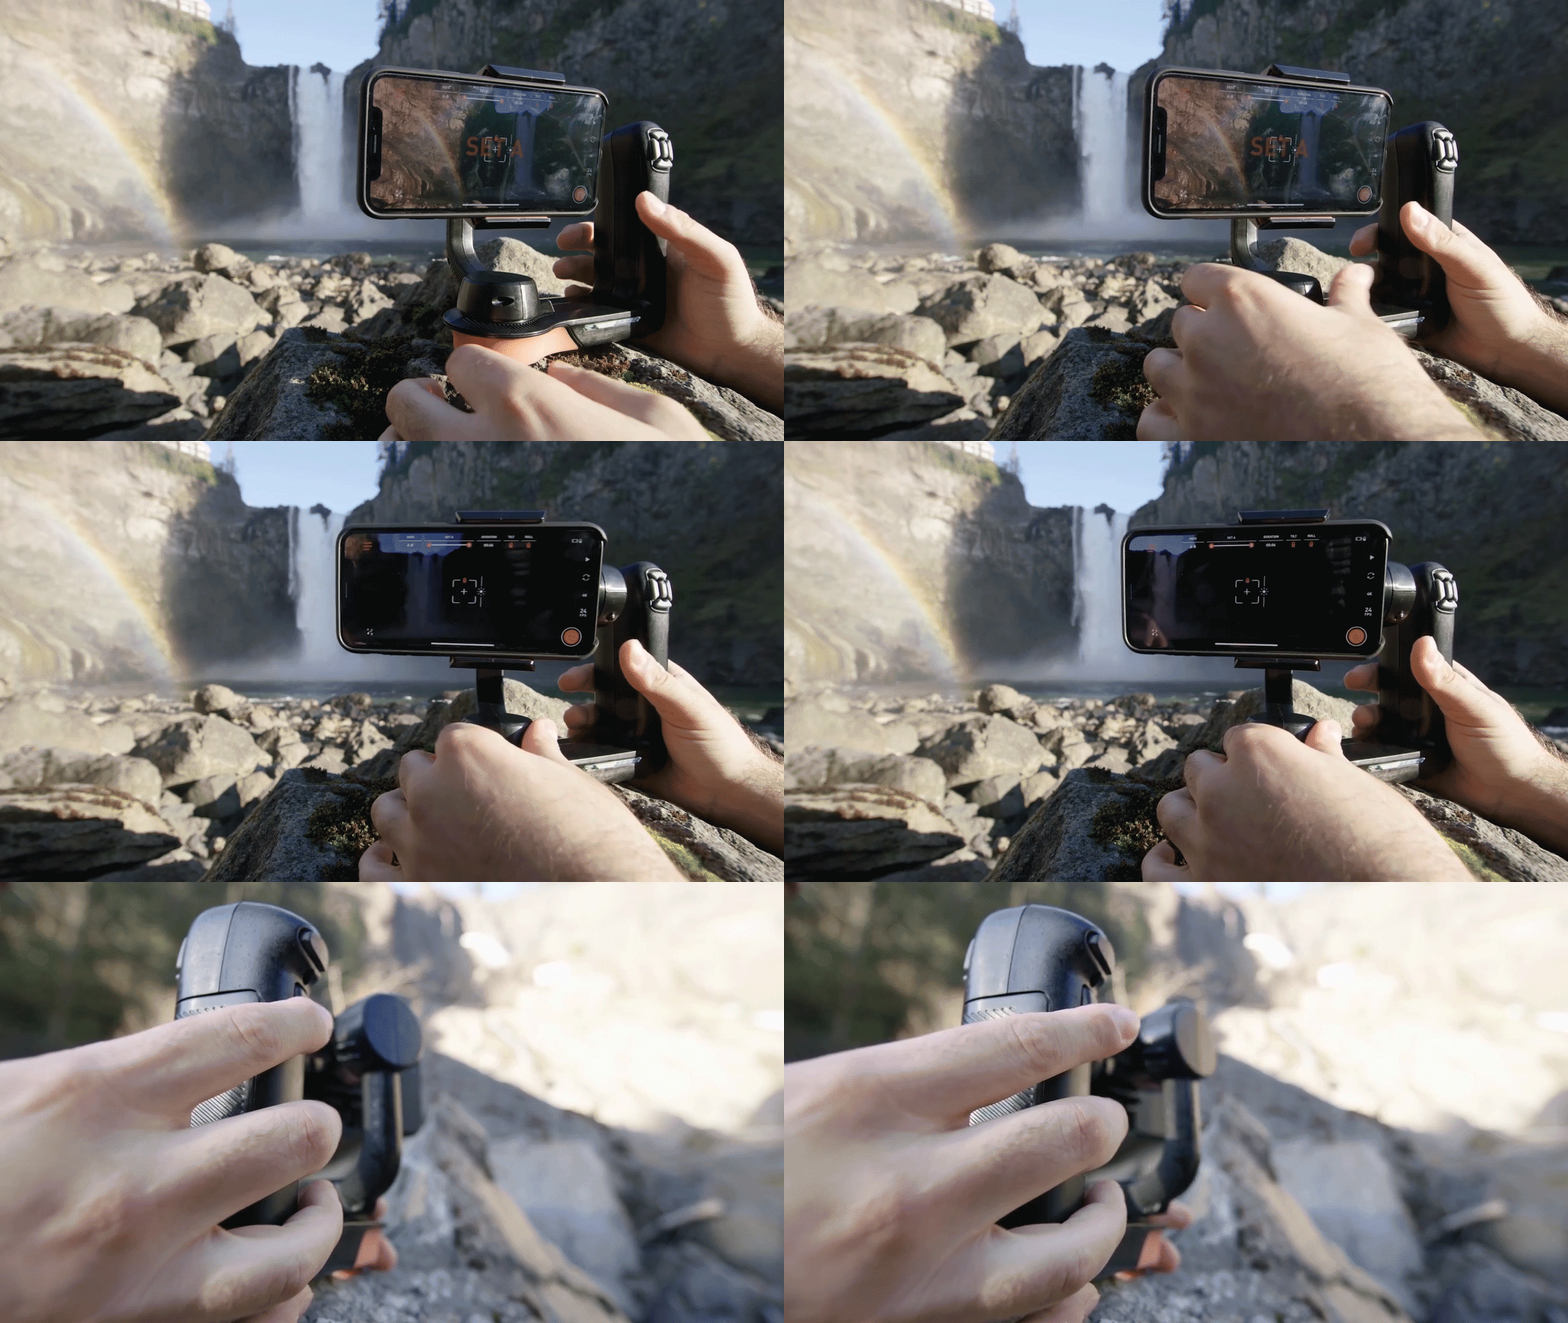
Step 2 - Set point B. Once again move your phone to until you find a finishing position you are happy with. Then press the trigger on your Movi’s handle once again to set point B.
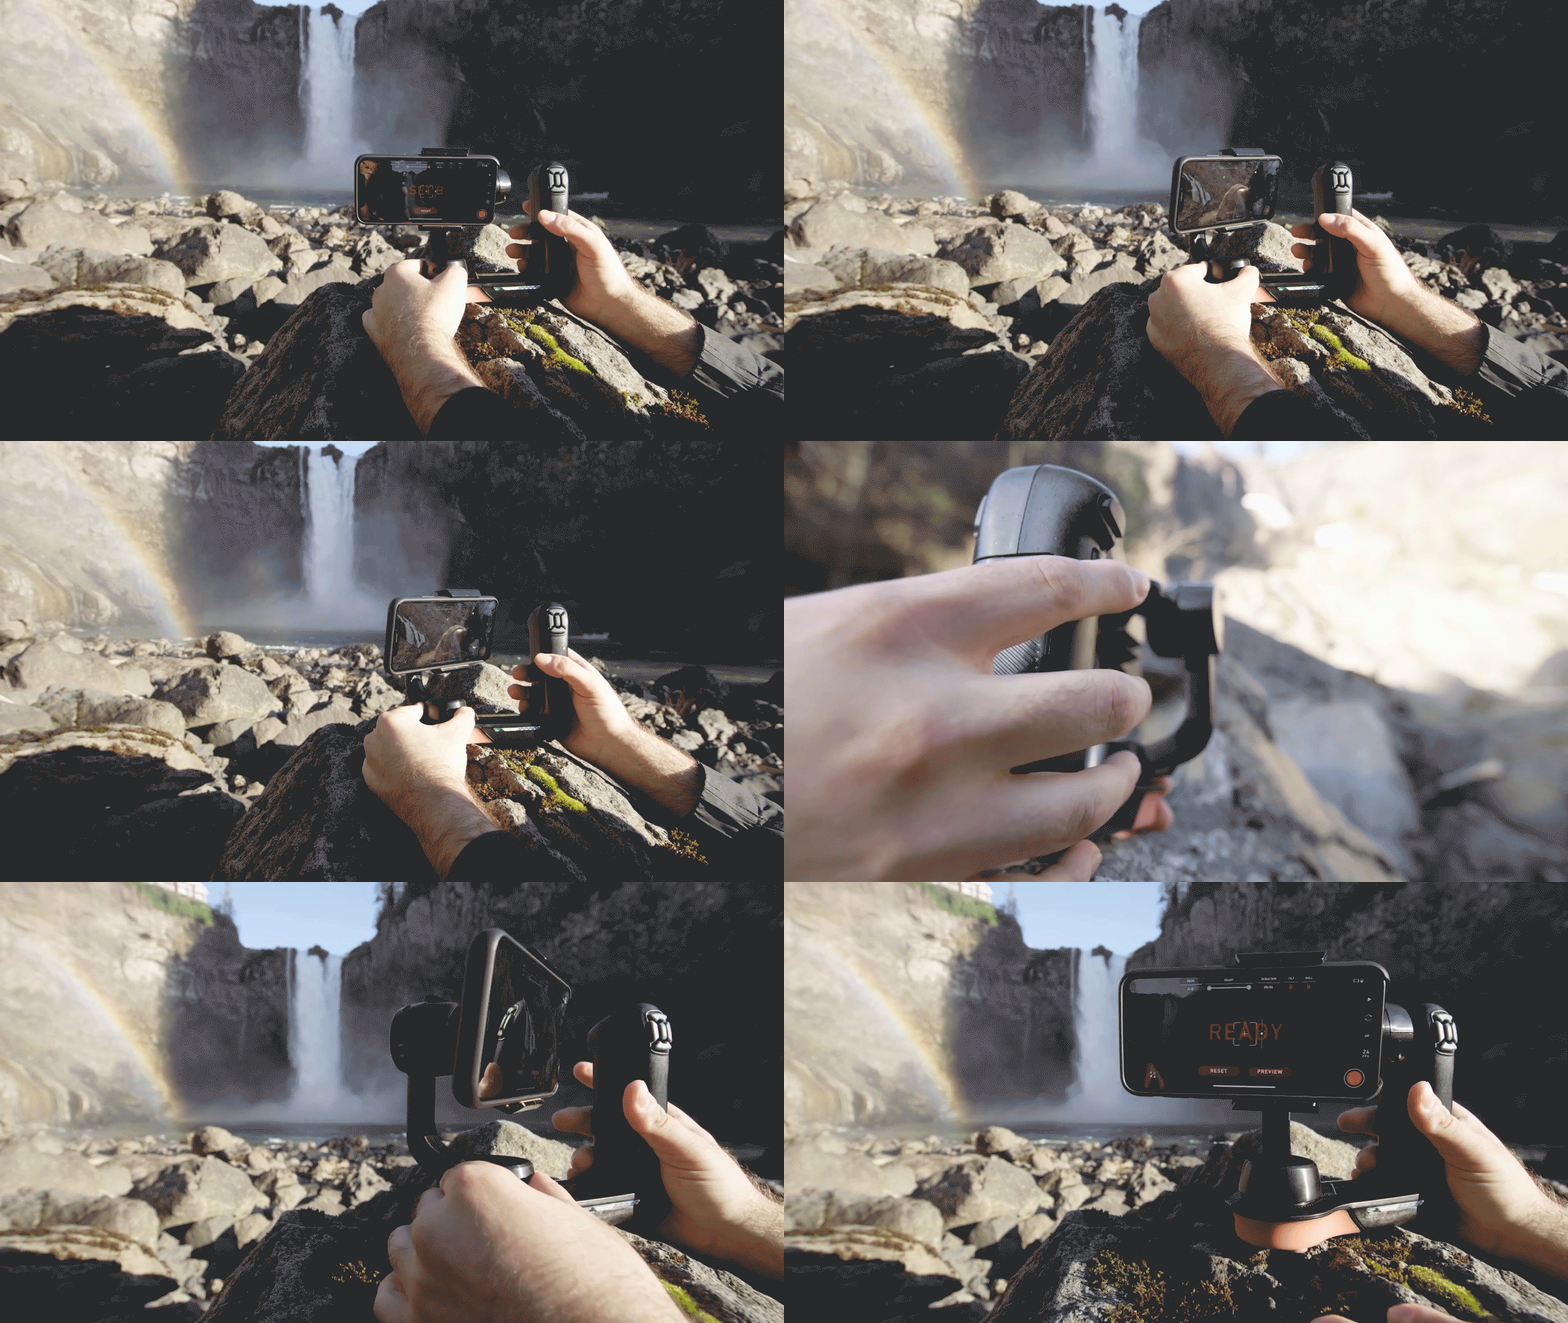
Step 3 - Set the duration. Tap the duration icon at the top of your screen and set the desired length of time that you want you phone to travel from point A to point B. Remember to set your duration for 5 seconds or longer and leave your phone filming for a few seconds before and after you finish your movement. This is important to ensure you capture the entire movement and will make it easier when your video is being edited.
Step 4 - Record. Tap the record button on your Movi’s handle to begin filming. Then press the trigger after a few seconds to begin your phones movement from point A to point B.
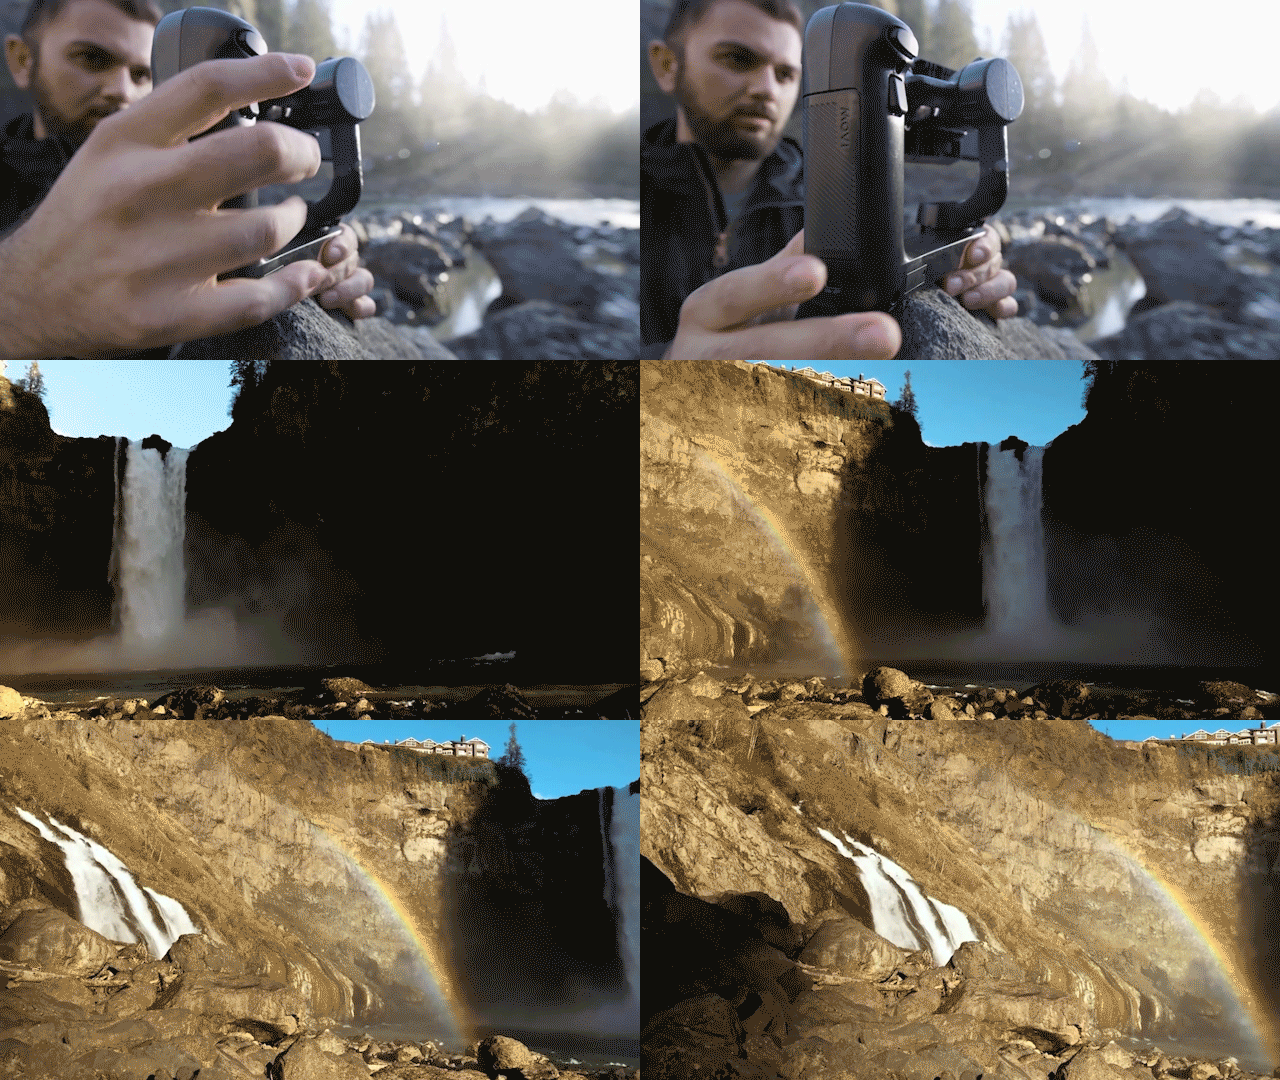
If something went wrong, or if you want another of the same shot, you can press the replay button to repeat the shot. You can also press reset if you want to change the positions of point A and point B.
How to shoot a two point timelapse
A time-lapse is a video that comprises a series of photos taken at a set interval, then pushed together to make a quick video clip that shows something that would have otherwise taken a long time to see.
A two point time-lapse allows your phone to move between two points as it takes the time-lapse making a much more spectacular shot.
Time-lapse mode works very similarly to Echo, so be sure to check out the article to get an understanding of how the gimbal works. To get to time-lapse mode, press the icon at the bottom left hand corner and select time-lapse.
Step 1 - Set point A. Set your gimbal down in your desired position or attach it to your tripod. Turn your phone to set the starting position of your shot. When you’re happy, press the trigger on the Movi’s handle to set that as your A point.
Step 2 - Set point B. Once again, move your phone to until you find a finishing position you are happy with. Then press the trigger on your Movi’s handle to set point B.
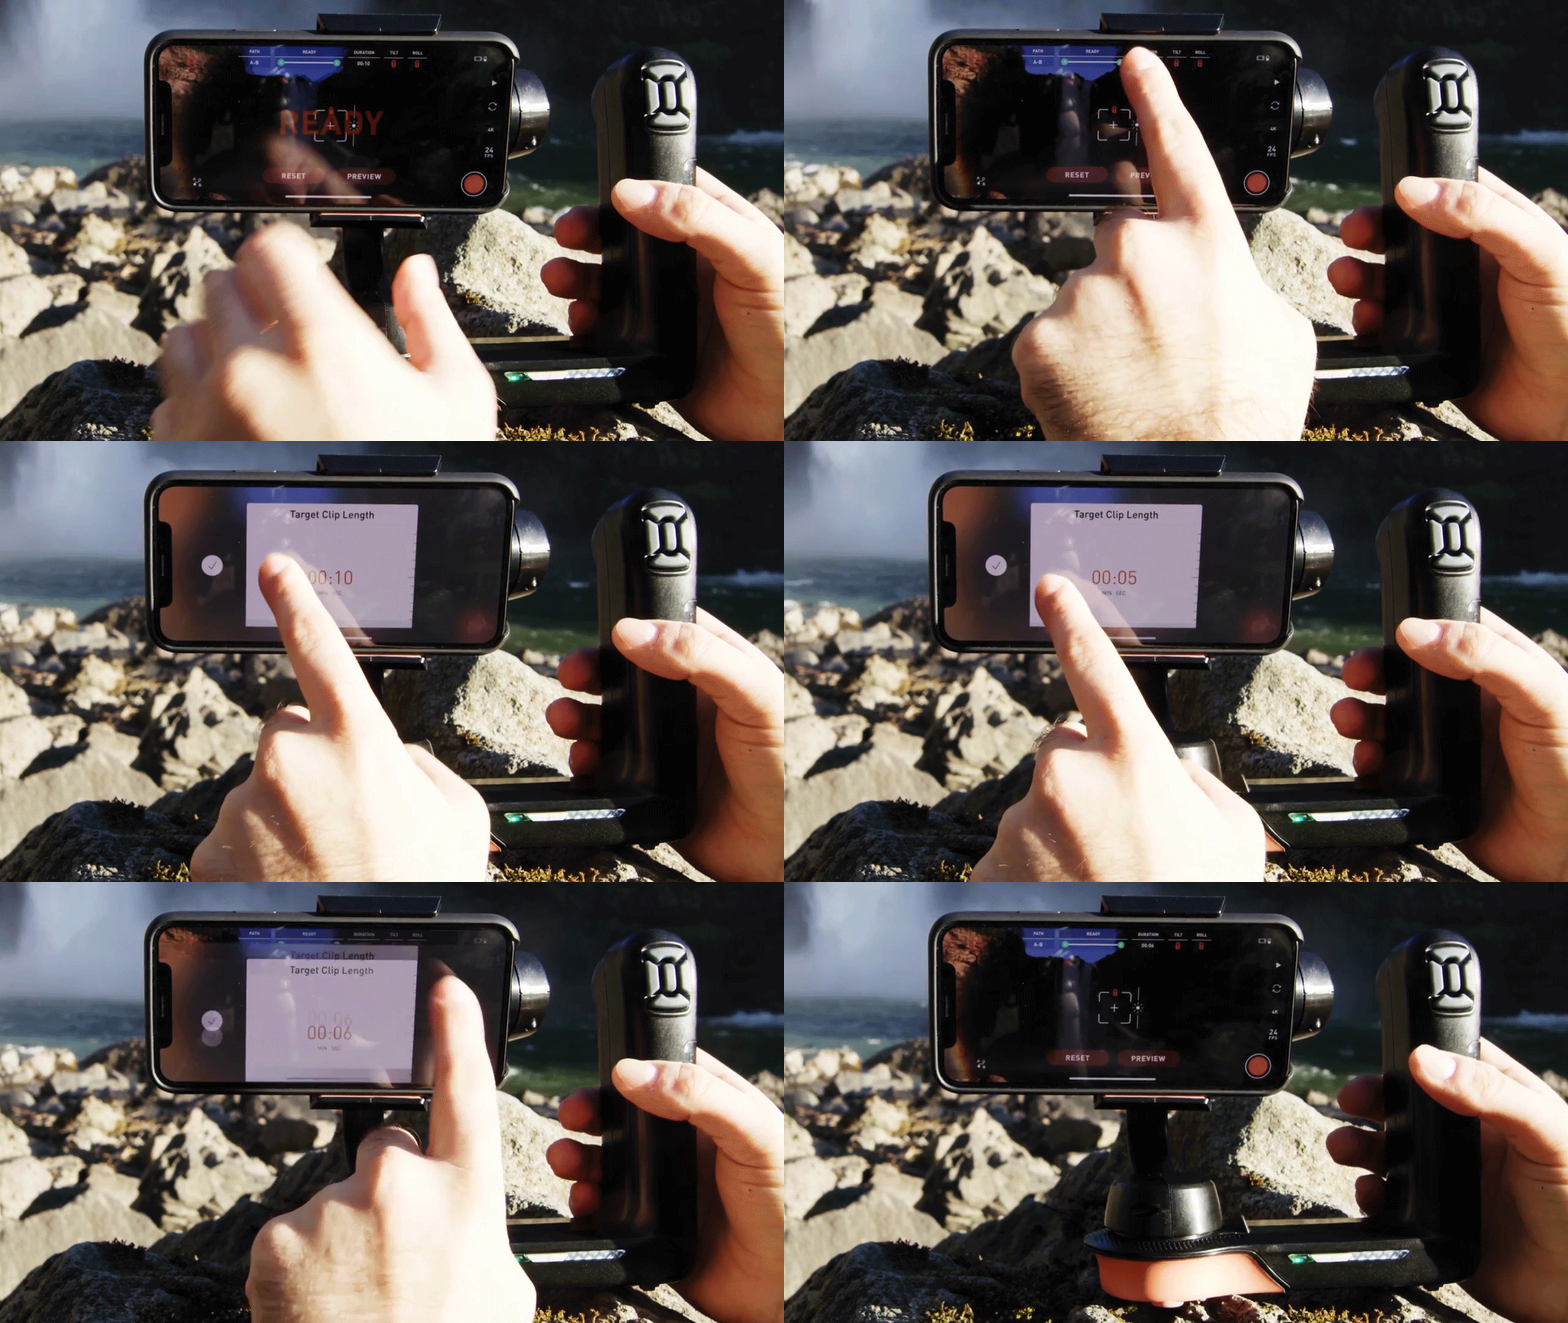
Step 3 - Set the duration. Press the duration button at the top of the screen. You will have 3 numbers before you.
The first number is the target clip length. This how long you want your final time-lapse clip to go for.
The middle number is time compression, this is how fast you want your final video to be sped up. If you are unsure, we recommend starting at 10x. You can always speed a time-lapse up in editing, but you can’t always slow them down.
The final number is shoot duration. This number represents how long you will have to leave your phone filming to capture the time-lapse. To make this number shorter or longer, change the target clip length or time compression. If you want to shoot for a shorter period of time, make the clip length shorter or time compression smaller.
Remember to lock focus and exposure when capturing a time-lapse. This will ensure that your shot stays in a consistent focus and that the light does not drastically change. To do this, press the middle button on the D-pad to lock the focus and exposure. The D-pad can be found on the handle of the gimbal.
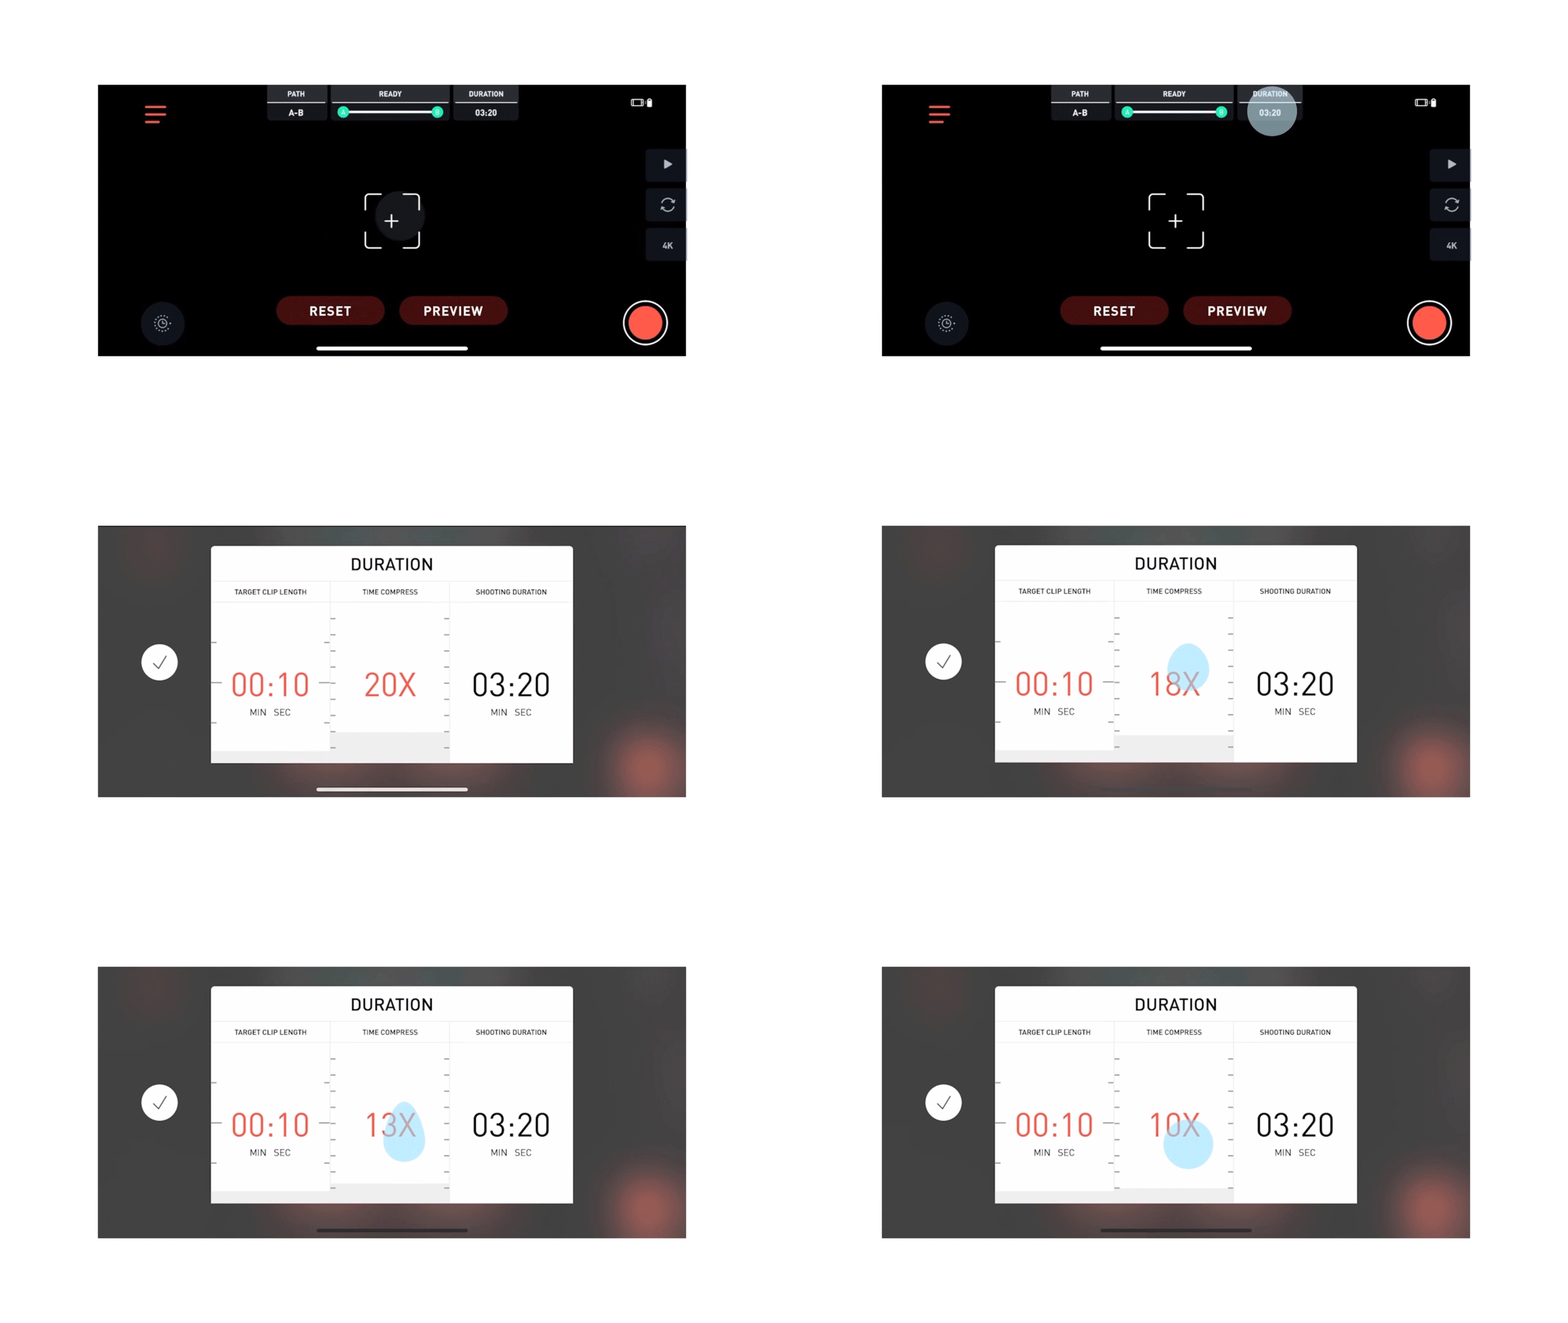
Step 4 - Record. Tap the record button on your Movi’s handle to begin filming. Press the trigger after a few seconds to begin your phone’s movement from point A to point B.
If something went wrong, or if you want another of the same shot, you can press the replay button to repeat the shot. You can also press reset if you want to change the positions of point A and point B.
How to use preset paths
If you would prefer to use presets rather than creating your own paths to shoot, press the Path icon at the top of your screen. You can toggle between these presets till you find one you like. Just like in the video above, set your duration, press record and then press the trigger to begin your movement.
Step 1 - Rather than creating your own path for your phones camera to follow, you can choose a preset path by selecting the Path icon at the top left of the screen.
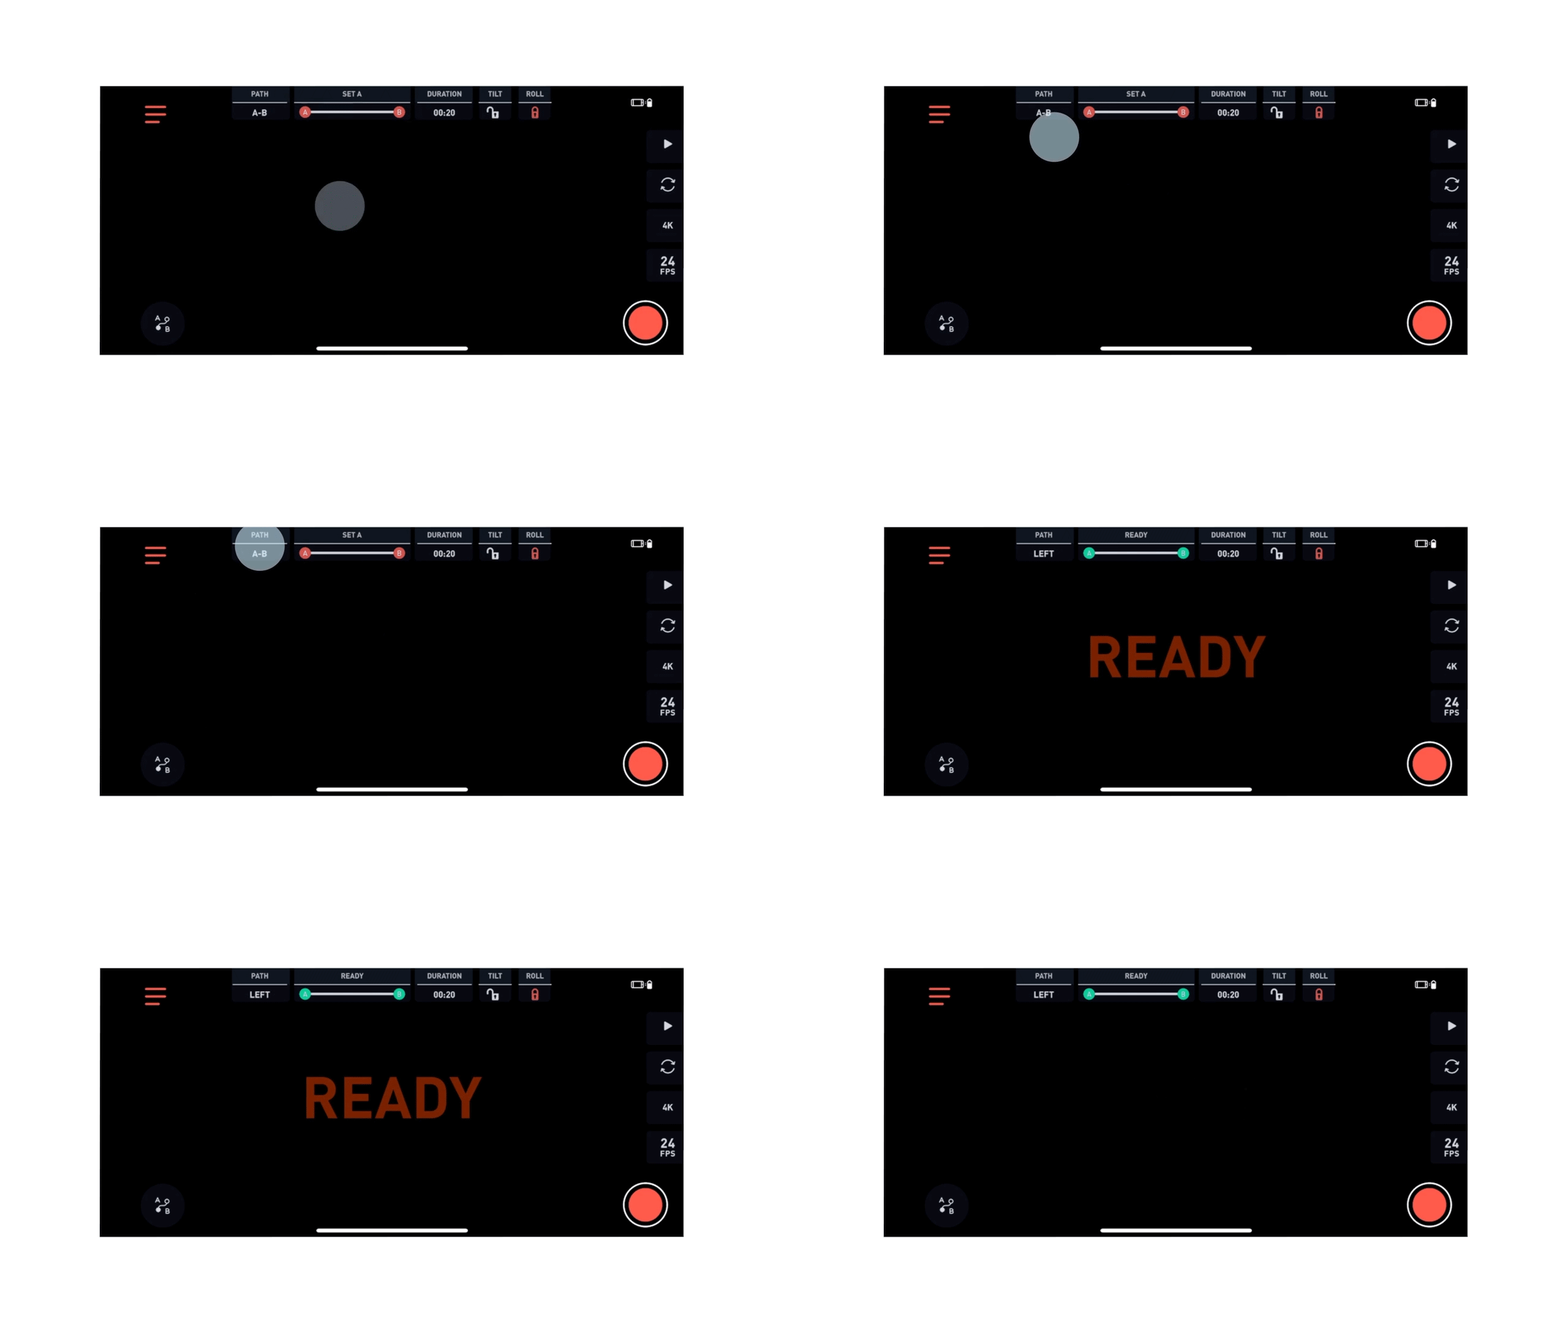
Step 2 - Set the duration by tapping the duration icon at the top of your screen and setting the desired length of time that you want you phone to travel on its path.
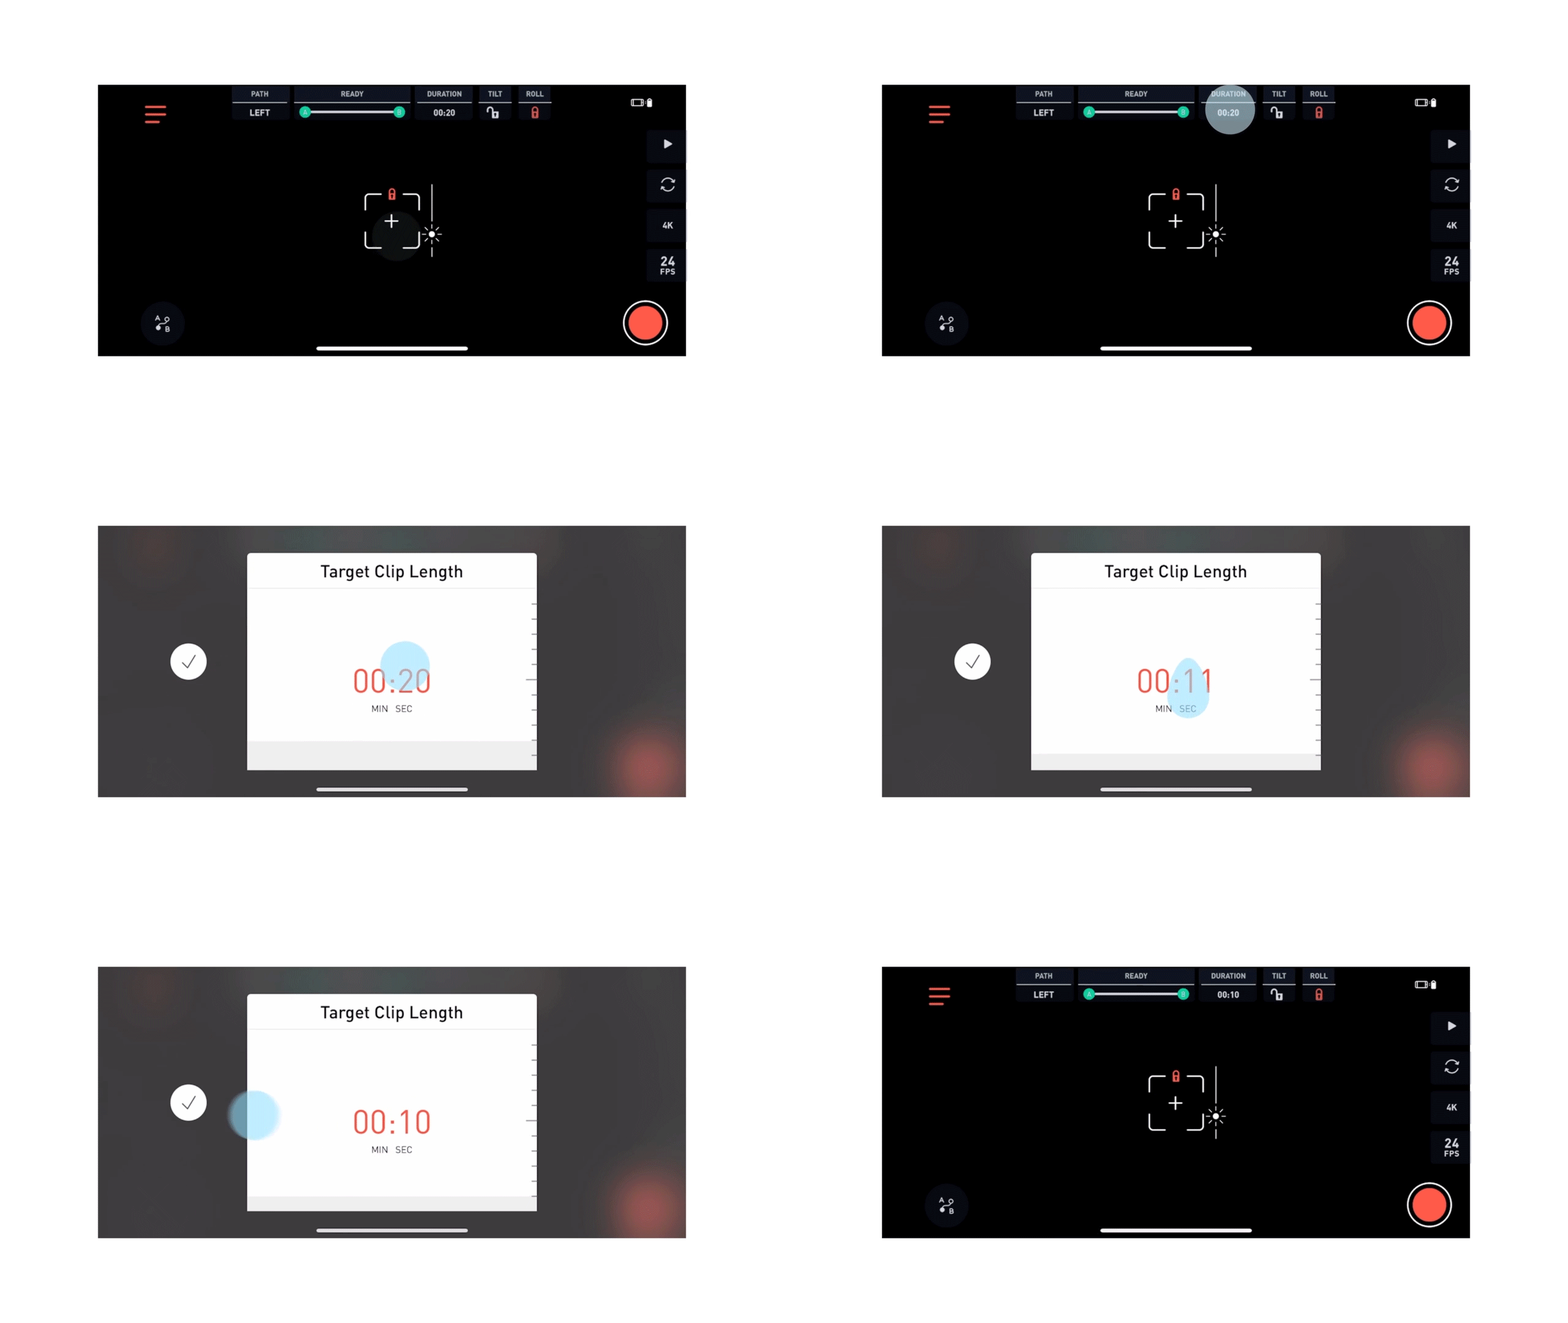
Step 3 - Tap the record button on your Movi’s handle to begin filming. Press the trigger after a few seconds to begin your phones movement on its preset path.

How to shoot a simple Movilapse / Hyperlapse
A Movi-lapse is better known as a hyper-lapse. The difference between a hyper-lapse and a time-lapse is that in a hyper-lapse the gimbal is moving. This kind of video combines movement and a time-lapse together to create a short video showing the passing of time whilst the camera moves.
To select Movi-lapse mode, press the icon at the bottom left hand corner and select Movi-lapse.
Step 1 - Set response to slow. You can toggle this to different speeds depending on how quick you want to move your gimbal whilst filming.
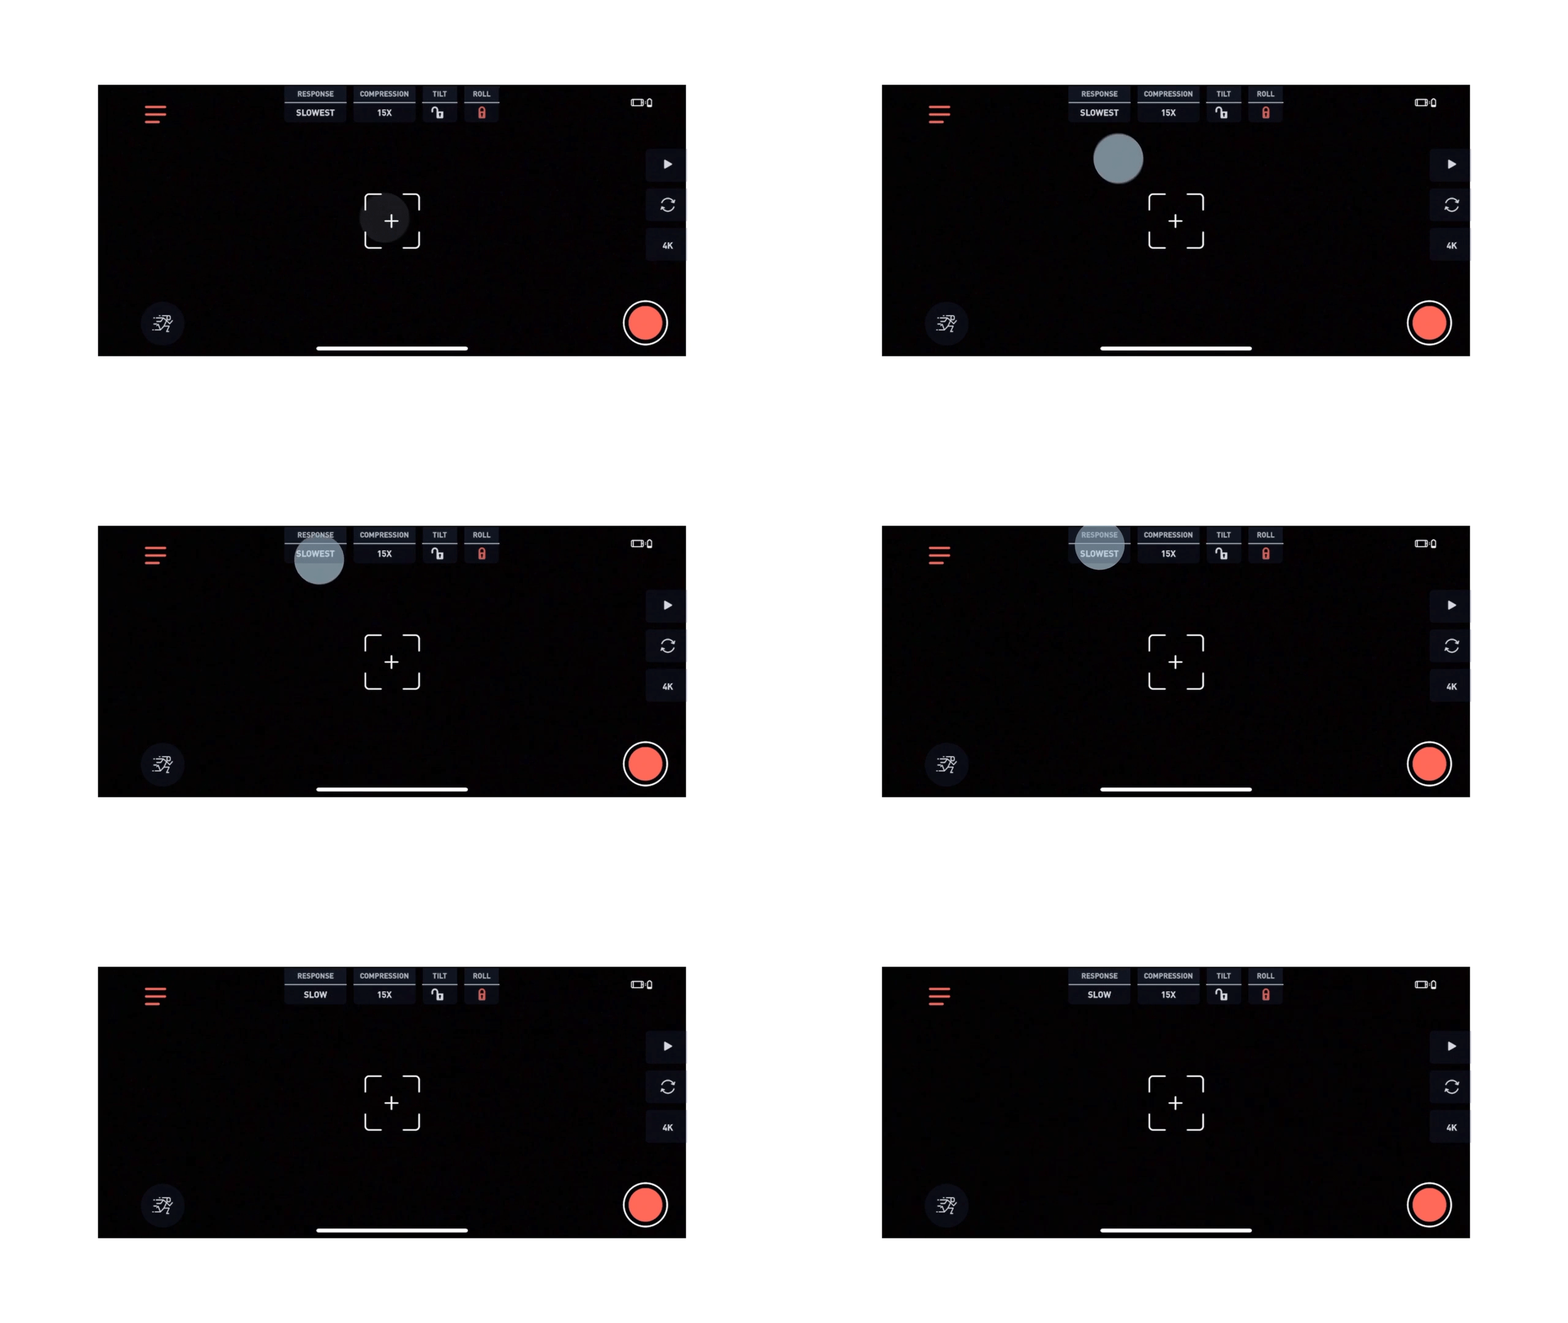
The rest of the steps in this article are some best practice tips when it comes to filming a hyper-lapse.
Step 2 - Framing a subject. hyper-lapses can be very interesting if you add a subject to follow. Place your subject approximately 3 meters or 10 feet in front the camera and, once recording, start to follow them.
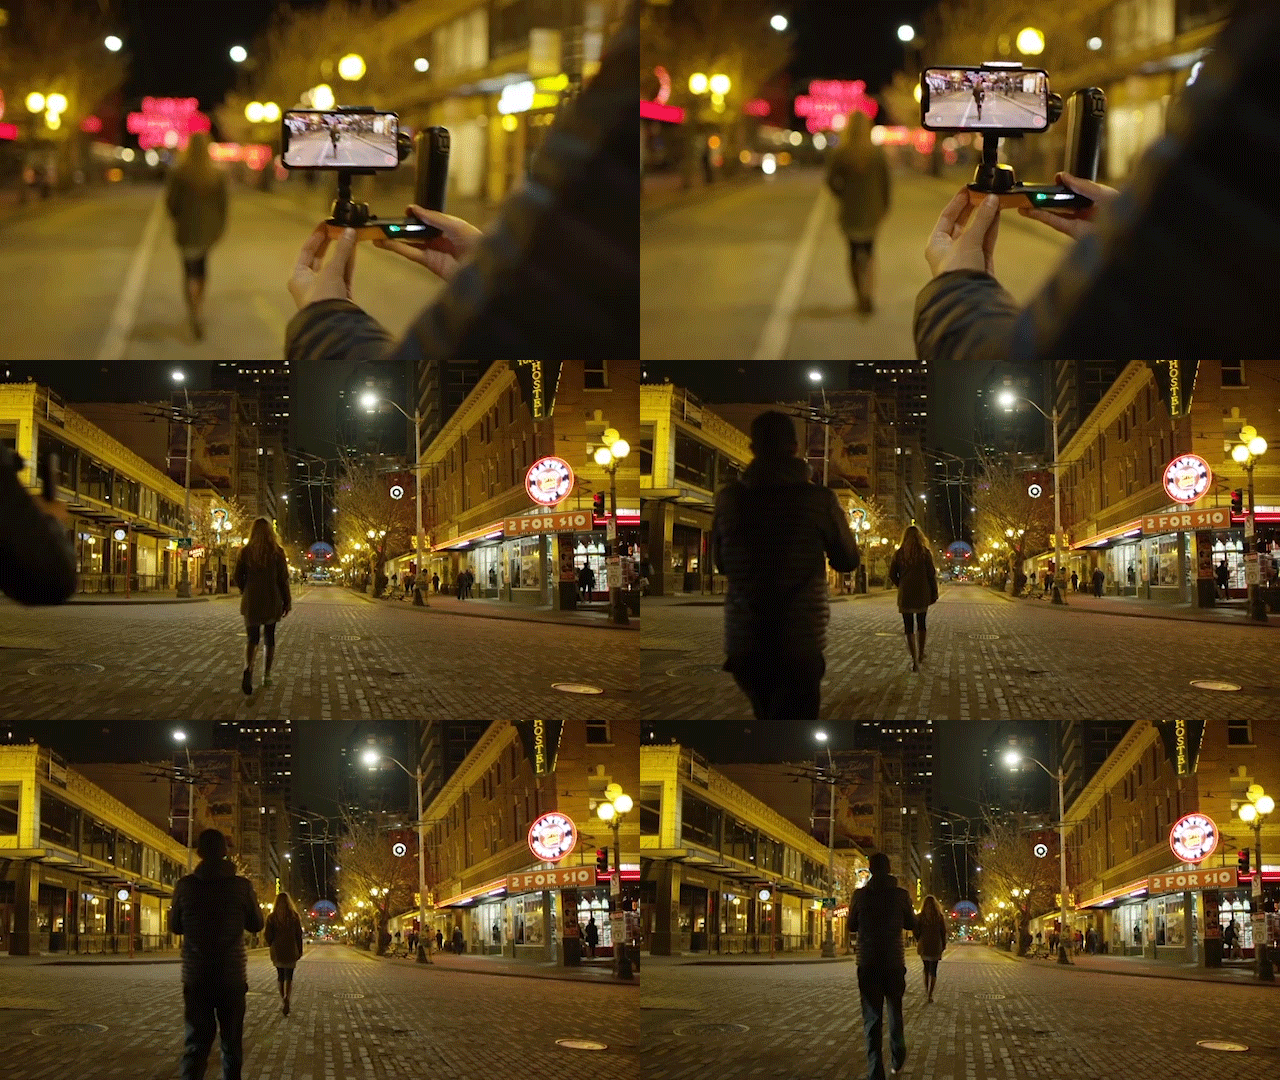
Step 3 - Keep the subject in frame. Make sure you keep your subject in the same part of frame that they were in when you began the video. Concentrate on moving at the same pace they move, to ensure you are not gradually getting closer or further away during the hyper-lapse.
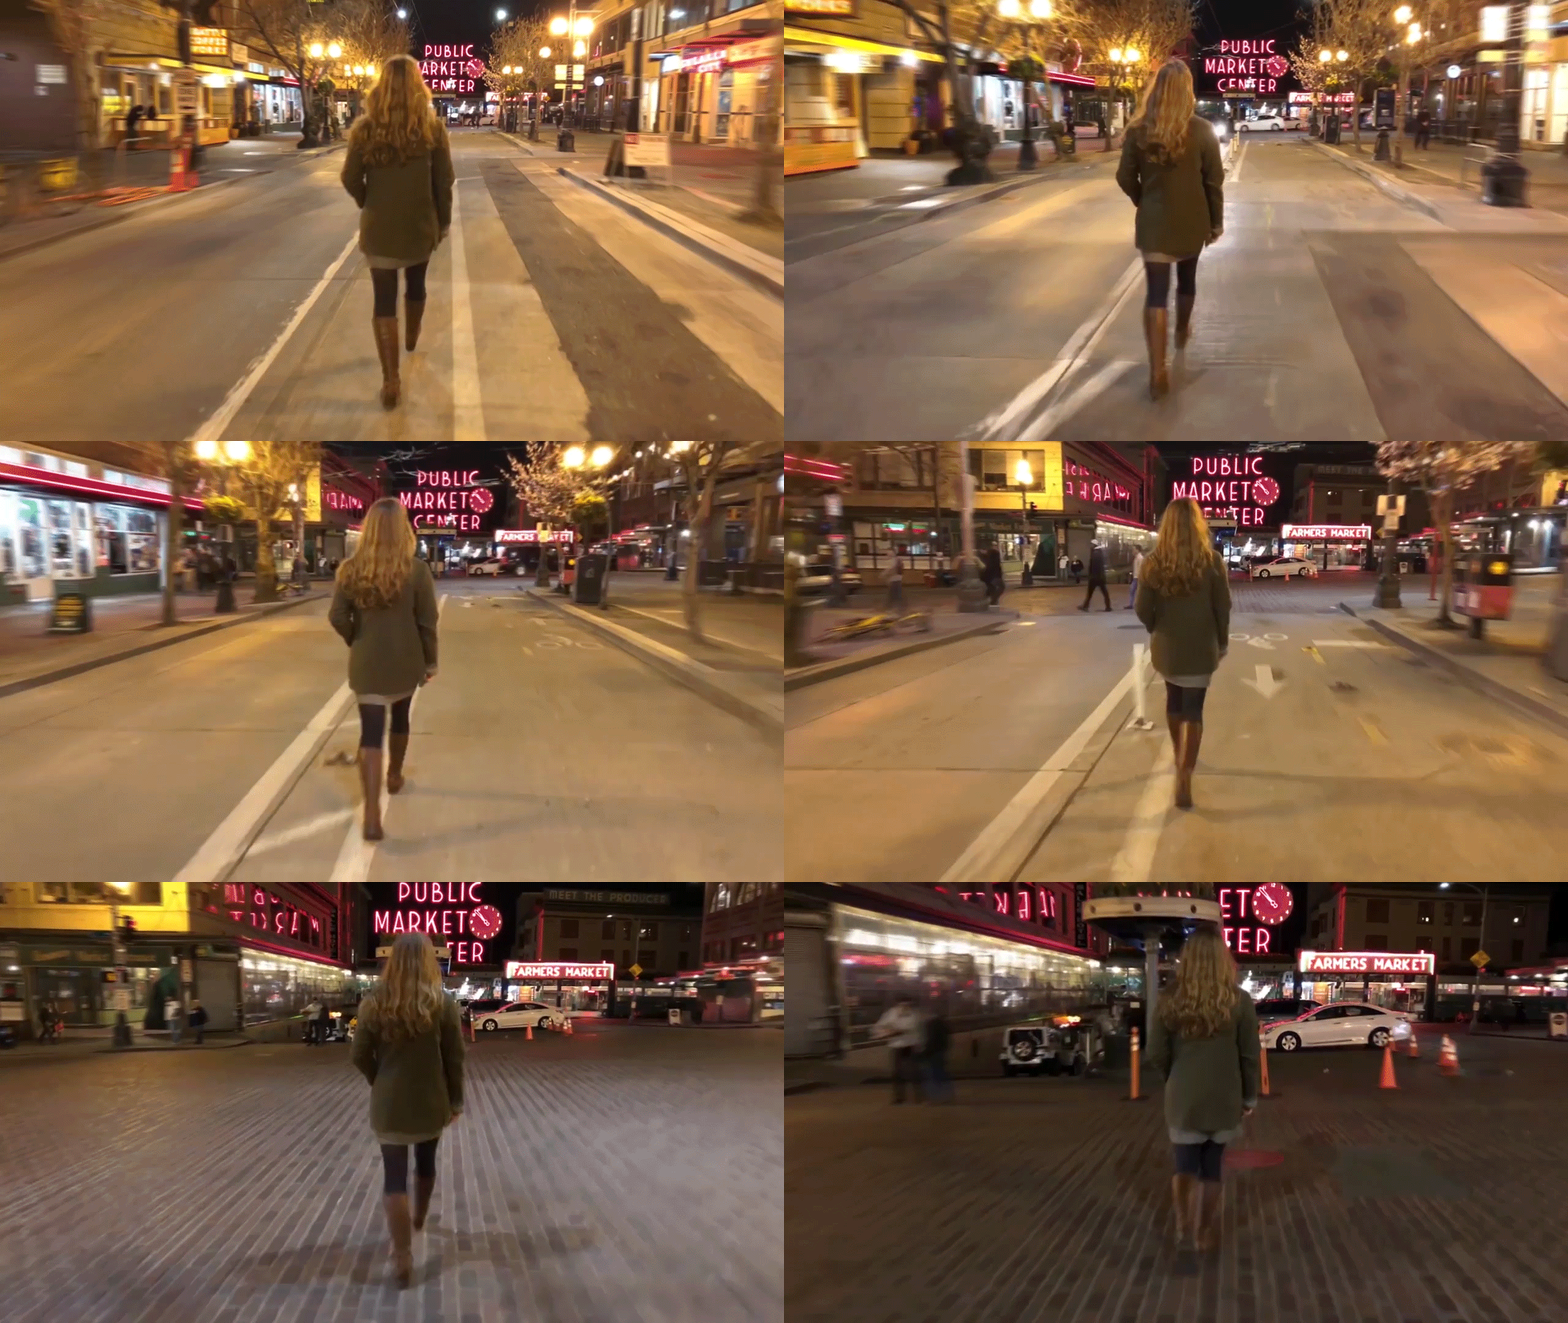
Step 4 - Adjust the position of your gimbal to keep the frame. Remember your Movi will not respond to your movements quickly. So if you need to make a quick turn, hold down the trigger on the handle and perform the turn. Once you’ve made the turn and your subject is back in the desired position, release the trigger.
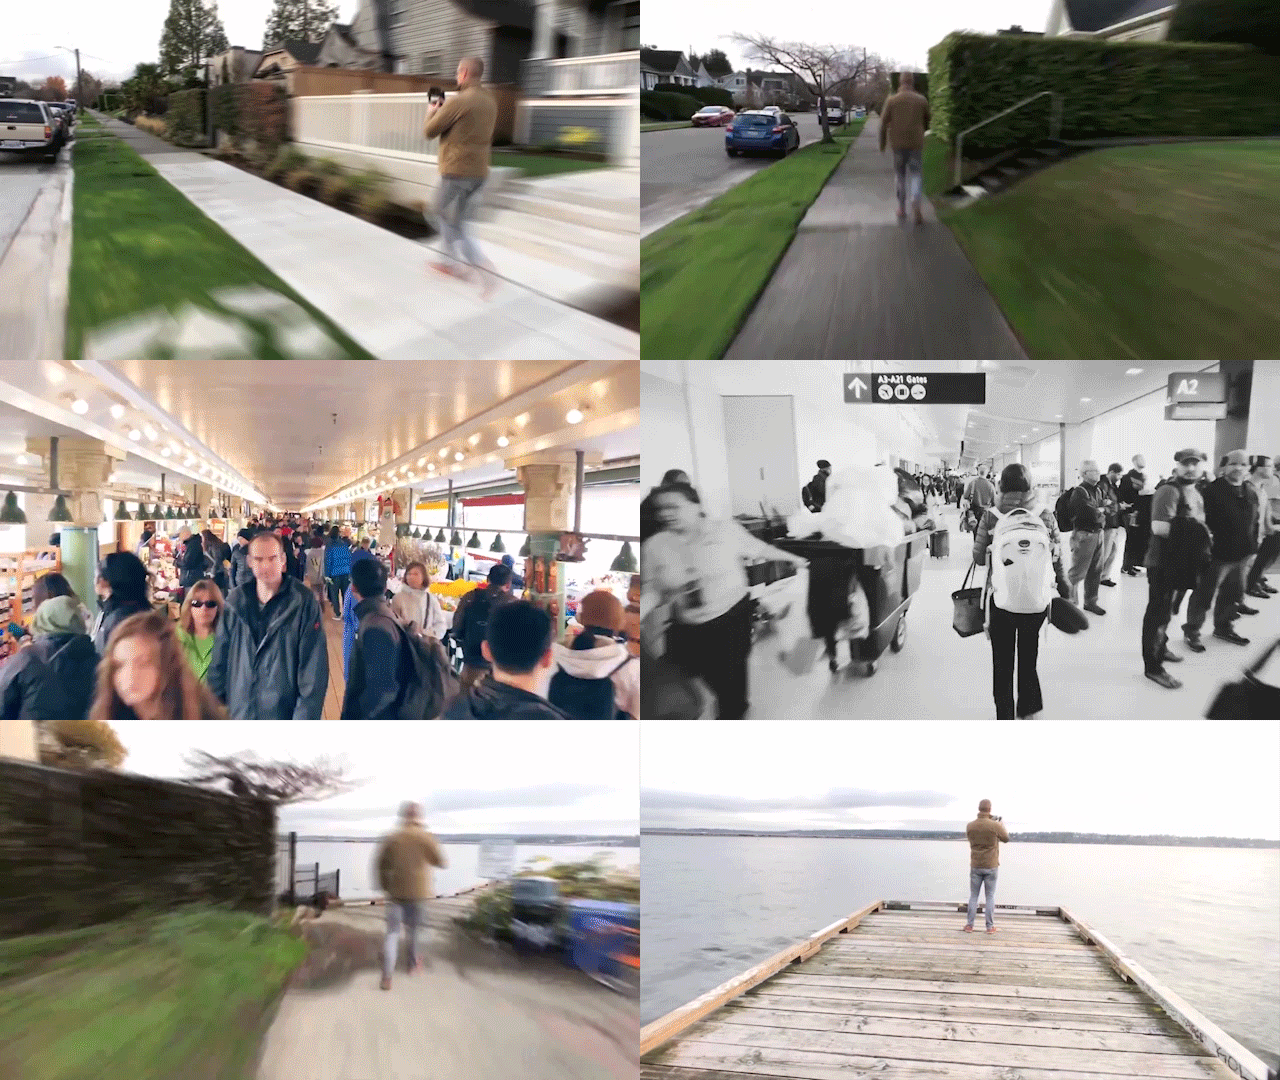
It is important to keep your Movi as still as possible when creating this video and walk very smoothly to achieve the best effects. The Movi will respond very slowly to any of your movements so you must plan ahead and start your turns much earlier than you would usually.
How to shoot a revolve shot
Orbit is a filming mode that allows you to shoot a perfect revolving shot by combining your movement and the camera’s movement. You can select it by pressing the icon at the bottom left corner of the screen and select Orbit Mode.
Step 1 - Set your orbit direction. Select left or right under the direction icon at the top of the screen. This will be the direction in which your phone orbits.
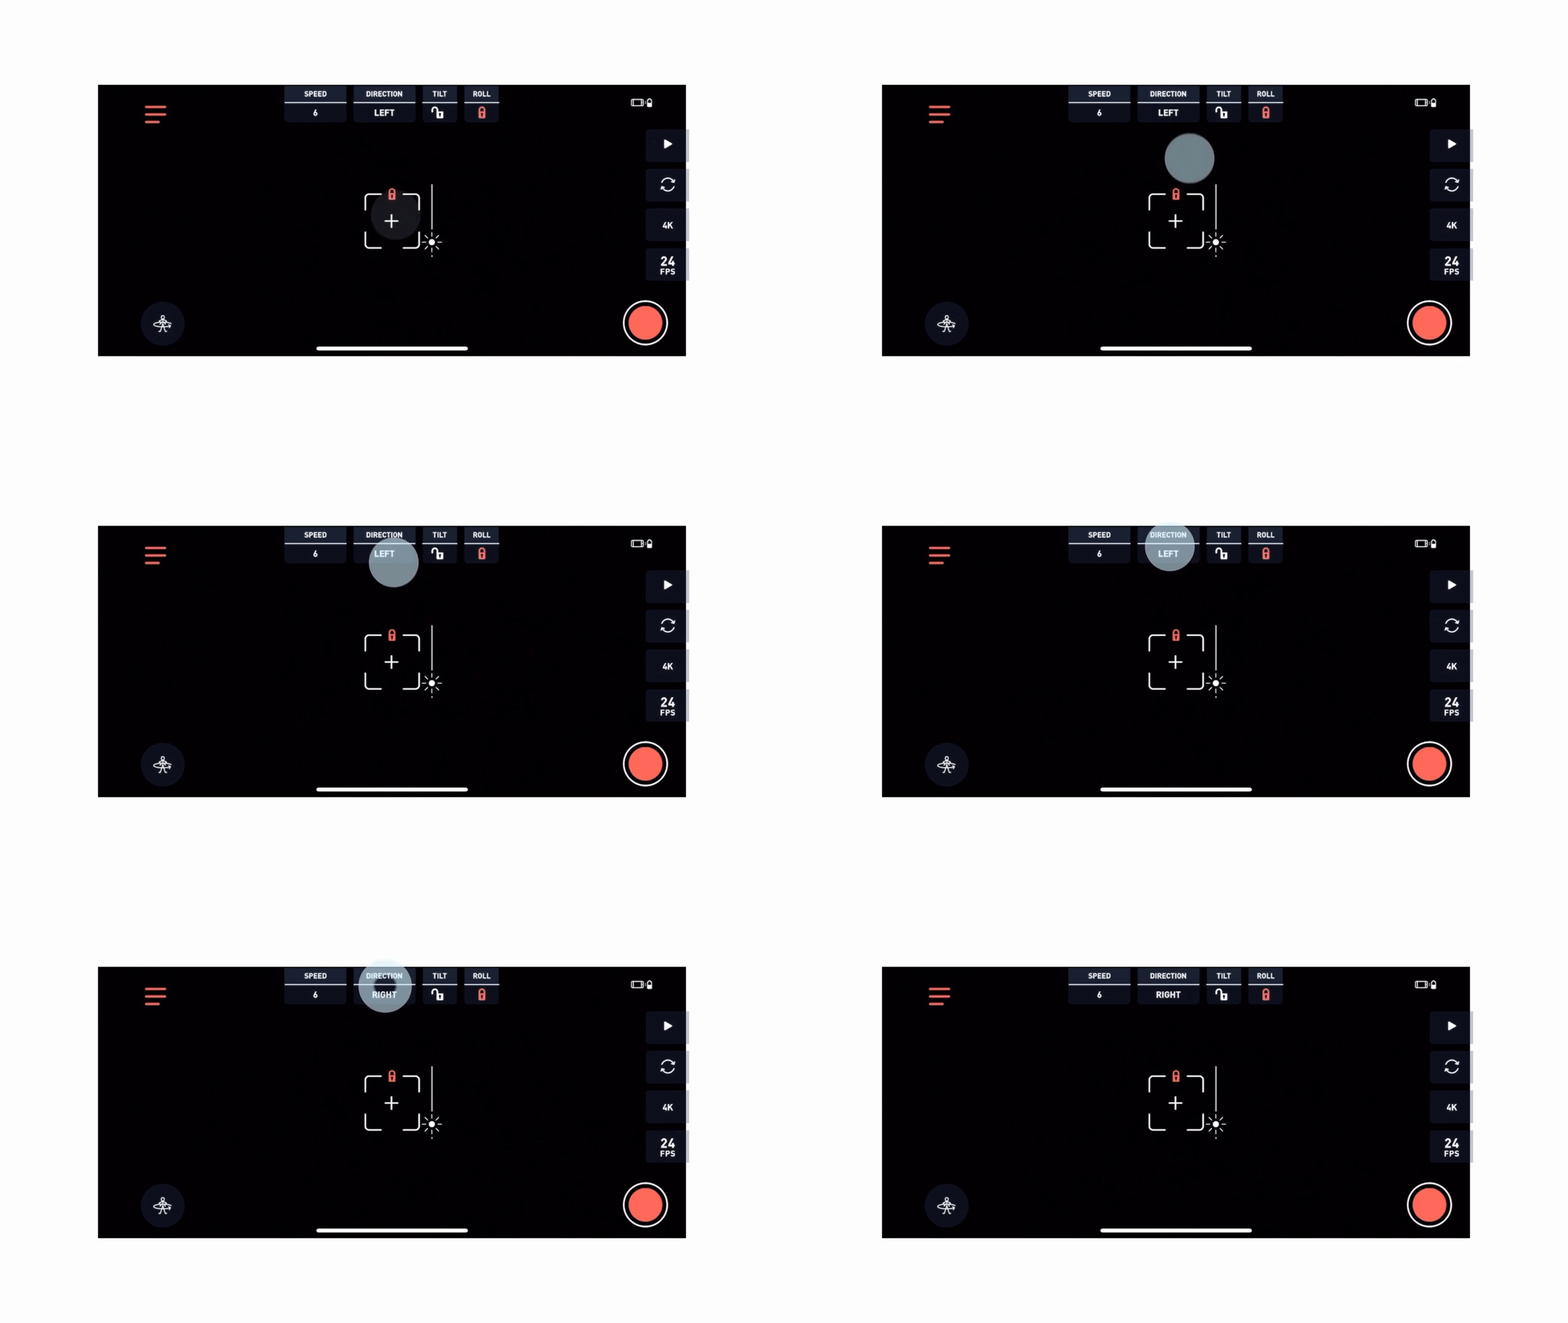
Step 2 - Set your speed. This will determine the speed at which your phone will turn. You can increase or decrease the speed with the left and right buttons on the D-pad. You can select the speed by pressing the Speed icon and scrolling up or down. The smaller the number, the more slowly your phone will rotate.
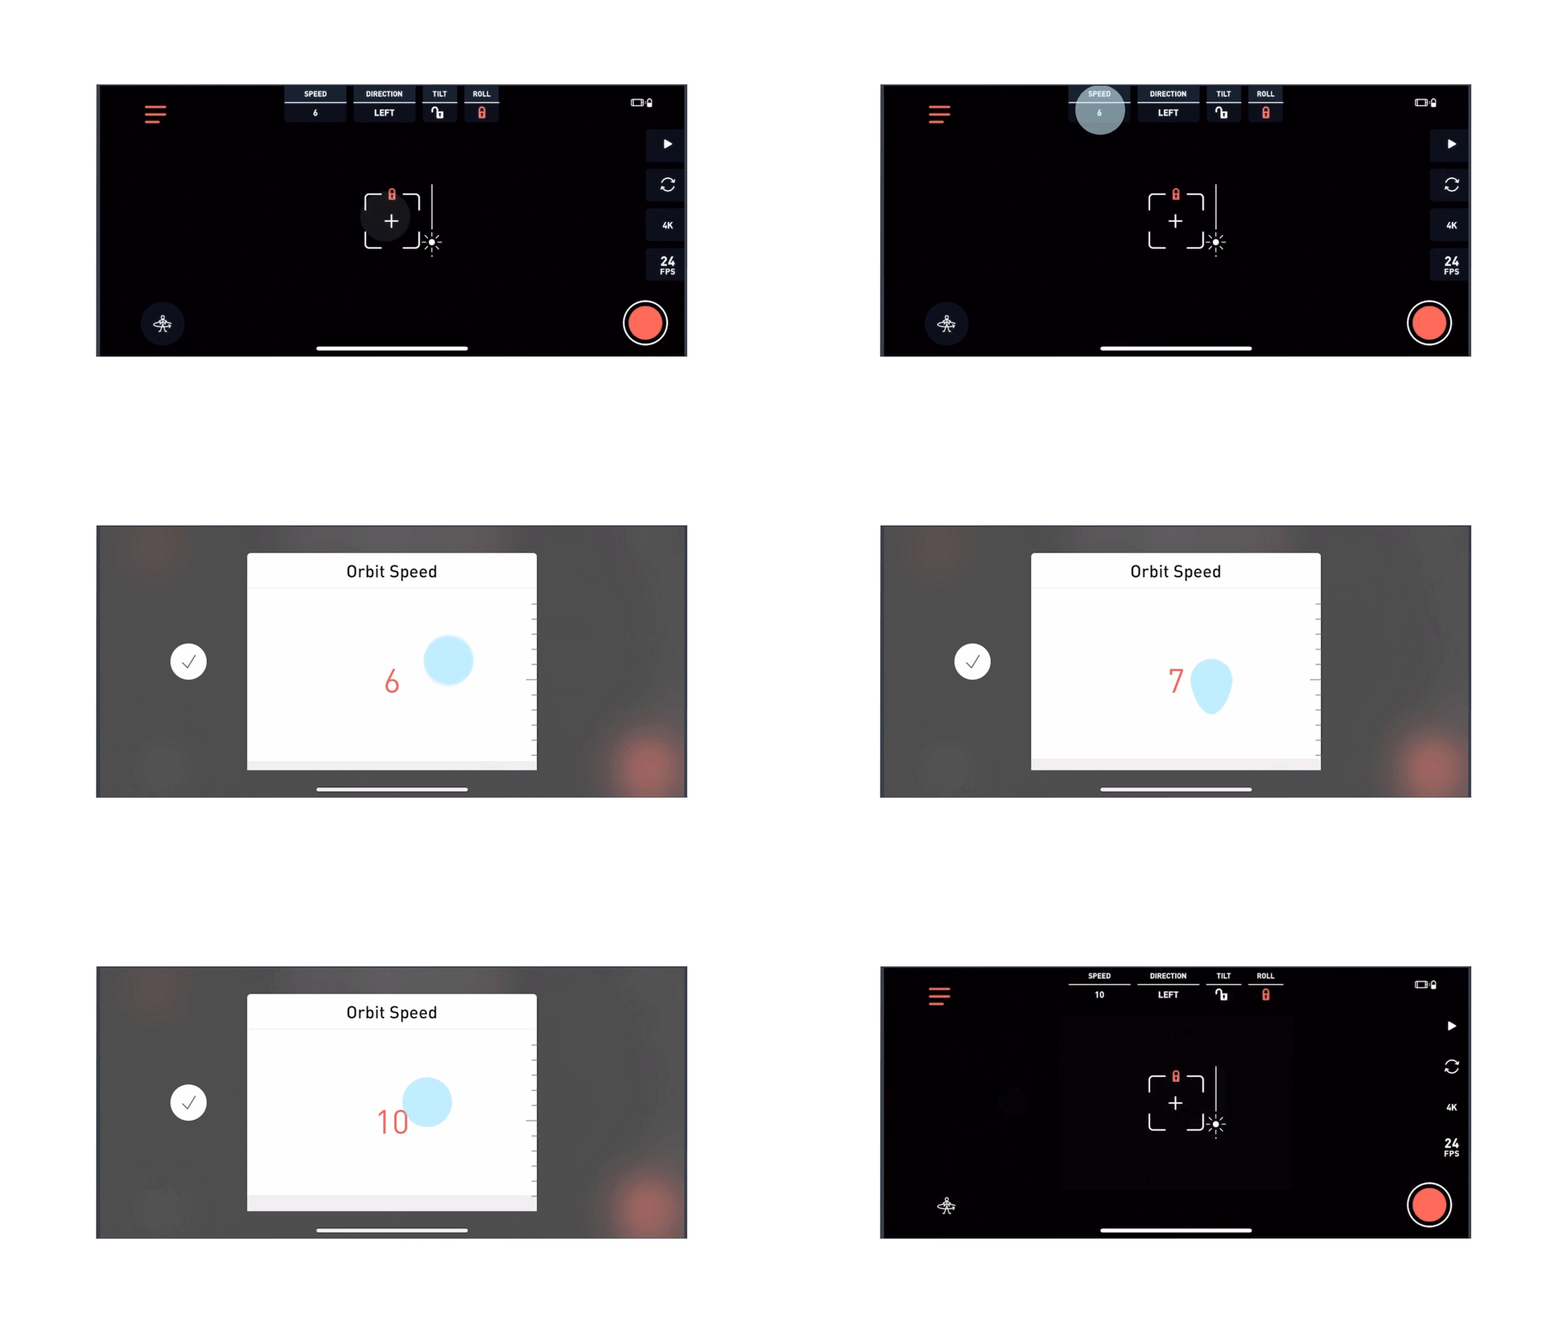
Step 3 - Record and circle. Press the record button on the handle to start filming. Then press the trigger to begin the orbit. Once it has begun, circle around your subject. Press the trigger once again to stop the orbit and then press the record button again when you’re finished.

To get creative with your shots, try moving closer or farther away from your subject as you circle around them.

How to shoot a rolling shot
Barrel Roll is a mode that allows you to have the phone roll 360 degrees as it films. You can access this mode by pressing the icon at the bottom left hand corner of the phone’s screen and select Barrel Roll.
Step 1 - Select the roll direction. You can select this by pressing the direction icon. CCW stands for counter clockwise and CW stands for clockwise.
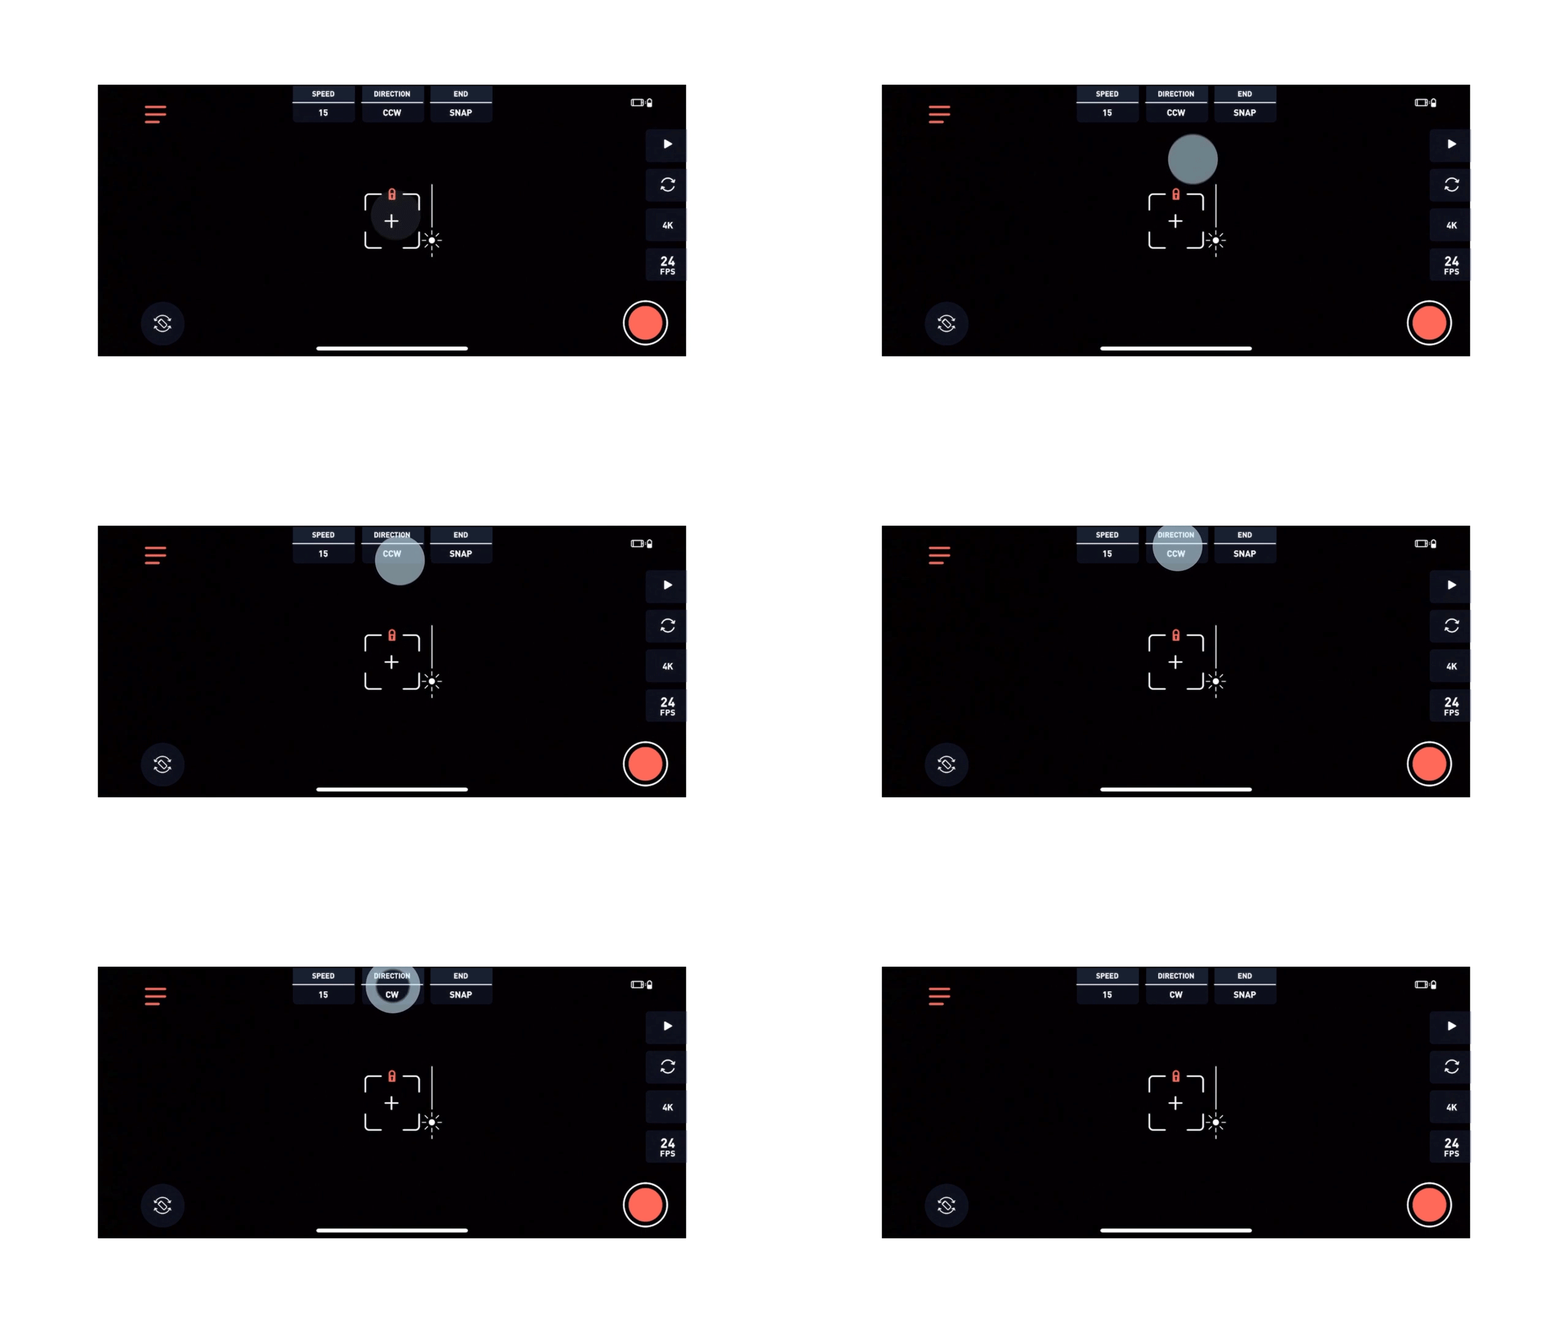
Step 2 - Set the speed. This will determine the speed at which your phone will roll. You can increase or decrease the speed with the left and right buttons on the D-pad. You can select your speed by pressing the Speed icon and scrolling up or down. The smaller the number, the more slowly it will roll.
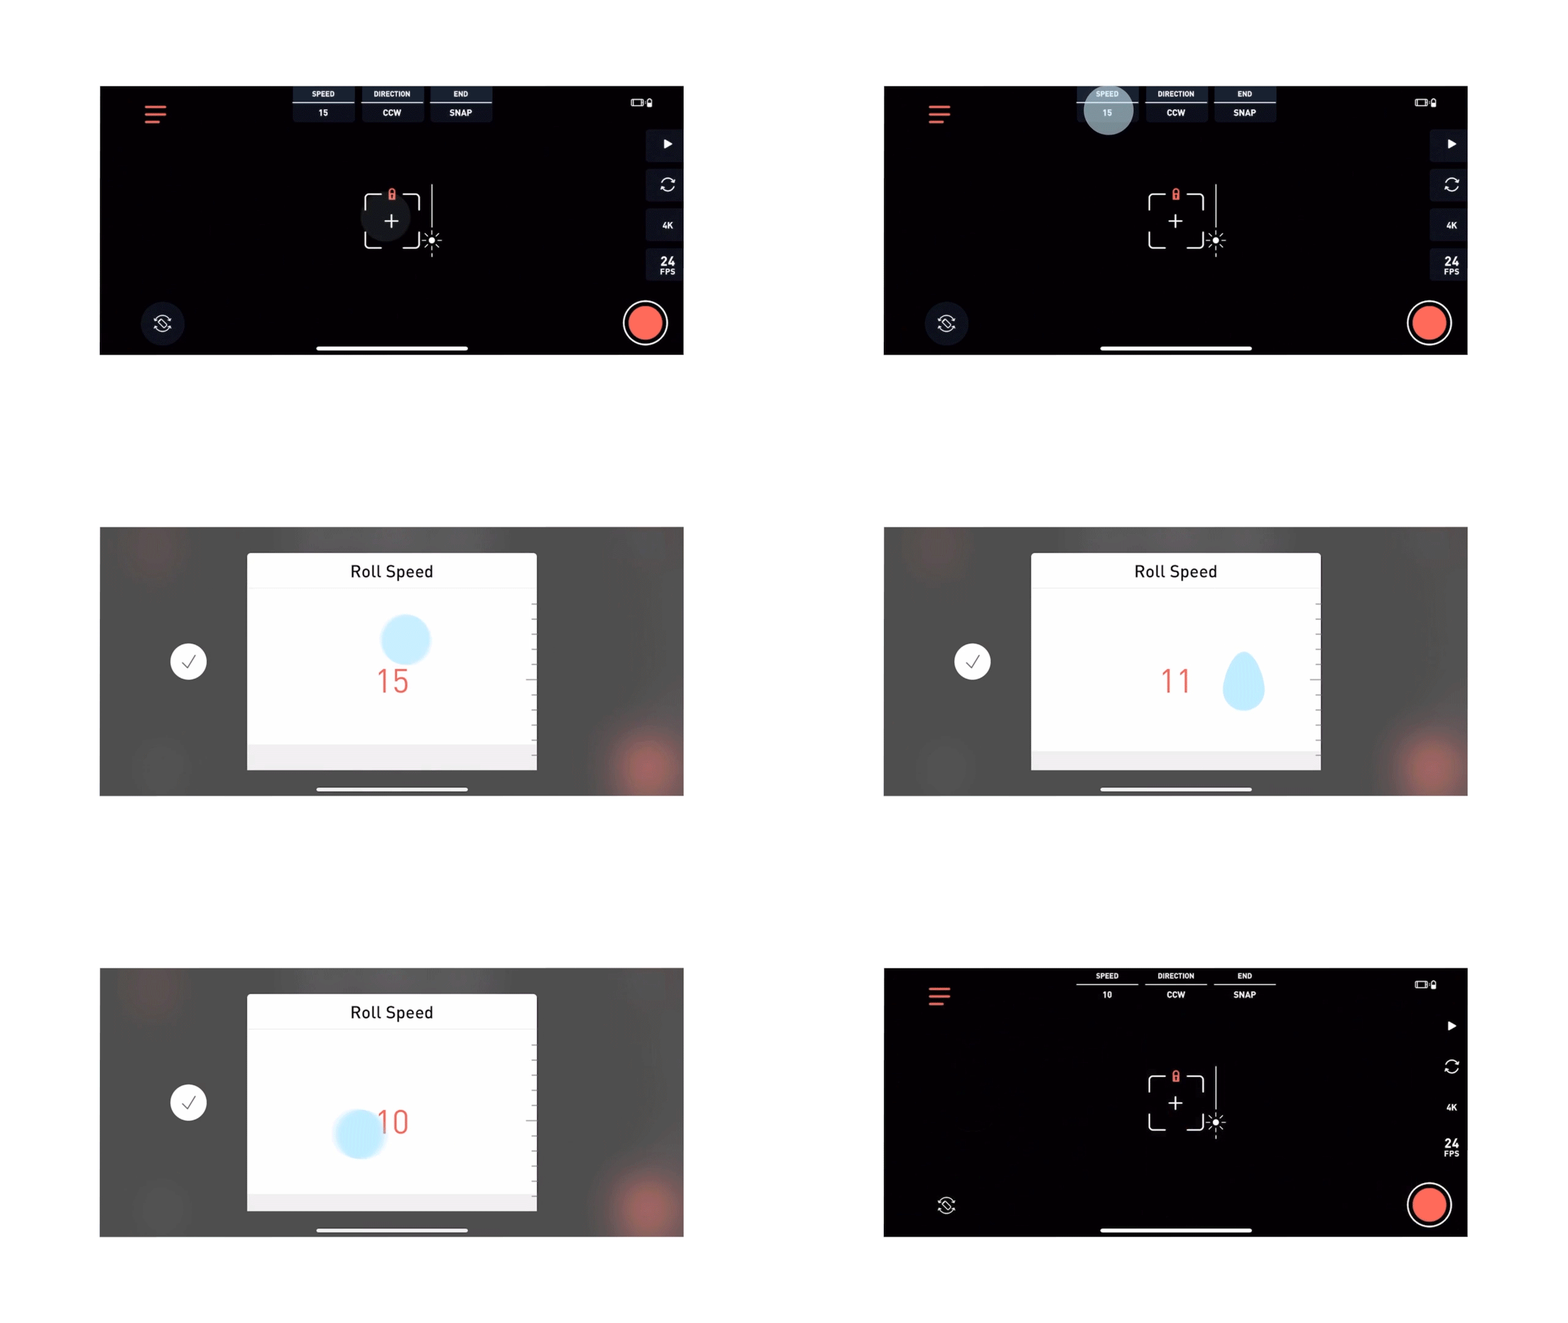
Step 3 - Record and roll. Press the record button on the handle to start filming. Press the trigger to begin the the barrel roll. Press the trigger once again to stop the barrel roll and then press the record button again to stop filming.

Remember that you will need to adjust your hand positioning to follow the phone as it rolls. You can stop the roll at any time by tapping the trigger.
Need help or have questions? Get in touch! We'd love to help!
*All footage and images are property of Freefly Systems.
