Common variants of the tutorial video
-
How-to videos
-
Training videos
-
Recipe videos
The tutorial video structure
Here's a great example of a tutorial video made by Shootsta.
A tutorial or training video consists of two parts: a piece to camera and relevant cutaways.
The piece to camera is for the presenter to outline the process verbally, and the cutaways visually demonstrate what is being taught.
Filming the Piece to Camera
The piece to camera is the backbone of most training videos. This is where your presenter talks through the steps and processes for your audience to follow. The first step to capturing the piece to camera is to set up the Shootsta Kit. Check out this article on How to Film a Piece to Camera to get started.
When you’re positioning your talent on camera, place them in the middle of frame. Alternatively, if you’re planning to have text or graphics on screen, position them a little to the left or right of centre with their shoulders facing in. This way, there will be enough space for your text or graphics.
For example:

If your presenter demonstrates the steps themselves, frame your talent so you can see the steps they are performing. When you film your cutaways, remember to grab close up shots of each action.
Filming the Cutaways for Each Step
Here are 6 tips for filming your cutaways:
-
Plan your cutaways based on what was said in your piece to camera. It’s important to show your audience what they need to know, not just tell them. Remember that your cutaways need to last the same length of time as what is being said, so read over your script again (or play back the audio of your piece to camera) so you can time your cutaways to your script.
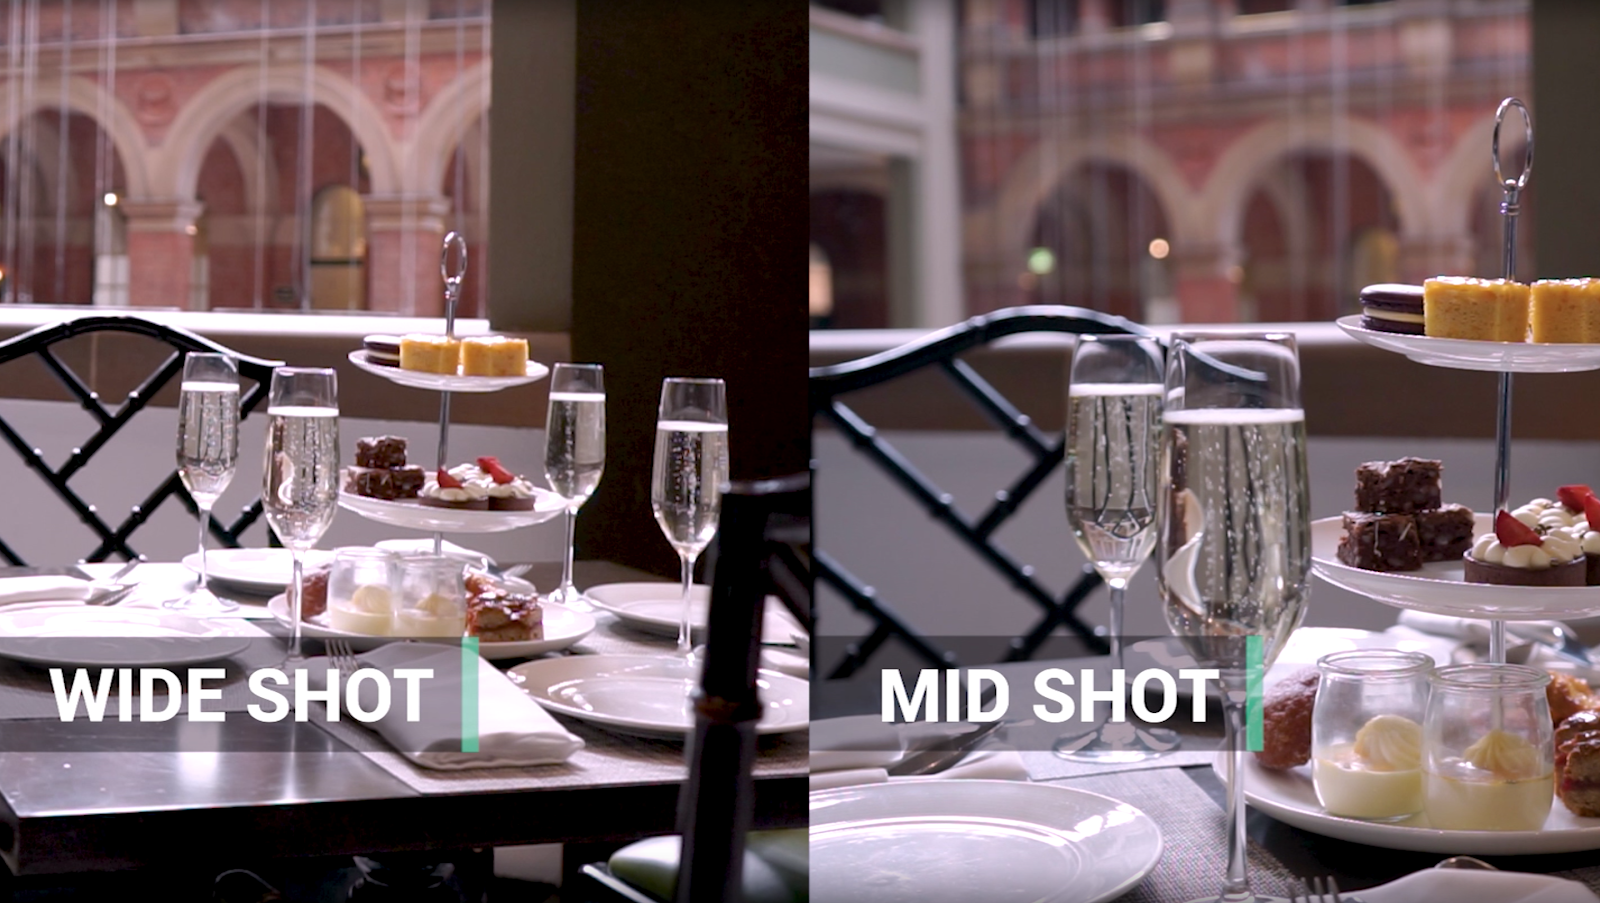
2. Close ups, mid-shots and wide angles are the three primary shot sizes you will use in your video. Not sure which one to choose?
-
Begin by capturing a wide angle. A wide angle establishes both the subject and the context of your shot.
-
A mid-shot comes in closer, highlighting the subject of the shot.
-
A close up is saved for any specific details that need to be captured. It’s easiest to move your camera closer to the subject to capture close up shots; save zooming for when you can’t get any closer.

3. Have all your props on hand before filming your cutaways. Check that they are fully functioning, and if they have a screen or glass element, wipe away any fingerprints or dust that might show up in your shot.
4. If you need to record a screen on a computer or phone, use screen recording software (Shootsta Cast, Quicktime, Loom or similar software) to capture the video and then upload that recording into your project in Shootsta. This will be much clearer than using a camera to film the screen.
5. Text on screen can be very helpful to reinforce the key points as they are spoken and shown through your cutaways. Remember to leave room in your frame for text. Note that the colours in your video will often influence the colour of your text. e.g. Black text on a dark background is difficult to read, but white text on a dark background works perfectly.
6. Capture sound effects. Having atmospheric noise helps to tie in all the visuals, and to make your scene more realistic. For example, a recipe video can be enhanced by the sounds of your dish cooking.
You can capture audio straight from camera or through an external recorder such as your phone or professional audio device. Capture audio for every clip, and if you have any additional sounds that you would like to add, record those separately.
You can always add additional sound effects to your video along with the captured sound effects.
The Reveal
If the process you are showing is something that has a tangible result, the Reveal can be an effective way for the viewer to compare their finished product to the best-practice version. For example, if you’re making a recipe video, the Reveal might show the finished dish, with somebody taking a first forkful.
Here are 3 tips when filming the Reveal:
1. Make your shot desirable. It is important to have your scene looking as good as possible. Take time to set up any props you need, and to clean up any mess or distracting items. Make sure the subject is well lit and in focus before you film.
2. Have people interact with it. This won’t work for every video, but where possible, have people interact with the finished product. For example, if the big reveal is a dinner dish, have someone place the plate down at a table, or have someone cut into it to eat. Interactions humanise the result, encouraging the viewer to try the process for themselves.
3. Shoot multiple angles. Shoot the Reveal as a close up, mid-shot and wide angle. This will add more visual interest to your reveal.
Directing a Tutorial or Training Video
Directing a tutorial or training video is very similar to directing a piece to camera. However, here are 3 specific tips around directing your tutorial or training video:
1. Pacing a voice-over. If you are using a voice-over, film the cutaways before recording the voice-over. Have the presenter or voiceover artist watch the cutaways as they read their lines. This will help them to time their words to the visuals.
2. Shoot your cutaways longer than usual. It is best practice to have each cutaway last for at least 10 seconds, but it is even more crucial to start the camera rolling on each cutaway 5 seconds before you start any actions, and to leave 5 seconds after the action is done before you cut. This will allow your editor more flexibility in timing your cutaways, which will lead to a more polished video.
3. If you are recording a voice-over, make sure your talent reads the script with a smile and that they have the script held at their eye level. This will ensure your talent sounds natural and friendly rather than sounding like they are reading off a script.
When you’re filming your tutorial video, remember to grab your piece to camera, your cutaways, and a Reveal that captures your audience’s attention.