Use this only if the settings have been changed from Shootsta's default camera settings.
This article will cover how to change your camera back to Shootsta's default settings.
Factory Reset
Menu > Suitcase icon > page 6 > Setting Reset > Initialise
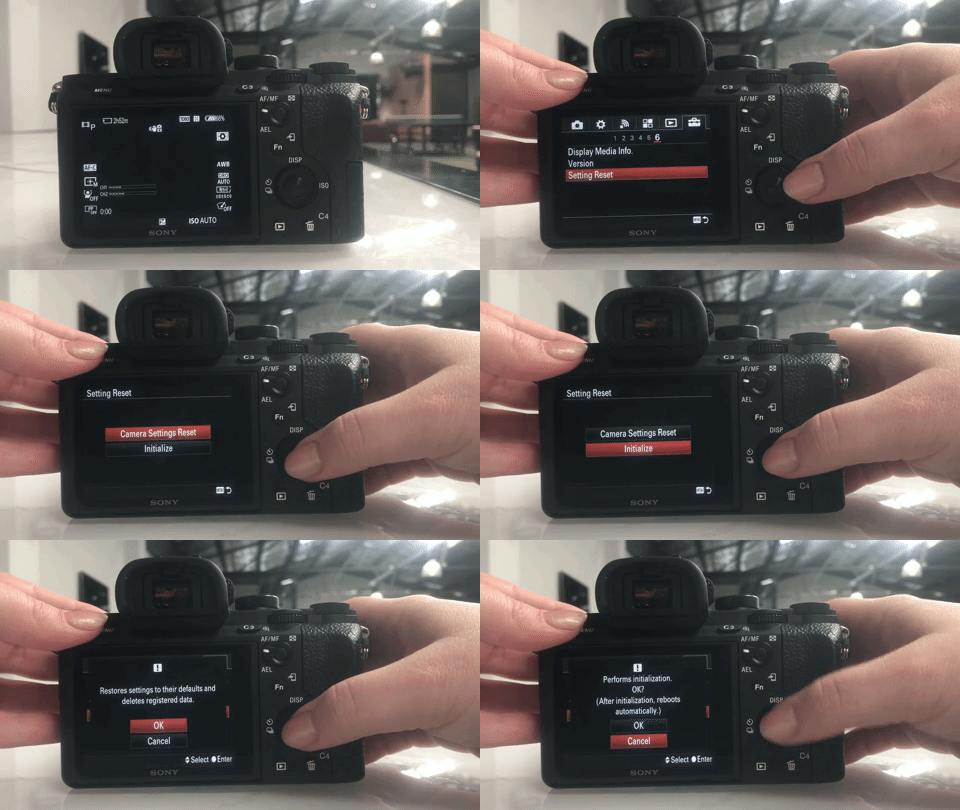
Apply Shootsta Camera Settings
Now you have factory reset your camera, let's add Shootsta Camera Settings.
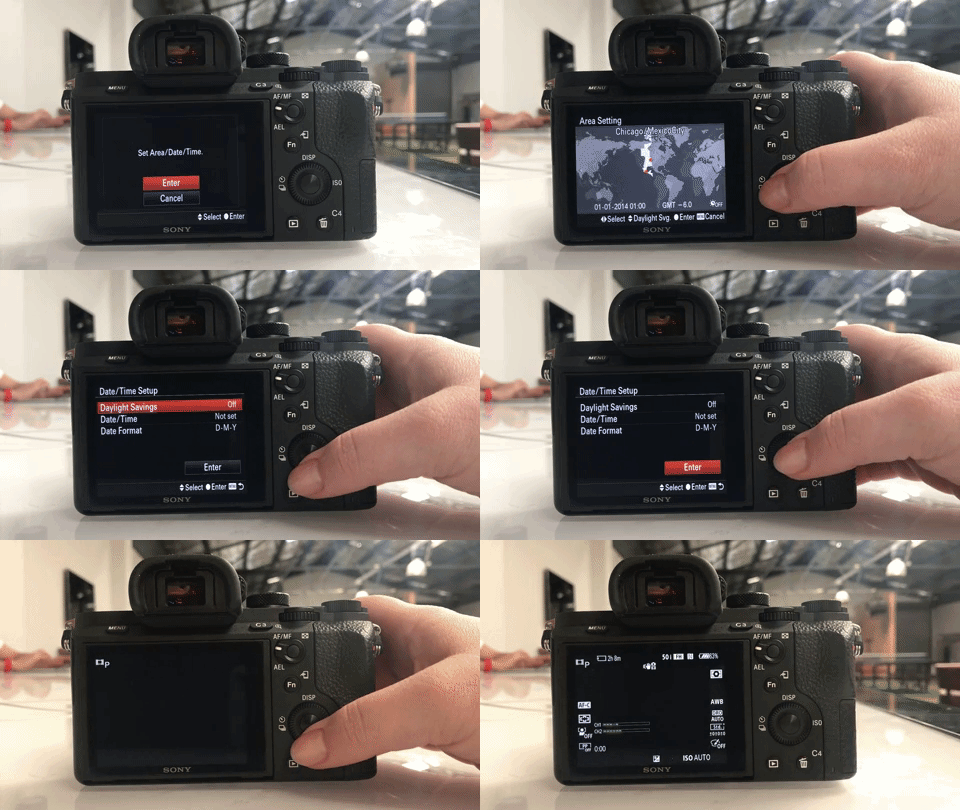
Set Date & Time for your region
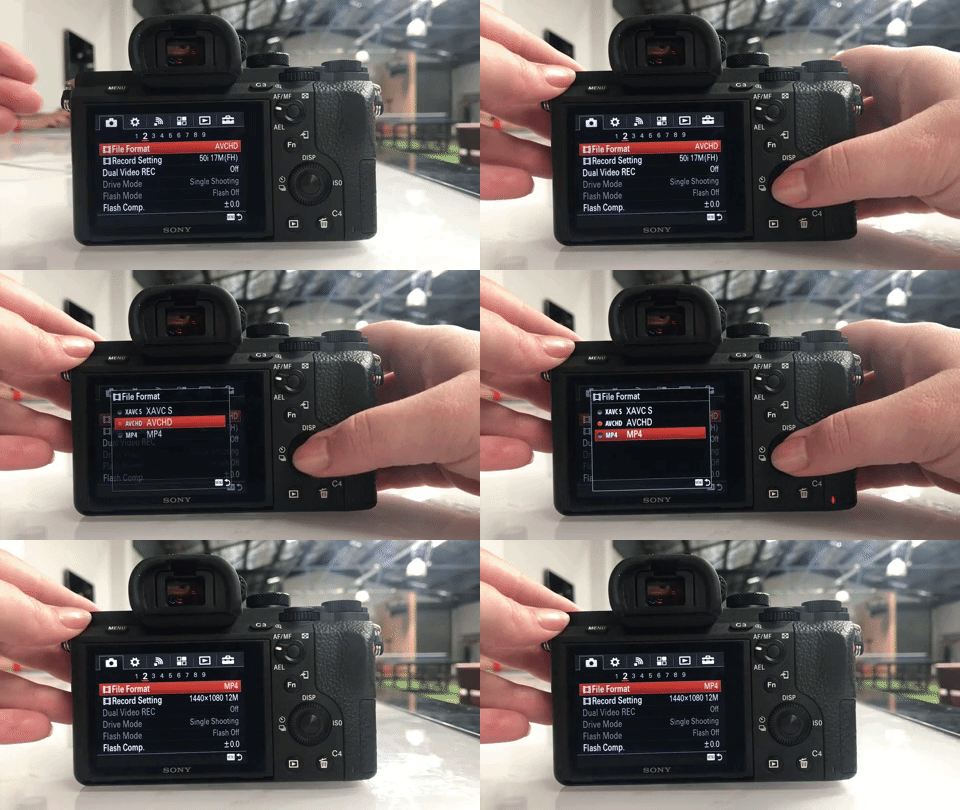
Change File Format to MP4
Menu > Camera Icon > Page 2 File Format change to MP4
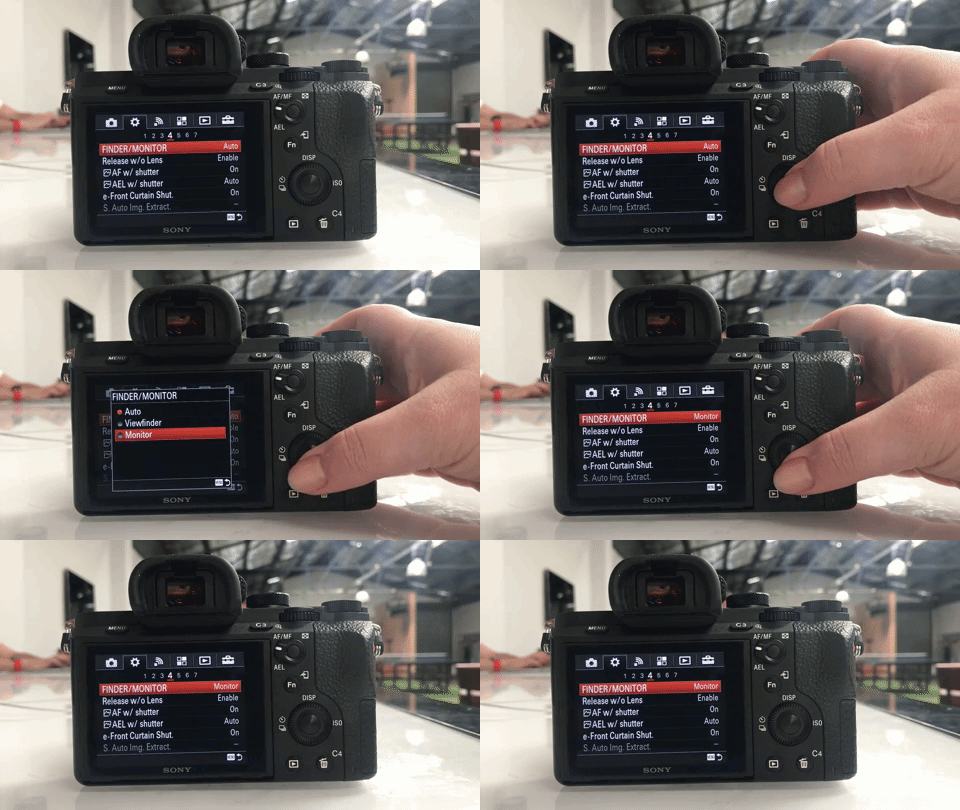
Select Monitor Only
Menu > Cog Wheel Icon > Page 4 FINDER/MONITOR change to Monitor
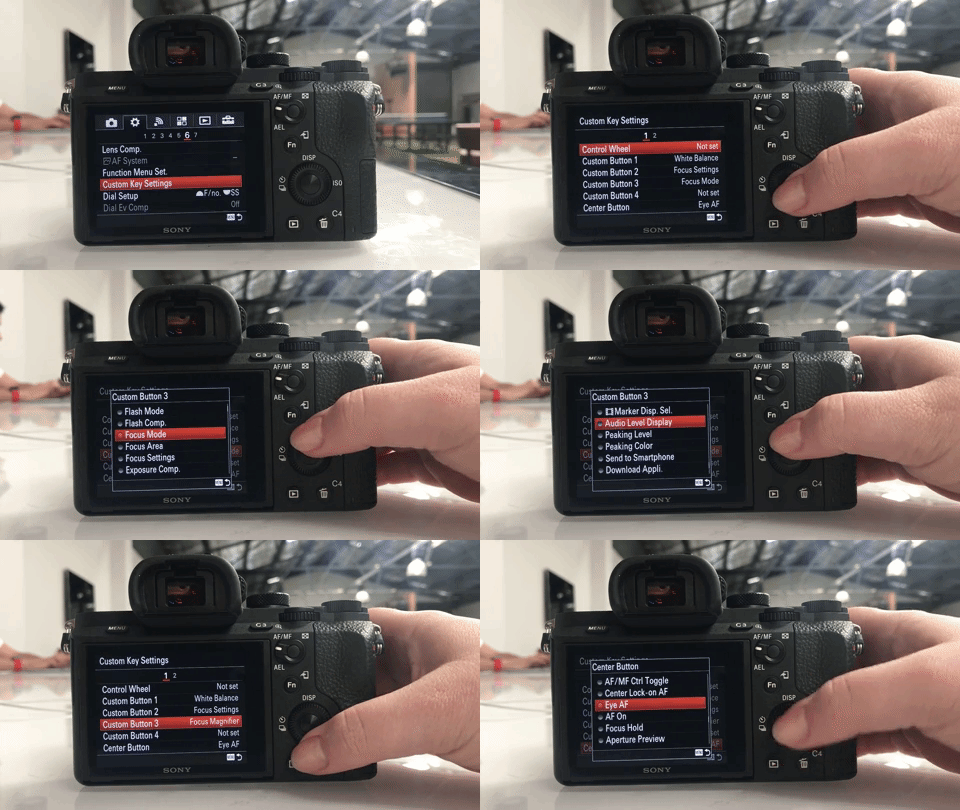
Set Custom Key Settings Part 1
Menu > Cog Wheel > Page 6 > Custom Settings page 1
Custom Button 3 > Focus Magnifier
Center Button > Audio Rec Level
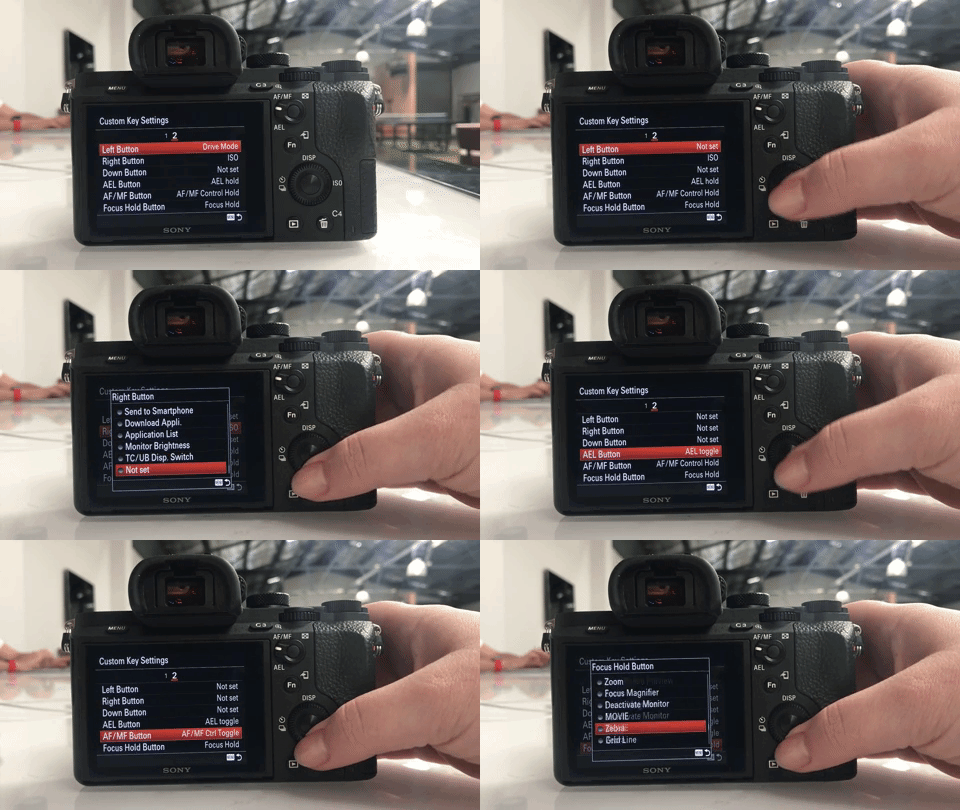
Set Custom Key Settings Part 2
Menu > Cog Wheel > Page 6 > Custom Settings page 2
Left Button > Not Set
Right Button > Not Set
Down Button > Not Set
AEL Button > AEL Toggle
AF/MF Button > AF/MF Toggle
Focus Hold > Not Set
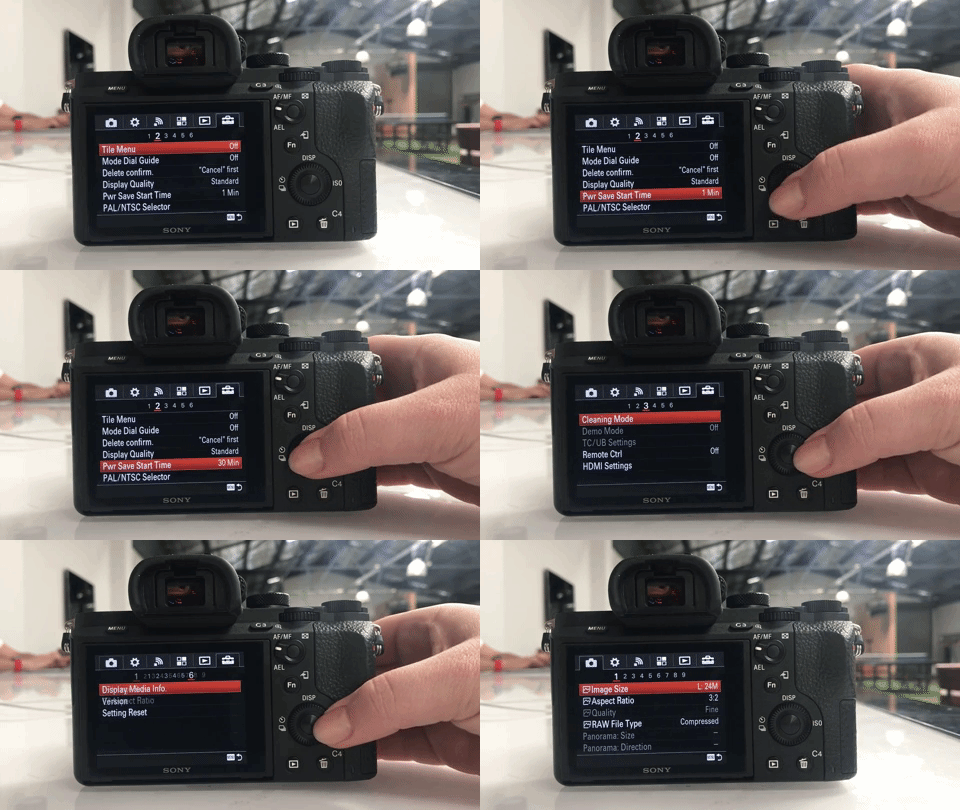
Adjust Power Save Start Tim
Menu > Suit Case Icon > Page 2 >
PWR Save Start Time > 30 minutes
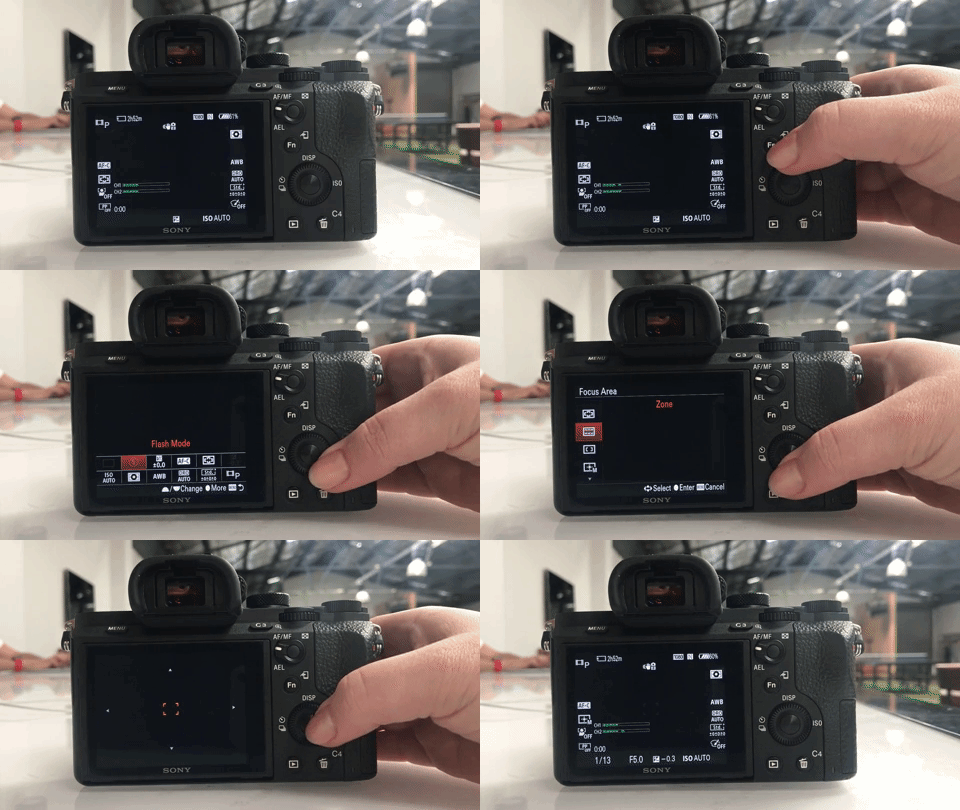
Adjust Focus Square Size
Fn > Focus Area Icon Select Flexible Spot 'M' > Center Button
Adjust Creative Style
Fn > Std Icon
Select Neutral > Center Button
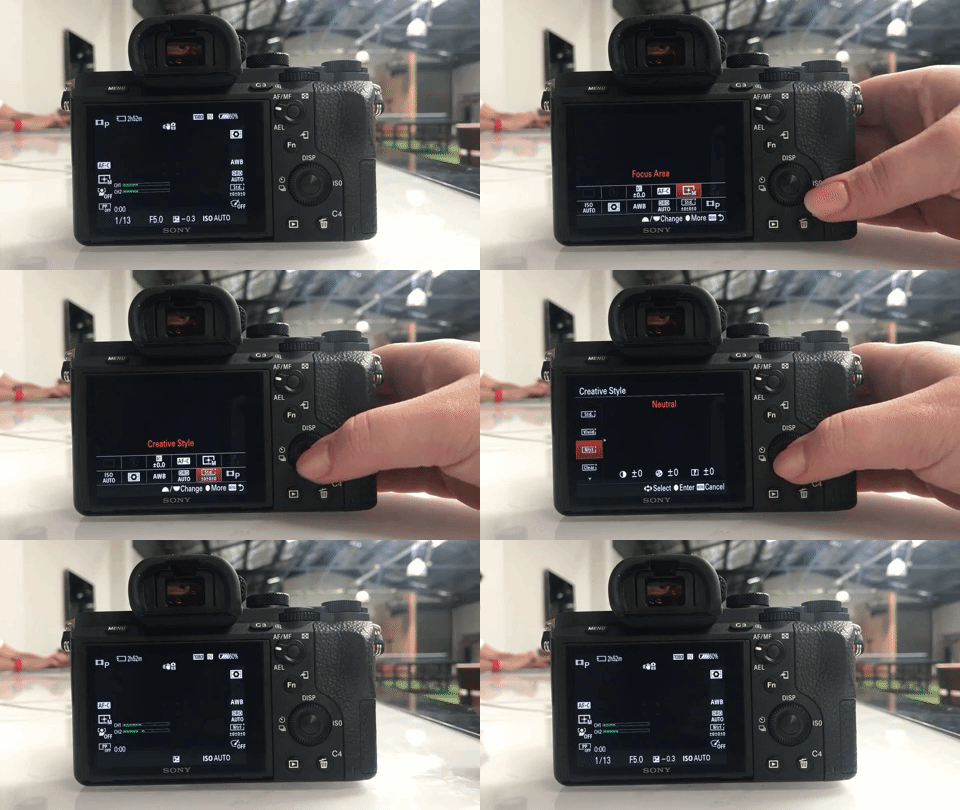
Your default camera mode should be 'Program Auto' - you can see this in the top left corner of the screen. You can change this via Fn> P in the bottom right corner.
Your settings are now complete!
Need help or have questions? Contact us. We'd love to help!
